I have had some clients who want to manage their remodel or construction job themselves. And, well…
Ever since the onset of HGTV, everyone thinks they can DIY their own projects.
I’ve written about this before. DIY-ing your own interior design project is not as easy as it looks.
I’ve even done it myself. And trust me... It usually costs you more time, more money, and a tremendous amount of hair and sleep loss, too. Of course though, many go ahead and do it anyway. That’s why, today, I’m sharing two tips for you on things that General Contractors do as part of their job that Homeowners tend to forget about, or don’t realize is important, until it’s too late.
- Btw: This article is written in appreciation of contractors everywhere. A good one is worth their weight in gold.
- Btw x2: This is also written while I am currently undergoing my own full-gut kitchen remodel. And yes... I decided to use a contractor instead of doing everything myself. I don’t need that headache, that risk, that frustration. I’ll gladly pay to have someone take that off me.
REASON #1: One of the biggest telltale signs that you have a good contractor is, in my opinion, the look of the job site at the end of the day.
Part of a contractor’s job is keeping a tidy work space. It helps with organization, keeps tools and equipment from disappearing, and makes homeowners feel like everyone is on top of their project.
This is not an easy task. Some subs are sloppier than others, and making time to tidy up at the end of every work day can result in time being taken away from the real work that needs to be done. However, if you have homeowners living in the house while you’re working on it, it is especially important for safety reasons, as well as maintaining an overall positive impression of how the job is being handled.
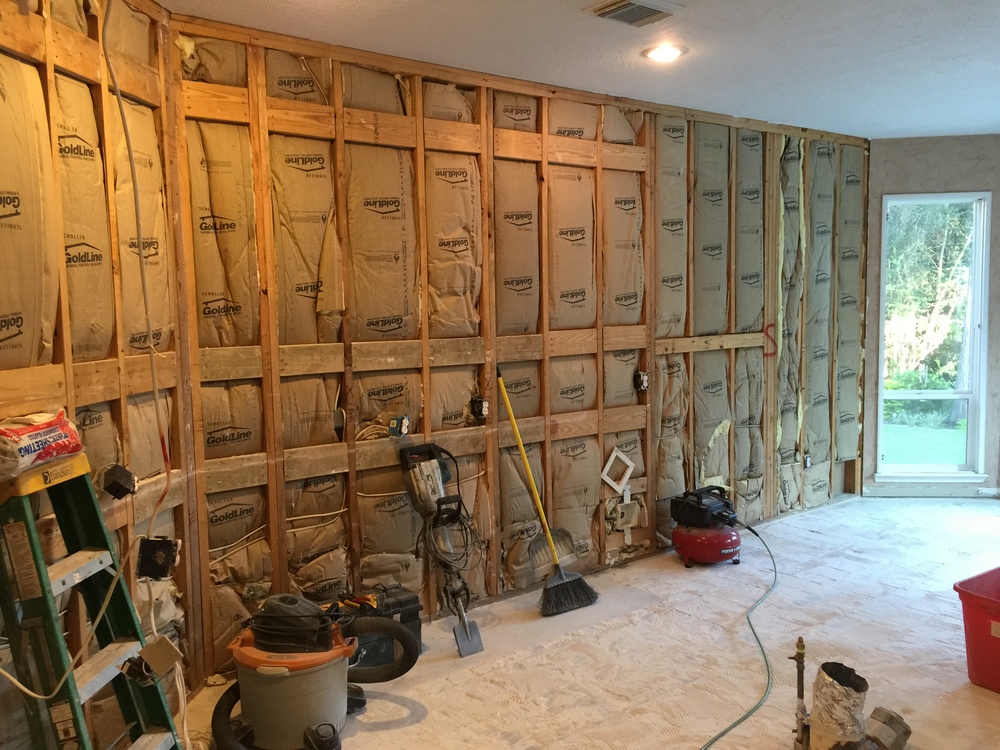
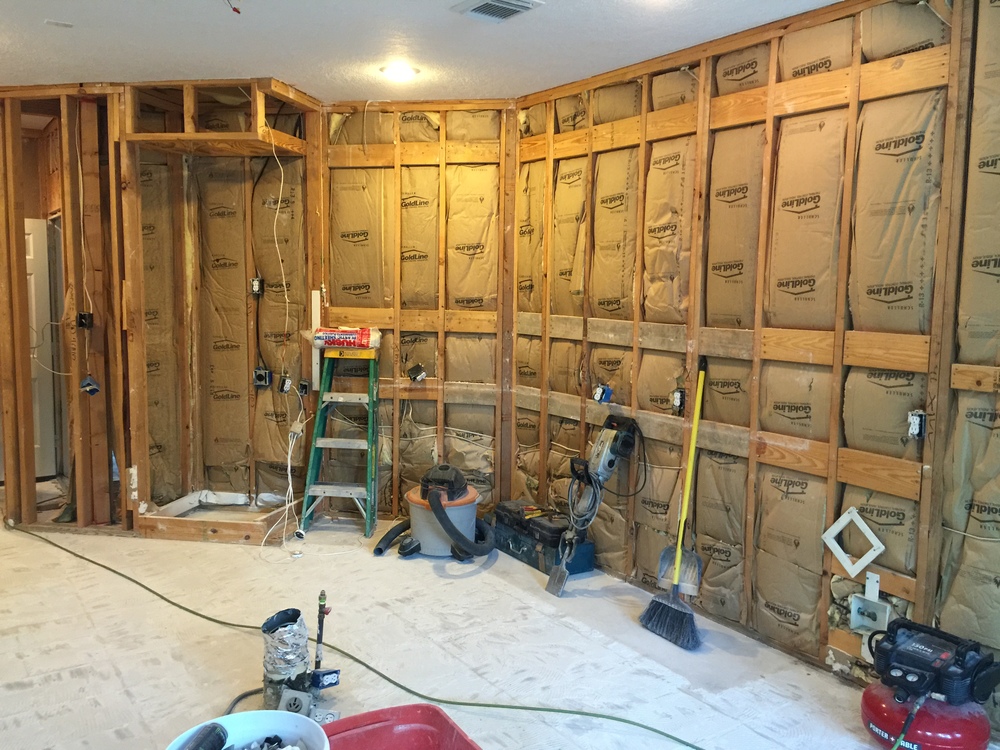
This past week at my house was all about demo and framing. This is how the project looked after the second day. I posted this pic on facebook and someone commented that a broom and shopvac were always good items for a contractor to bring on a job — and you know what… That’s right! I commented to my contractor, Tony Knepper of Knepper Enterprises, that it appeared that someone had come in and sucked all the cabinets, countertops, and sheetrock out of my house and walked away. It was so nice and tidy. :-)
One day last year I went to Houston for a paint consultation. I’ll never forget that jobsite. The homeowners had me meet them at their house, which was new and under construction. It had been under construction for two years. (That, right there, is a sign that a homeowner is contracting the job.)
When I walked up to the site it had just rained pretty hard. There was almost no possible way for me to get to the house. There were boards — some with nails sticking out upwards — and construction materials all over the yard. Sinking mud was everywhere. There were a few thin boards someone had strategically laid down that I had to hop onto and walk over in order to get to the front door. And wouldn’t you know it… I still somehow managed to lose my balance at one point, causing me to step into squishy mud that was at least a foot deep. Once I reached the porch I then had to remove my shoe and scrape it all off. :-(
I knew before I made it to the porch that the homeowner was contracting this job and didn’t realize the importance of job safety, tidiness, and how that affects the actual work and schedule of the job. How could any worker get any materials up to the house after a rain like that if there was not a safe, direct path?
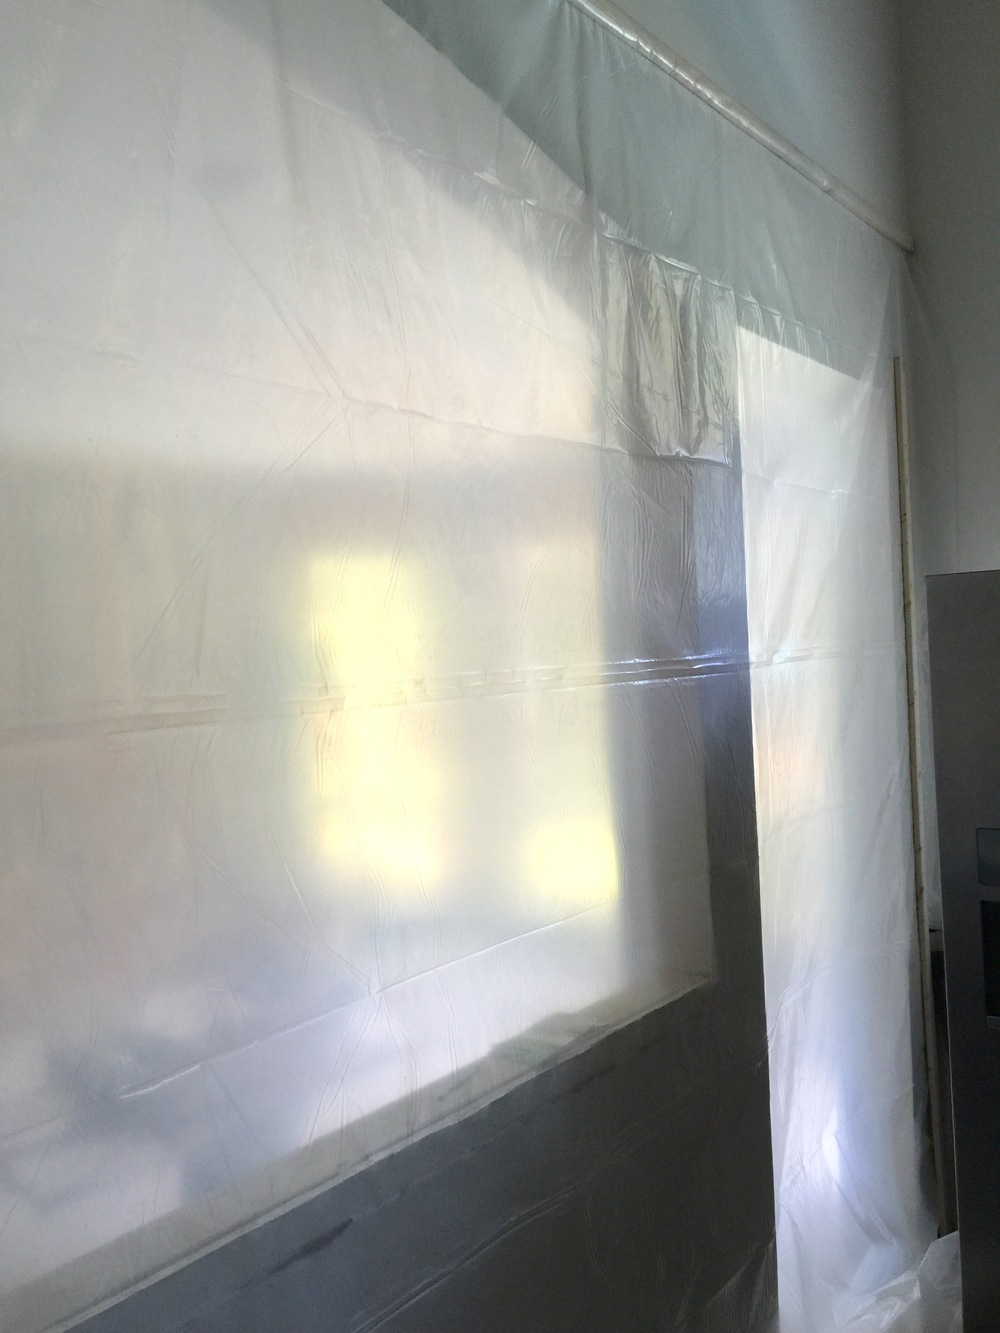
Plastic wall
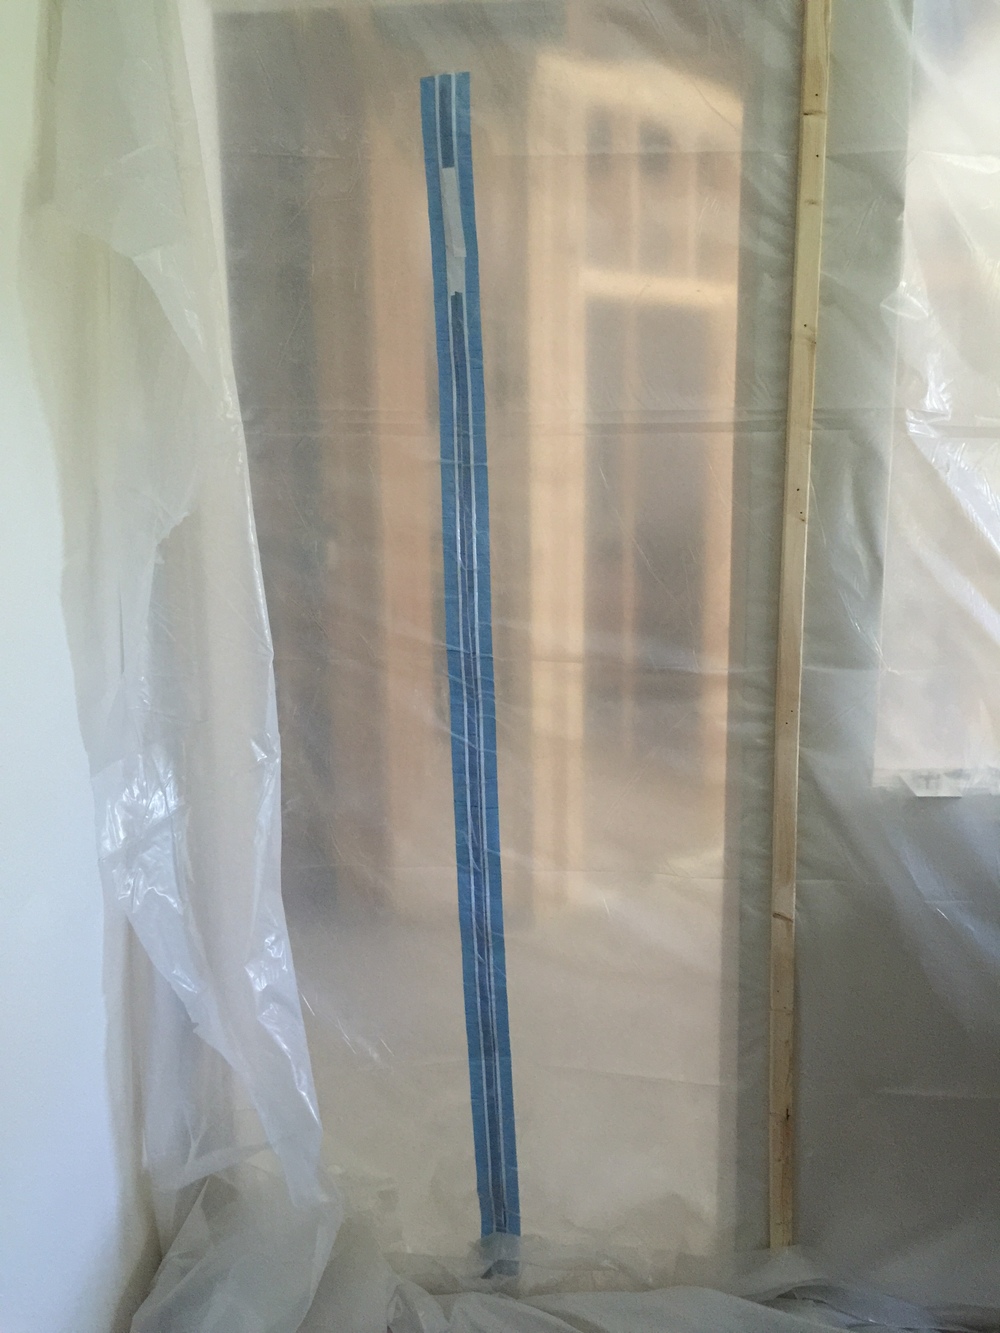
Zipper
REASON #2: Another item that homeowners don’t often think about that a general contractor is always conscious of is the protection of the property.
The last thing a contractor wants to do at the end of a job is go in and fix something one of his guys has accidently destroyed in the process. Sure, it might happen; and that’s part of the risk they take on and they realize that. However, sometimes simple protection procedures are all it takes to prevent accidents from happening.
Here is the plastic wall my contractor created for my kitchen remodel. There’s no way to keep all the dust out, but minimizing it with a system like this is great. It even has a zipper, so you can get in and out without tearing half of it down.
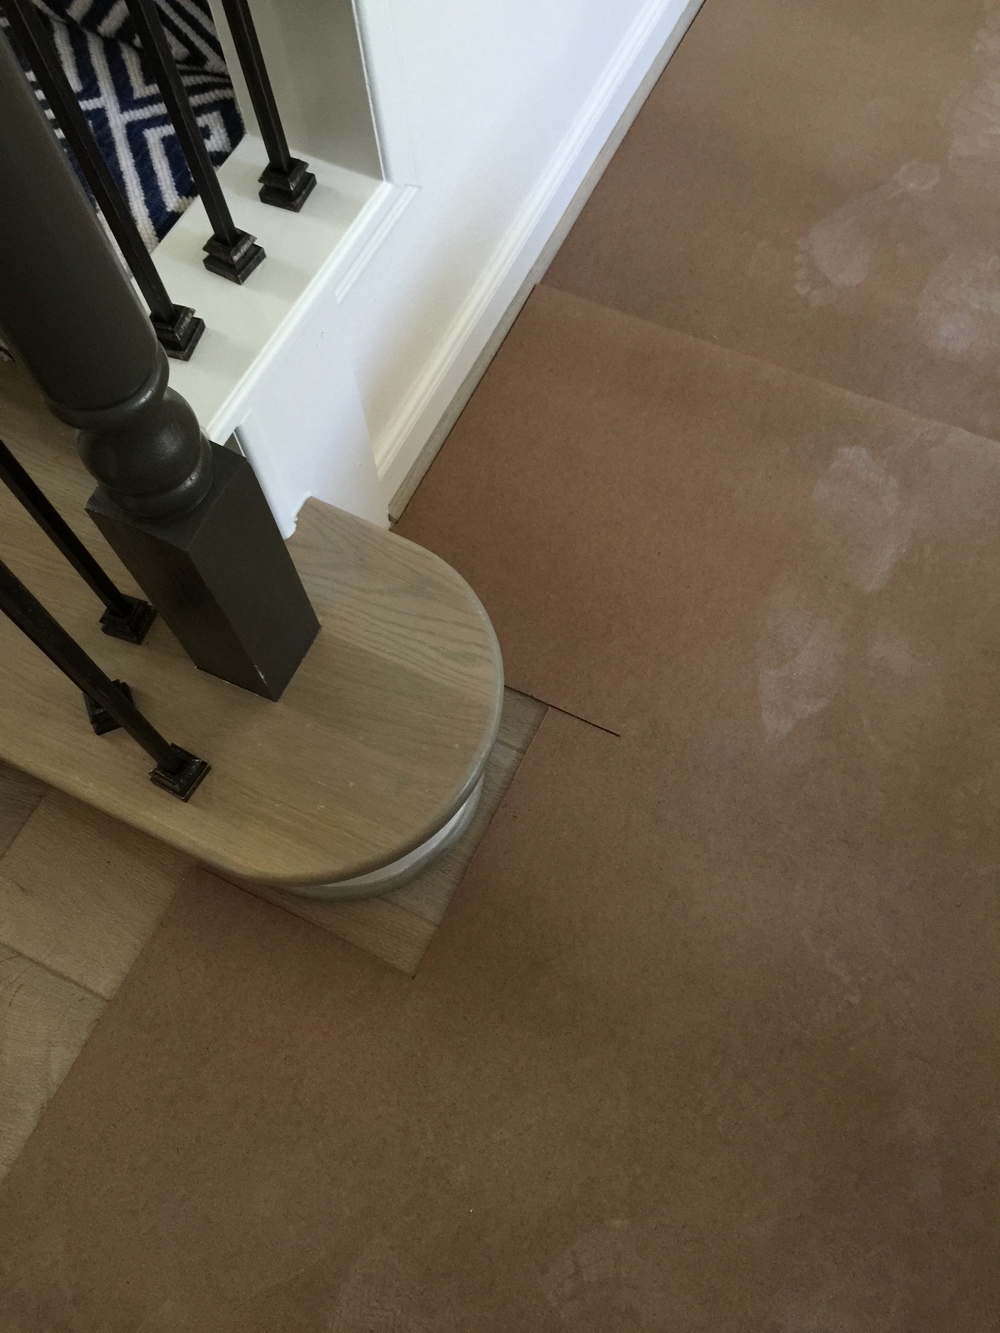
They used masonite on my beautiful wood floors to protect them. The workers aren’t on the living space side of my house much, but they are using the bathroom in here since I don’t have another one that is accessible close to the kitchen. So, to protect the floors, they laid down a path of masonite. You see, paper just tears up. Also, if something is dropped on flooring protected by paper, you risk it getting dinged. Also, you don’t need tape to hold the masonite down like you do with paper. There’s always the risk of tape residue sticking to the flooring and ruining it, especially if it is left down for two months or so. (I’ve got a story for that too. An expensive one. It involved a sticky residue from regular masking tape that was put down on my own studio’s concrete floor finish by the building owner/contractor after he was told he had to use masonite and that tape would ruin the floors. Grr.)
If I haven’t yet convinced you to hire a reputable general contractor — or “GC” for short — to manage a big project, then...
At least remember these two important tips for increasing productivity and satisfaction, and decreasing the likelihood of damage and further expense.
Follow me on Instagram to see the latest pics from my remodel, as well as bits and pieces from all my latest projects. I’m posting job site pics of my kitchen remodel keyed with this hashtag: #carlaskitchenremodel


