Huwebes, Abril 28, 2016

Photography As Art: A Home Decor Must-Have!


Photographer: Tori Aston


Photographer: Tori Aston


One day I was cruising through Instagram and one of my photographer daughter's posts popped up in my feed. It was a photo she took out on a walk in LA:


Photographer: Tori Aston


Photographer: Tori Aston


It just really caught my attention. I loved that it was bold and had a graphic quality to it, referencing nature with an organic appeal. I knew I wanted a copy of it because it would look great on a wall in my home.

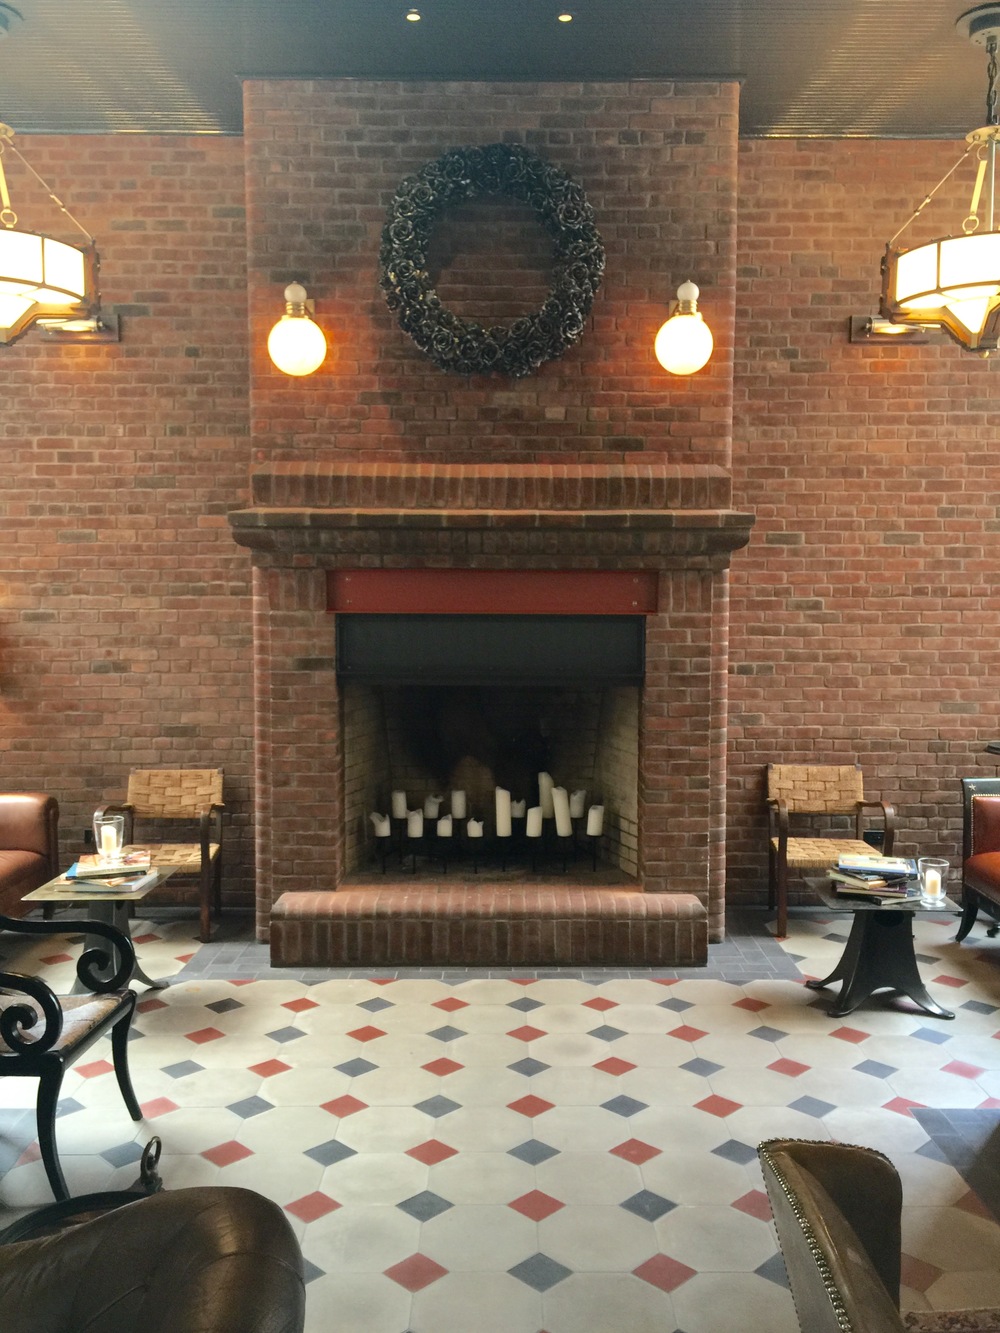
I don't have many walls for art; none of us do here in The Woodlands. We have big, open spaces and lots of tall windows. However, I do have one really special place for art above my fireplace.

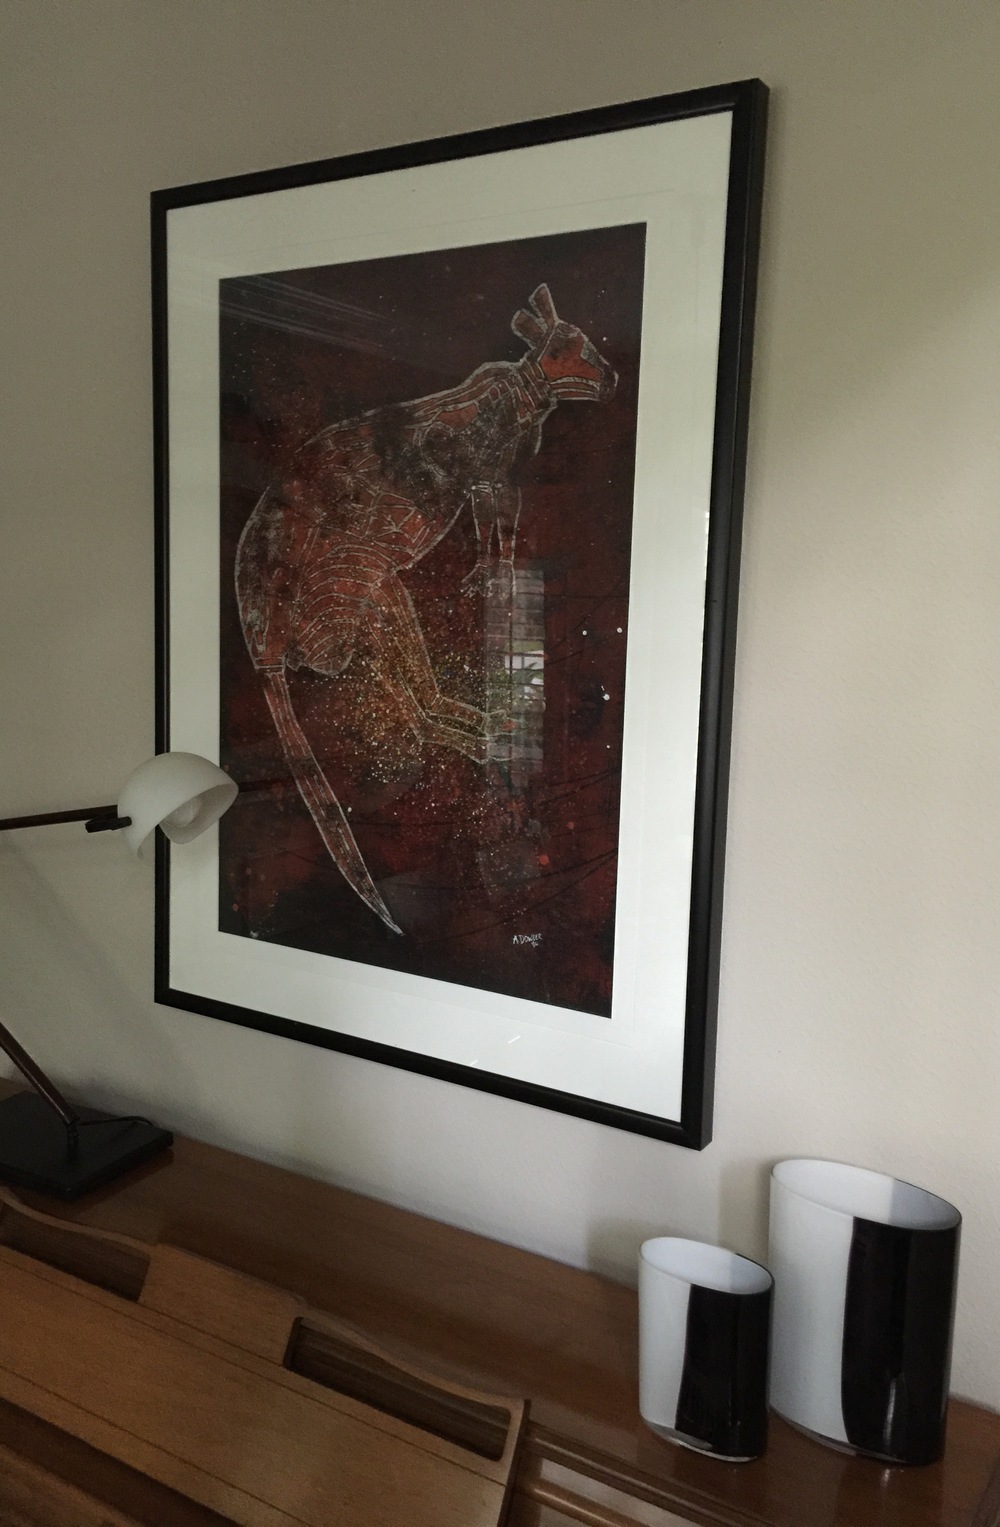
Previously, I had this painting we purchased when we lived in Australia, hanging there.

I love it. It's done by an Aboriginal artist whose gallery we visited in Alice Springs; but it's red, and I'm not really a fan of red. I also had wanted something bigger, because this wall is a two-story space. I have since put that painting in my dining room, and it looks great there.


Aboriginal painting


Then I had some faux grillwork hung above the fireplace. It was actually a piece left over from a project. This particular piece had come in 2” too wide to be installed in a window. Not sure how that happened, since there were three windows and the other two fit perfectly. I had them measured by my window treatment installer, and it should have been a perfect fit, but things don't always go as planned. When that happens, I have to assume the responsibility when it's purchased through my studio and do it over. So I had this very tall piece of faux iron grillwork hanging on this wall for a couple of years. 


Mantel - Before with grillwork


Really though, it wasn't my style. I'm kind of over the whole curly ironwork thing and wanted something bold, graphic and more up-to-date over my fireplace. I'm soooo into photography as art; and, because I have a photographer in the family, had been thinking about checking out some of her images for awhile. When I saw this photo I knew it would work beautifully and make for a bold design refresh for this room.


Overall Fireplace - Photography as art over fireplace, Tori Aston, Photographer.


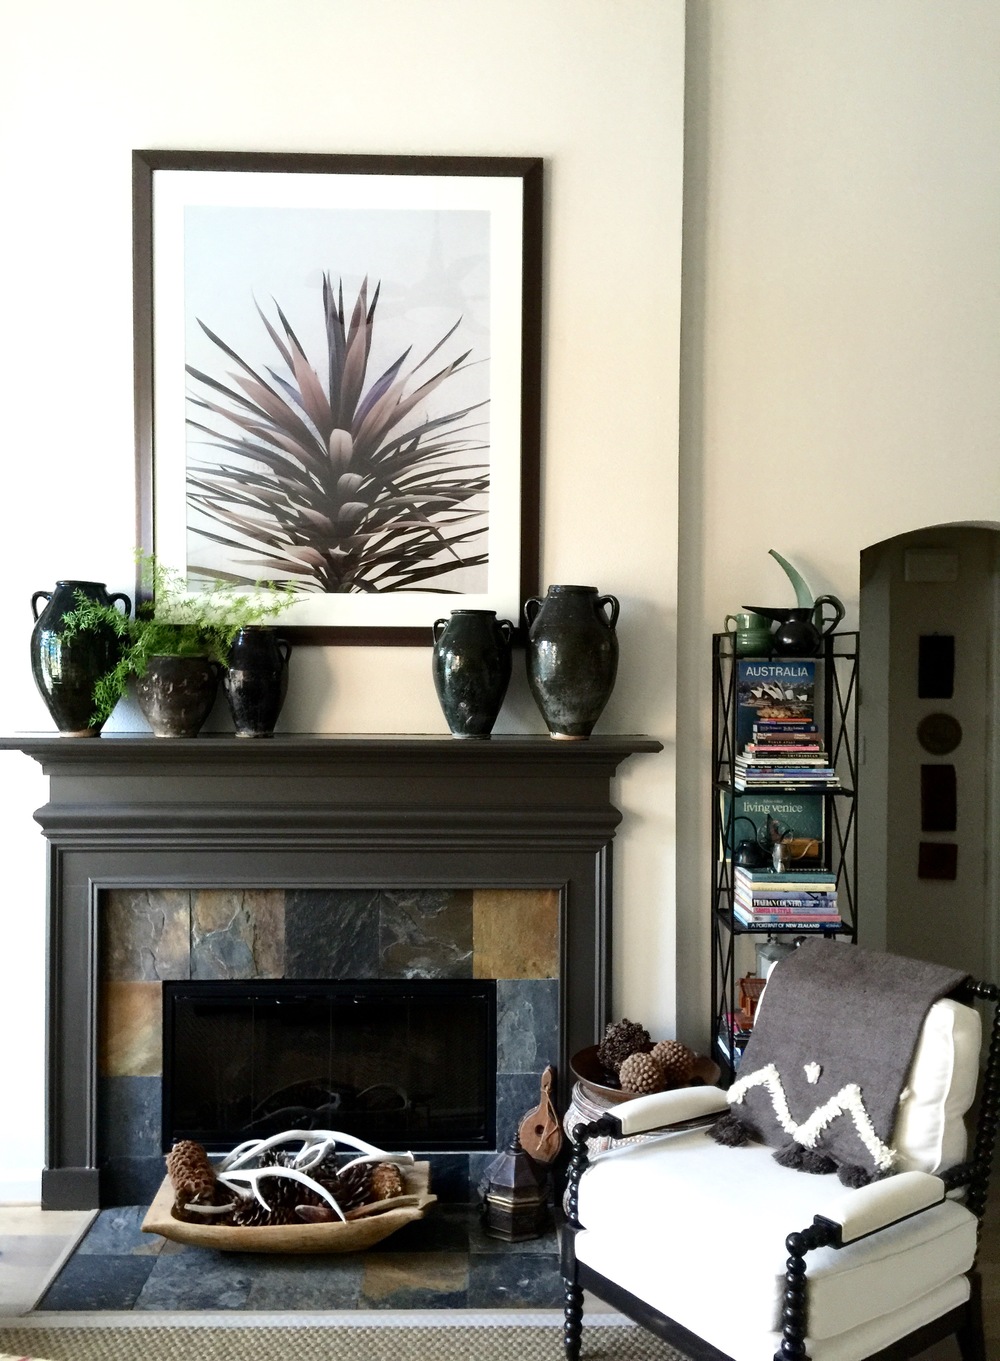
Fantastic! I love it!

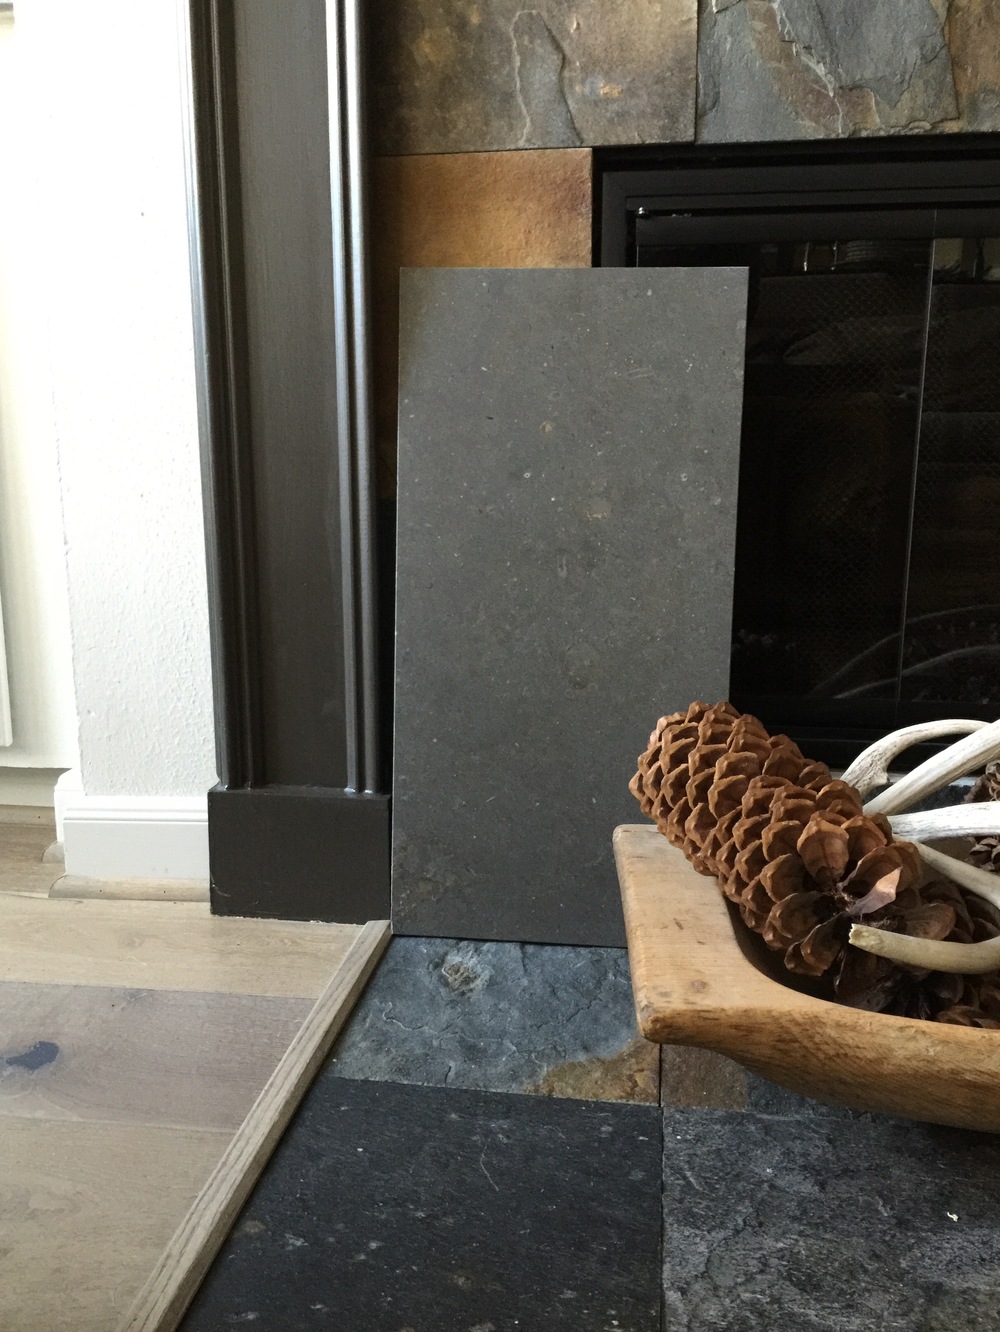
Now I just have to talk my husband into letting me re-tile the fireplace surround in my gorgeous limestone that I used on my kitchen floors. It's the perfect consistent color and works so well with my SW Black Fox paint on the mantel!


Limestone


Just when he thinks we've remodeled the whole house..... :-/

Miyerkules, Abril 27, 2016

Mother's Day Gifts from Etsy

Midweek greetings! Today I was browsing Etsy in search of a few little gifts for some favorite moms and came across some lovely shops I had never visited before.


Today is the day to really think about ordering since Mother's Day is only TEN days away. Here's a roundup of shops you may want to browse in search of something special for a mother, aunt, grandmother, sister, or friend!


Handmade ceramics for kitchen, garden, and home by Convivial Production.


 convivial productions planter


planter / fruit bowl


Family tree gemstone necklaces by Danique Jewelry.


 family tree necklace


birthstone drop necklace / family tree necklace


Simple and sweet, scented candle tins from AromaLab.


 candle tins etsy


mom / love


Personalized initial bracelets from Frosted Willow.


 frosted willow bracelets


initial branch bracelet / infinity bracelet


Stylish tablet covers at Case Genie.


 stylsh ipad covers


marble / floral


Handblown flutter glass bowls by Foci Gallery.


 flutter handblown glass bowls


blue flutter / green flutter


Boho beach blankets and textiles by On the Rainbow.


 boho beach towels


navajo coral / aztec blue


Whimsical wooden wall clocks from DecoyLab.


 whimsical wall clocks


 floral kirie / pig


Handmade lavender sachets by GardenMis.


 lavender sachets


herringbone / butterfly


Gorgeous blue and white handmade ceramics by Art & Manufacture.


 blue and white ceramics


pie plate / oil & vinegar


.

Martes, Abril 26, 2016

Distressed Hardwood Flooring: The Hand Scraping Process

Do you have your eye on distressed or hand scraped hardwood flooring for your home? This style has become a popular choice for homeowners that want the look of an old, reclaimed hardwood floor that will last a long time and show minimum wear.


What exactly are hand scraped or distressed floors?


This hardwood flooring is intentionally scraped to provide a warm, natural look to a room. Before today's modern sanding methods, floors were hand scraped on site to make the floors flat. Today's hand scraping is done to add texture, richness and uniqueness.


There are two prominent methods used to give distressed floors this look:


  1. In an effort to reduce labor costs, manufacturers created machine-made scraped floors. Although it's cheaper for the consumer, it's easy to see a pattern repeating across the floor, which lacks a natural feel.

  2. Hand scraped wood floors are actually done by hand, giving the homeowner a truly unique floor. Although this method can have a very natural look, it is extremely dependent on the skill of the person scraping the floor.

There are a few different methods used when it comes to hand scraping a floor, including denting, scooping, sanding or creating a reclaimed look with wormholes, splits and other naturally occurring character markings. Some product lines also allow the homeowner to choose between heavy, medium and light scraping.


Although machine-scraped floors are more cost-effective, this is one area where you get what you pay for; hand scraping and beveling done by an artisan is a truly one-of-a-kind floor that will give your home unique beauty, which is why we think it's worth the extra cost.


About Hand Scraping & Beveling Hardwood Floors


Although there are plenty of DIY hand scraping articles out there, this is one service you definitely want to hire a company like San Jose Hardwood Floors to complete. Real custom, rustic distressed hardwood flooring takes more than simply denting, scooping, roughing or sanding the floor unevenly. As you consider who you want to hand scrape or bevel your hardwood floors, ask where the work is done, who will be doing the work and if you can get a custom sample.


The process begins with creating a custom sample for the customer, which they signed off on before we start. Then our artisans use 3" blades to scrape the boards right on the floor. Once the journeymen are done with the scraping and beveling, they'll apply two coats of a custom stain to the wood and then a final coat on-site following the hardwood floors' installation.


Additional choices to consider:


  • Hand scraped hickory is the most popular choice of wood as it is currently more cost-effective than walnut, the second most popular choice of wood.

  • It's also important to consider what type of stain and varnish you'd like for your hardwood floors, as those with a darker finish tend to show the scraping more than naturally-finished floors (the finish finds its way into the cracks, making it appear even darker).


Want to know more about distressed hardwood flooring? Our high-end hand scraped and beveled floors are available in a wide variety of species like hickory, spotted gum, jarrah, beech, maple, black walnut and more. Come visit our showroom to see it in person for yourself. Remember to contact us for a free in-home estimate too, whether you're interested in hardwood floors or another type of flooring!

Can I Put Vinyl Tile On Top Of Vinyl Sheet Flooring?


Dear Bob and Betsy,

We have a vinyl sheet flooring right now and want to put new glue-down vinyl in our kitchen. Can we lay the vinyl tile on top of vinyl sheet flooring?

– Jack and Carolyn W.

Dear Jack and Carolyn,


It's great that you want to revamp your flooring from old vinyl sheet flooring to vinyl tile plank flooring! Before installing over top of your previous vinyl flooring, you should follow the tips below.


Tear It Up!


By applying a glue-down vinyl over another vinyl, your are creating a soft substrate for you new floor. Glue-down vinyl plank flooring needs a very firm sub-floor in order to adhere properly. By having too soft of a sub-floor, your new vinyl floor will wear faster, leave lasting dimples from furniture, and ultimately will crack the vinyl. Be sure to follow all instructions on the vinyl flooring installation instructions and adhesive instructions for a successful installation.


Glue Down Vinyl Flooring (Photo Credit: Young and Domestic)

Glue Down Vinyl Flooring (Photo Credit: Young and Domestic)


If Tearing Up Isn't An Option


If tearing up the vinyl flooring is too much of a hassle or you are unable to do it, consider switching to a laminate flooring. Laminate flooring is a floating flooring, meaning that you do not use glue or nails to lay down the flooring. Most laminate flooring uses a click-lock system in order to install the floor. What you will first do, is lay down an underlayment and then install the laminate flooring on top of it. The underlayment allows the laminate flooring to float on top of the sub-floor. Be sure to check and make sure you use a thinner underlayment, since you will already have some give because of the previously installed vinyl flooring.


Laminate flooring and underlayment

Laminate flooring being installed on top of underlayment


If you have any other questions or comments, please feel free to write them below! We love to hear from you and answer any questions you have!


More Vinyl Flooring Tips:


The post Can I Put Vinyl Tile On Top Of Vinyl Sheet Flooring? appeared first on Passion for Home - Bestlaminate Blog.

Lunes, Abril 25, 2016

Touches of Purple

All of us fans are still mourning the loss of Prince, he was one of the icons that was so much a part of our generation. As Jimmy Fallon stated in his tribute on Saturday Night Live, “He had his own color, he owns purple.” It was everywhere, on his guitars, his clothing, and we all know the famous song.


The color purple is not used as often as it should be as an accent in my opinion. I'm not a huge fan of saturated crayon purple in decor, but I love muted lilac and rich plum, especially when paired with gray and gold. Purple has such an elegant quality when done right. Today's post is dedicated to the the color purple and Prince, he will be missed.


 lilac velvet chairs


luxe


 lilac velvet sofas


betsy burnham design


 plum accent chairs


anne hepfer


 purple velvet dining chairs


carey karlan


 purple velvet accent chairs


gz interior design


 purple bedroom accents


leslie fine interiors


 lavender bedroom


amanda nisbet


 lavender window panels


 gray and plum living room


luxe 1 / 2


 lilac grasscloth ceiling chairs


rethink design studio


..

5 Ways Your Unintentionally Ruining Wooden Floors


Though wood is obviously a hard material that can withstand all manner of knocks, a lot of people with wooden flooring take this for granted and don't correctly look after or maintain it. For this reason many home owners are unintentionally ruining their wooden floor. Below we list a few of the most common no-no's involved in looking after your flooring and how they can result in all kinds of damage.


Sunbathing

If you chose the colour of your wooden flooring for a specific reason – whether you like the hard and dense darkness of Walnut or the bright and natural colouring of Beech – you'll want to keep it that colour for as long as possible. Keep your blinds drawn when the sun is at its strongest will help limit sun exposure and discolouration and ensure the wood doesn't dry out and possible shrink/crack.


Sharp Objects

Whether it's high heeled shoes or your cat and dog's scratchy paws, constant exposure to any kind of sharp object is going to chip away at the integrity of your hardwood flooring. Keeping things like this in check, on top of using rugs underneath table and chair legs, will ensure your flooring remains to spec.


Mopping Up Too Often

Unless you've got muddy feet constantly traipsing through your home, you won't need to mop your wooden floor more than once a month. When it is time to clean, ensure the mop is damp and not soaking and give your floor a dry rub when finished. If you need to clean constantly, give your wooden floor a once over with a dustpan and brush or a quick vacuum instead of turning to the mop. But saying that…


Vacuum – With The Right Attachment

Most people look at the various attachments that come with a vacuum cleaner, nod, then stick the upholstery brush on and put the rest in the cupboard never to be seen again. Stop right there! Using a floor brush attachment is much more gentle on your wood and offsets the grit and dirt that can scratch your floor.


Letting Off Steam

Are you getting the picture that too much water is bad for your wooden flooring yet? Good. If you're using a steam mop instead of a regular mop, make sure your mop is on the lowest setting and constantly moving across the floor. If your floor has a wax finish or has been laid for a while, we'd recommend skipping steam altogether.  Be very very cautious with steam cleaning, as most manufactures do not recommends there use and this could have an effect on any warranties.  Justwood as a company do not advocate the use of steam cleaners on most of the floors they supply.

Sabado, Abril 23, 2016

BOTB 4.23.16

You guys. Prince. I'm still so sad. I associate one of his songs with just about every phase of my life. My heart is broken that he is gone, he was such an icon and so talented.


This morning the sun is out and it's a big day for us, it's the annual hometown parade where thousands of people congregate. It's always a fun event and one of the reasons I love living in a small-ish town. I'm walking in the parade with my little boy and his martial arts studio, it's very cute to see them all in their uniforms and belts walking down the main street waving at the thousands of people who come every year.


Tomorrow I'm spending the day painting furniture in my garage, a dresser for my brother and a bed for my son. I bought him a loft bed to make more space in his room to store all of his Legos and toys underneath, I'll post an update on that space soon.


Thank you so much for all your tips on where to go and what to eat while I'm in Paris this summer, we decided to stay in a boutique hotel for few days then I rented a loft on Air B&B in Le Marais for 5 days to get more of a “life in Paris” feel if only for a short time. I've started a list of places to visit thanks to all of your suggestions! And now for the favorite projects and spaces:


Make your own fabric covered privacy screen with a tutorial at Apartment Therapy.


 privacy screen diy


Discover how to hide pesky cable cords when mounting a flat screen with Young House Love.


 mounted tv hidden cords


Build a floating desk and storage towers with the step-by-step process featured at Shanty 2 Chic.


 floating desk and towers


Build a DIY tripod lamp with The Winthrop Chronicles.


 diy tripod lamp


Download a printable garden planner for your seedlings at Curbly.


 printable garden planner


Craft speckled jewelry dishes from IKEA coasters at DIYs.com


 speckled jewelry dishes


Make paper flower napkin rings for your spring soiree with Aki at Consumer Crafts.


 paper flower napkin rings


These pretty DIY marble chargers would look lovely on a table set for Mother's Day! Project by Bird's Party.


 marble diy chargers


Enjoy your spring weekend!


xo


.

Biyernes, Abril 22, 2016

Our Hallway Is Done & It's Magnetic!*

Edwardian Hallway
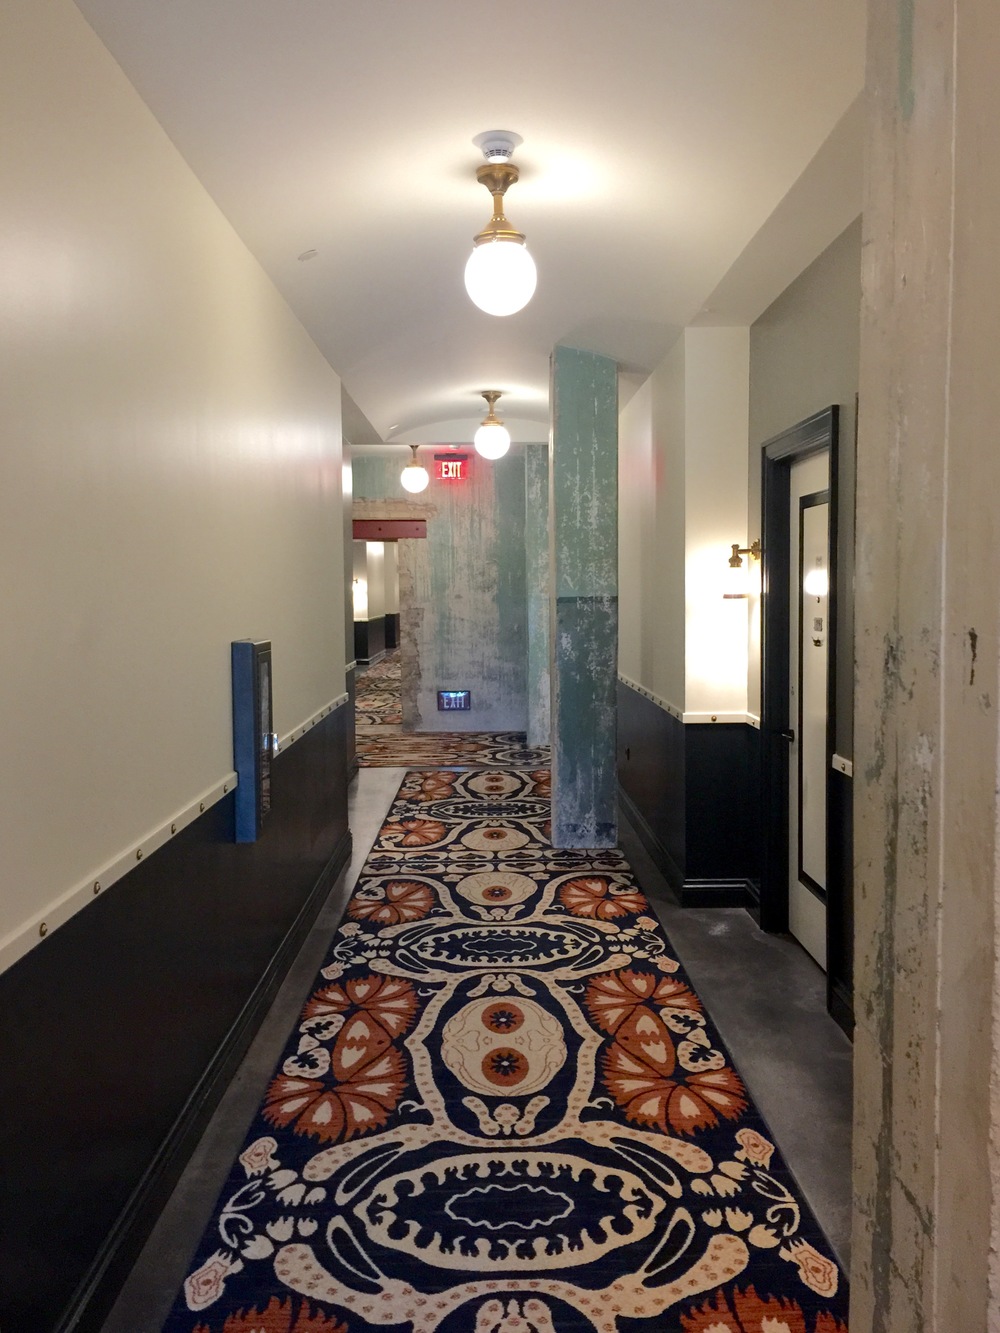
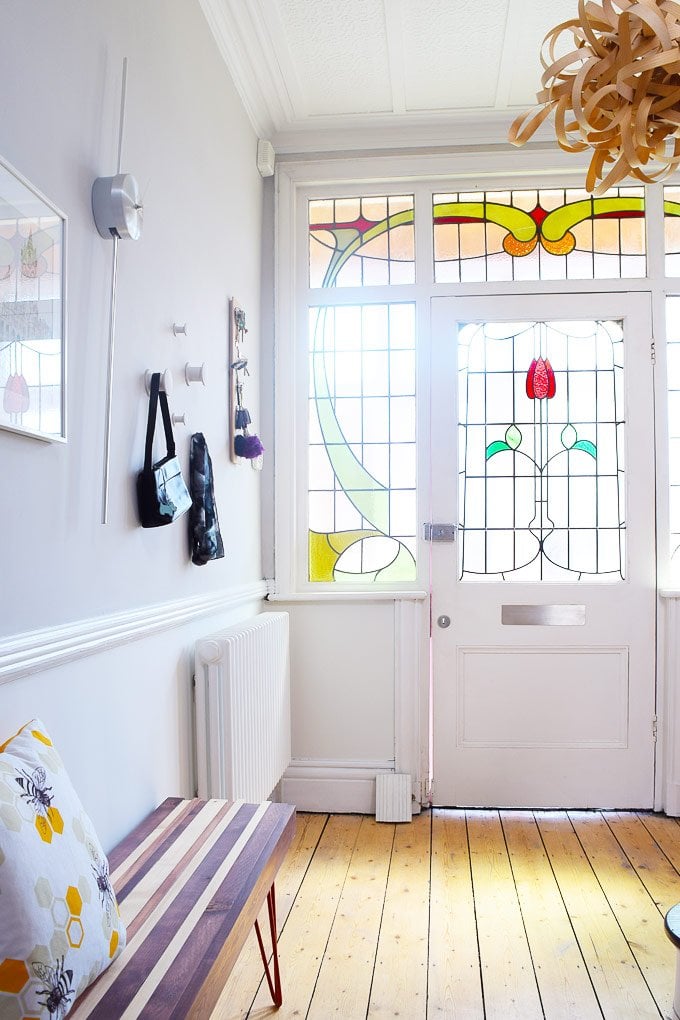
Over the last couple of weeks we've been working on a hallway makeover and after having everywhere plastered and about 30 hours of cleaning and painting it's done! When we first moved in it looked like this… After a quick coat of white paint not long after moving in it turned into this… … and... 


Read More »


The post Our Hallway Is Done & It's Magnetic!* appeared first on Little House On The Corner.


Huwebes, Abril 21, 2016

The Art of Arranging Flowers & Books, As Taught By 'Hotel Emma'


Fresh flower bunch - Hotel Emma


I've been toying with the idea of taking a flower arranging class. 

It's really something I am not good at. I try, but I usually end up with a single type, mass of flowers in my photoshoots. Typically, there's lots to do on those days, and I don't have much time to arrange the flowers. Because it's not something I can do quickly and with ease, I just go en masse with one type of flower.


Seeing how others arrange flowers to make natural, beautiful combinations truly inspires me. 

When I visited Hotel Emma last weekend and saw their flowers everywhere, I had to share them here with you. They are absolutely gorgeous. Most of the creations have a wildflower type look or a really dense, colorful fullness. I just love that they are a bit wild and overflowing, almost bursting out of the container. The rustic pottery containers are so appropriate.

On just about every tabletop in the hotel, books also reside. There is a library, where guests are treated with a cocktail and a visit with the concierge, while perusing this lovely collection of 3,700 books, acquired from Sherry Kafka Wagner. There's more about "The Library" HERE.

Please note in the photo below of the library bookshelves, how they are lit from above in the shelves below eye level, and lit from below in the shelves above eye level. While perusing the books, there aren't any glaring light sources shining in your eyes. :-) Roman and Williams thought of everything. 


Books and fresh flowers: just the very best decorating accessories...right?

I think so. ;-)


Books on coffee table - Hotel Emma Lobby


Fresh flower bunch - Hotel Emma


Bookshelves - The Library, Hotel Emma


Fresh flowers in metal can - Hotel Emma


Fresh flowers on side table - Hotel Emma


Lobby Bookshelf - Hotel Emma


Lobby flowers - Hotel Emma


Spring branches - Hotel Emma


Entry Hall Table - Hotel Emma


Fresh Flowers - Hotel Emma


Fresh flowers on side table - Hotel Emma


Fresh flowers on side table - Hotel Emma Lobby


Fruit bowl - Hotel Emma


Fresh flowers, orchids - Hotel Emma Lobby


Lobby with paneling - Hotel Emma


How Do I Clean Mold On Vinyl Flooring?


Dear Bob and Betsy,

Our french doors have been leaking. I noticed this dark stain under the vinyl floor. I'm thinking it's mold. How do I clean mold on vinyl flooring and will I have to replace the flooring?

– Pete H.

Dear Pete,


Yikes! Mold is never a word you want to see in your home. While mold in your home is not always a death sentence, you should be cautious when dealing with mold on vinyl flooring or any flooring.


Get A Mold Test


In order to find out what type of mold you are dealing with, you should really get the mold tested. This can be done either by purchasing an mold kit from the store, or calling in a professional. Some mold can be simply cleaned with a bleach and water mixture, but other molds need to be cut out and the home's air scrubbed. Know what you're dealing with before you start trying to clean up.


Home Mold Test Kit (Photo Credit: Stage My Own Home)

Home Mold Test Kit (Photo Credit: Stage My Own Home)


Fix the Underlying Problem


Although vinyl floors are resistant to moisture, mold and mildew can grow if there is standing water around the edges, grooves or under the floor. If you notice standing water, it is important to fix the cause of the standing water before trying to repair or clean your floors.


For Harmless Mold Cases


If your kit comes back with a harmless, common mold, you can simply clean it up with a bleach and water mixture. Allow the area to air dry completely with the use of fans or an air purifier. Clean off the affected vinyl flooring in the same manner, allow to dry, and then reinstall.


Mold On Window (Photo Credit: Ask Meta Filter)

Mold On Window (Photo Credit: Ask Meta Filter)


For More Serious Mold Cases


However, it is a more harmful mold such as black mold, simply using bleach WILL NOT kill it. These molds can appear to be killed by using a bleach and water mixture. However, the only true way to get rid of mold is to cut it out.


Before anything, you must stop the leak. Fix this first or there will be more issues with mold and damage in the future. You then must rip out whatever has mold on it and replace it. Dangerous mold can and will cause sicknesses, including vomiting, nausea, and breathing related problems. Dont' take any chances on your health. Cutting out the mold in the sub-floor and replacing the flooring is the best way to completely remove the mold from your home. You should then rent an air scrubber for the room to remove any mold spores. Retest the room or home to make sure you have removed all of the mold.


Mold Under Flooring (Photo Credit: Den Garden)

Mold Under Flooring (Photo Credit: Den Garden)


If you have any more questions or concerns, you should leave a comment below and we will help in any way we can!


More Vinyl Flooring Tips:


The post How Do I Clean Mold On Vinyl Flooring? appeared first on Passion for Home - Bestlaminate Blog.

Miyerkules, Abril 20, 2016

Summer in Paris

It's official, I'm booked for a trip to Paris in July! I haven't been to this city in fifteen years and I'm so so excited to return. As of now I'm traveling by myself but my plan is to get one or two friends to come with me!


eiffel tower flower frame


via


I'll be brushing up on my French in order to get by and watching a few movies with Paris as the backdrop to get me in the mood. An American in Paris and Midnight in Paris come to mind can you recommend any others?


I'm headed there in July, and I know it will be crowded with tourists, but I'd love to hear some ideas on where I should stay, what I should see, and where I should eat! Will you share your favorites with me?


.

Martes, Abril 19, 2016

What to Expect: From Initial Contact to Beautiful Refinished Floors

Do you want to refinish your floors? Are you curious what to expect? At San Jose Hardwood Floors, we pride ourselves on exceptional customer service; a big part of that is keeping you well informed throughout your flooring project. Here's what you can expect the process to look like.


Step 1: Initial Contact


The first step is getting in touch. You can submit a form through our website, give us a call or stop by the showroom to get started. We always suggest you come into the store if you can; we want you to meet us and see what we are all about for yourself. By visiting our showroom, you'll be able to see we're a start to finish turnkey solution and we never rely on subcontractors.

Once you contact us:


  1. We'll schedule an appointment so we can come out and assess if your floors can be refinished. Some can't be refinished, such as certain types of engineered flooring (which can have a very thin layer of hardwood on top) or a very old hardwood floor that has already been refinished many times. If this is the case, we'll happily discuss replacement options with you.

  2. While at your home, we'll measure the space and discuss color and finish options. In addition to the wide variety of colors we have available, we're able to do custom-mixes so you can have just the right shade of stain and dye for your home.

  3. Following our appointment, we'll send an estimate as well as a copy of our liability and workers' compensation insurance the following day by 9am (if not sooner). Our estimates are very detailed and include specifics like:

    1. Type and color of stain/dye

    2. Finish type

    3. Baseboards


  4. Once you receive your estimate, we'll give you a call to walk you through the project, estimate and logistics of the job. We'll also recommend professional services to assist with:

    1. Moving/storage of your furniture

    2. Area rug cleaning (if your floors are getting a facelift your rugs should, too)

    3. Painting

    4. Cleaning


Step 2: Scheduling the Project


Once you decide to move forward with the project, we schedule the job by taking the following factors into account:


  • How long you'll need to be out of your home, if at all

  • What schedule is convenient for you (we do work Saturdays, but Sunday is traditionally our day off – if it turns out the only way your floors can be refinished is by us coming on a Sunday, we may be able to do that)

  • If you're also currently remodeling, any other contractors that may be working on your home; we can work with them as well as we have a lot of experience working with a wide range of home improvement professionals


Step 3: Implementing the Project


As we begin work on your floors, you can expect the following:


  1. You'll need to have all your furniture removed when we arrive to begin (remember, we can recommend great movers and storage companies that can handle this for you).

  2. We'll put up plastic in some parts of your house to protect the rest of your home from dust. Our dust containment system is top of the line, although there's no truly “dustless” refinishing, we create a minimum amount of dust.

  3. We'll start by making any necessary repairs to the floors.

  4. We'll fill/trowel the floor with putty where needed.

  5. We use different grits of sandpaper depending on your floors' condition.

  6. Next we open mesh screen the floors, which is a type of sand paper.

  7. Then we clean the floors so they're perfect for the lovely new finish.

  8. After we tap the floors with mineral spirits, we apply the new stain or dye (or a combination of the two) by hand. This is the only way to ensure a consistent finish; we never use mops to apply the floor dye or stain.

  9. Whether you opt for water- or oil-based finish (we'll help with the decision so you get the best finish), we always apply three coats.

    1. For oil-based finishes we apply one coat a day, so it takes three days.

    2. For water-based finishes we can apply the first two coats in one day, so it takes two days.


Step 4: Baseboards


What about your baseboards? If they're in good condition, we can edge right up to them. We may need to add a base shoe by filling in the little gap under the baseboard that appears when the floors are sanded (the floor becomes lower so the baseboard doesn't go all the way down to the floor anymore).


If you need new baseboards you have two options:


  1. Paint-grade baseboard (you'll need to provide the painter, but we're happy to make recommendations). We suggest you get them painted before they're installed.

  2. Stain-grade baseboard (we'll finish these for you).


And, of course, we're happy to install your baseboards for you!


Step 5: Enjoy!


After the project is complete, you can move your furniture back in and enjoy your beautiful refinished floors!


Are you ready to get started? Come visit our showroom and/or contact us to schedule your initial appointment!

MUST-SEE: 'Hotel Emma' - A Hotel That's Texan, Rustic & Modern, All At Once


Overall Lobby - Hotel Emma


Exterior by the riverwalk - Hotel Emma


Exterior by the riverwalk - Hotel Emma


I had a nice, quick weekend trip to San Antonio this past weekend. 

No special reason for the trip, except that I've been dying to see this hotel that opened up last November: Hotel Emma. I can't believe my husband finally relented for one night. 


This is real luxury.

It is so incredibly unique, and a real destination all it's own. It's on the river (they've extended the riverwalk to it's front door), located in the old Pearl brewery. The interior was gutted and cleaned up, and this fabulous hotel created within, keeping some of the original equipment, details, and industrial elements, while incorporating all the luxurious amenities of a world class hotel. It's industrial, Texan, rustic, and modern, all at once. With an old money feel, a historical background, and a really great story, it's more than just a hotel, but an experience in itself.

I'm not going to relate that story, because someone else has done it so well: Joni Webb, of Cote de Texas, wrote about the background and history of the site and the hotel. So I'm just going to link to her wonderful post, here.


What I'm sharing today are some overall shots, and some of the interesting details that I captured while there. 

These are the things designers notice: the tiny touches that are often overlooked, but when paired with the rest, make for thoughtful and impactful design. To say that designers of the project, Roman and Williams, did a truly remarkable job is an understatement. They interpreted this unique combination of a luxury hotel and sense of place so well that you would think they are Texan.

Enjoy!


The Reception / Entry Patio


>
Front Entry Patio - Hotel Emma


Front Entry Patio - Hotel Emma


>
Front Entry Outdoor Tile - Hotel Emma


Front Entry Outdoor Tile - Hotel Emma


>
Reception desk - Hotel Emma


Reception desk - Hotel Emma


>
Tile Floor - Reception, Hotel Emma


Tile Floor - Reception, Hotel Emma


The Lobby


>
Overall Lobby - Hotel Emma


Overall Lobby - Hotel Emma


>
Lobby - Hotel Emma


Lobby - Hotel Emma


>
Lobby Fireplace - Hotel Emma


Lobby Fireplace - Hotel Emma


>
Lobby - Hotel Emma


Lobby - Hotel Emma


>
Lobby seating - Hotel Emma


Lobby seating - Hotel Emma


>
Hotel Emma Lobby chair and table


Hotel Emma Lobby chair and table


>
Library table lighting - Hotel Emma


Library table lighting - Hotel Emma


>
Antique doors - Hotel Emma


Antique doors - Hotel Emma


>
Water Feature - Hotel Emma


Water Feature - Hotel Emma


>
Public Restrooms, Lobby - Hotel Emma


Public Restrooms, Lobby - Hotel Emma


The Larder & Bar


Bar -  Hotel Emma


Bar -  Hotel Emma


>
The Larder - Hotel Emma


The Larder - Hotel Emma


>
Wrought Iron Barn Door - Larder


Wrought Iron Barn Door - Larder


The Library


>
Stair railing detail in the Library - Hotel Emma


Stair railing detail in the Library - Hotel Emma


>
Accent lighting in the Library - Hotel Emma


Accent lighting in the Library - Hotel Emma


>
Rug detail Library -  Hotel Emma


Rug detail Library - Hotel Emma


>
Stair railing detail - Hotel Emma


Stair railing detail - Hotel Emma


Upstairs Hall


>
Tooled leather panels - Hotel Emma elevator cab


Tooled leather panels - Hotel Emma elevator cab


>
Signage - Hotel Emma


Signage - Hotel Emma


>
Hall Rug - Hotel Emma


Hall Rug - Hotel Emma


>
Wainscot Detail - Upstairs Hall, Hotel Emma


Wainscot Detail - Upstairs Hall, Hotel Emma


>
Upstairs Hallways


Upstairs Hallways


>
Room Door Details - Hotel Emma


Room Door Details - Hotel Emma


The Bedroom


>
Room details, bed, pillow - Hotel Emma


Room details, bed, pillow - Hotel Emma


>
Cabinet, room details - Hotel Emma


Cabinet, room details - Hotel Emma


>
Cabinet detail in rooms - Hotel Emma


Cabinet detail in rooms - Hotel Emma


>
Inside cabinet, room details - Hotel Emma


Inside cabinet, room details - Hotel Emma


>
Room details, chair and bench - Hotel Emma


Room details, chair and bench - Hotel Emma


>
Room details, Mexican glassware - Hotel Emma


Room details, Mexican glassware - Hotel Emma


The Bathroom


>
Bathroom Details - Hotel Emma


Bathroom Details - Hotel Emma


>
Bathroom Details - Hotel Emma


Bathroom Details - Hotel Emma


>
Bathroom Details - Hotel Emma


Bathroom Details - Hotel Emma


>
Bathroom Details - Hotel Emma


Bathroom Details - Hotel Emma