Hello ! Today’s the day to share pictures of the kitchen remodel with all of you! I’ve written about the process a few times before and I partnered with Cliq Studios using their cabinets to jump start this remodel.
I’m breaking this remodel feature up into two posts, today is the beauty shots with some before images for comparison, it’s quite a transformation! Next week I’ll share the back story with all the little decisions, details, and setbacks that occurred during the nine month renovation, plus sources too.
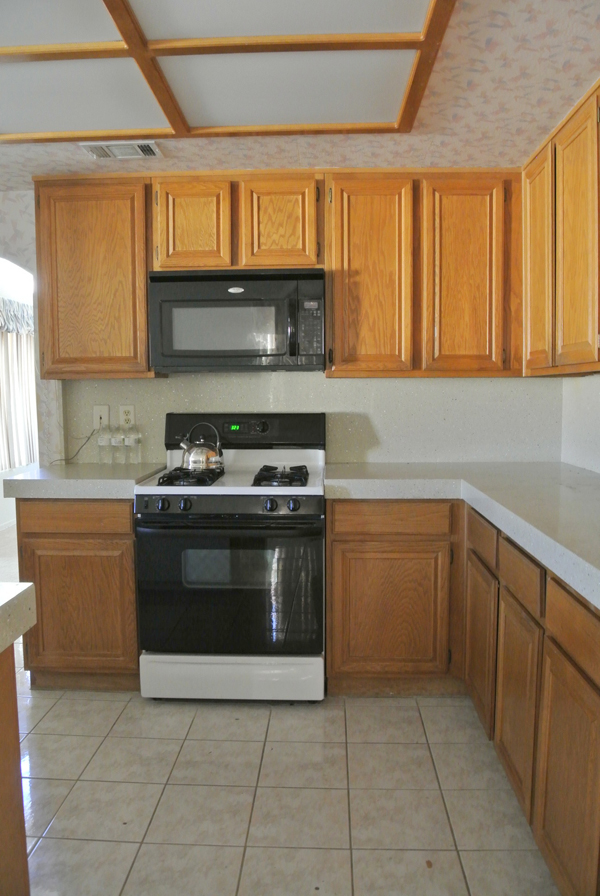
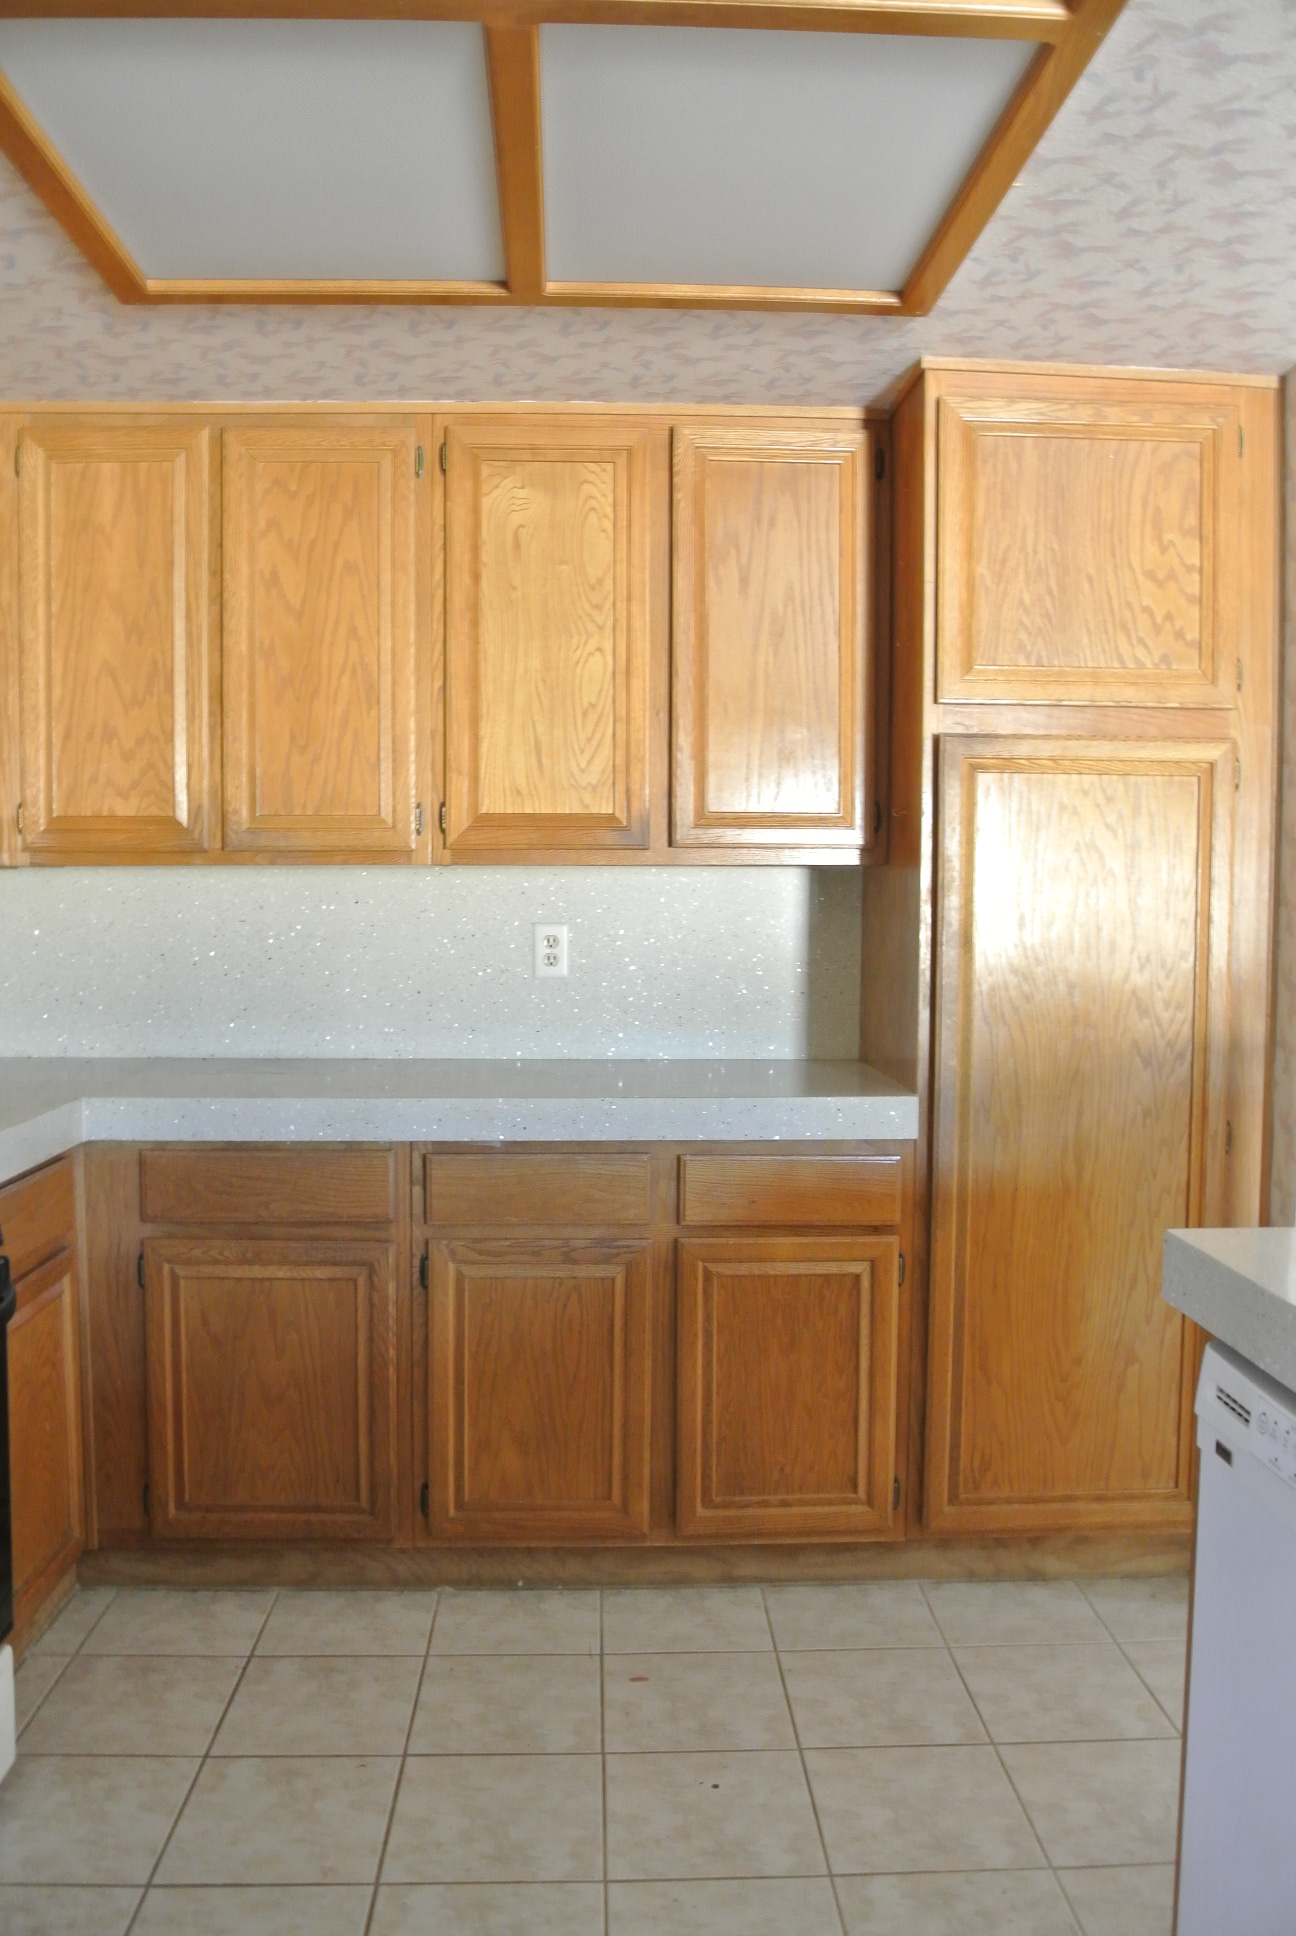
So, back to the beginning. We bought this house last summer but didn’t begin the kitchen renovation until December. It began with demolition, we removed all the cabinets, the wallpaper, the florescent box ceiling light, and the flooring. Here’s what the range wall looked like before the demo.
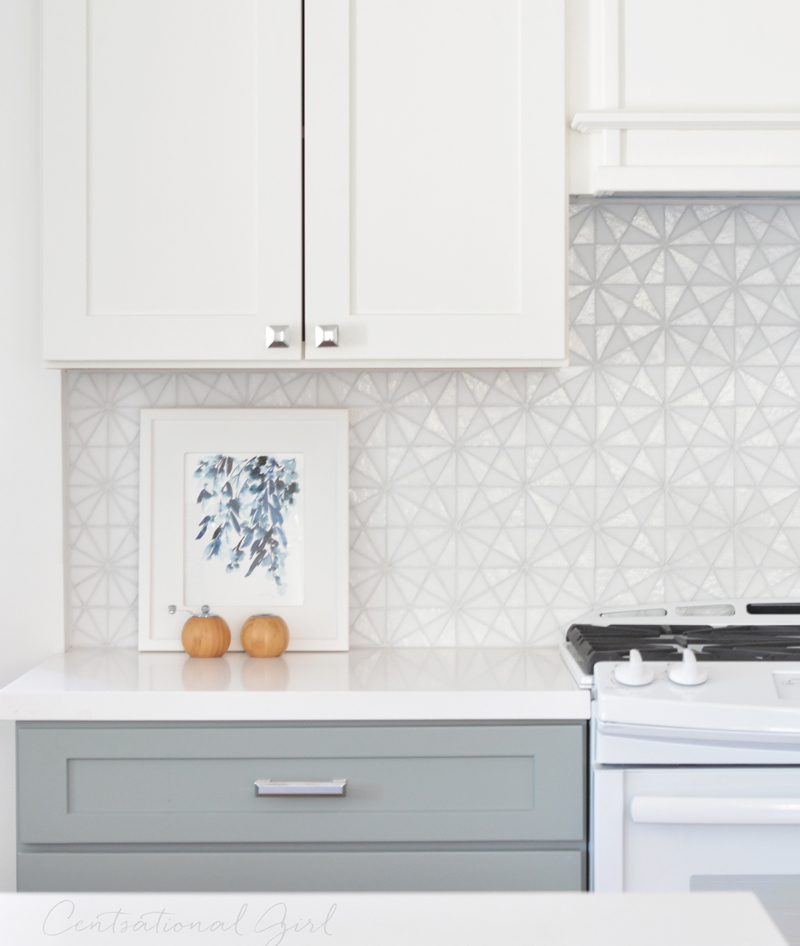
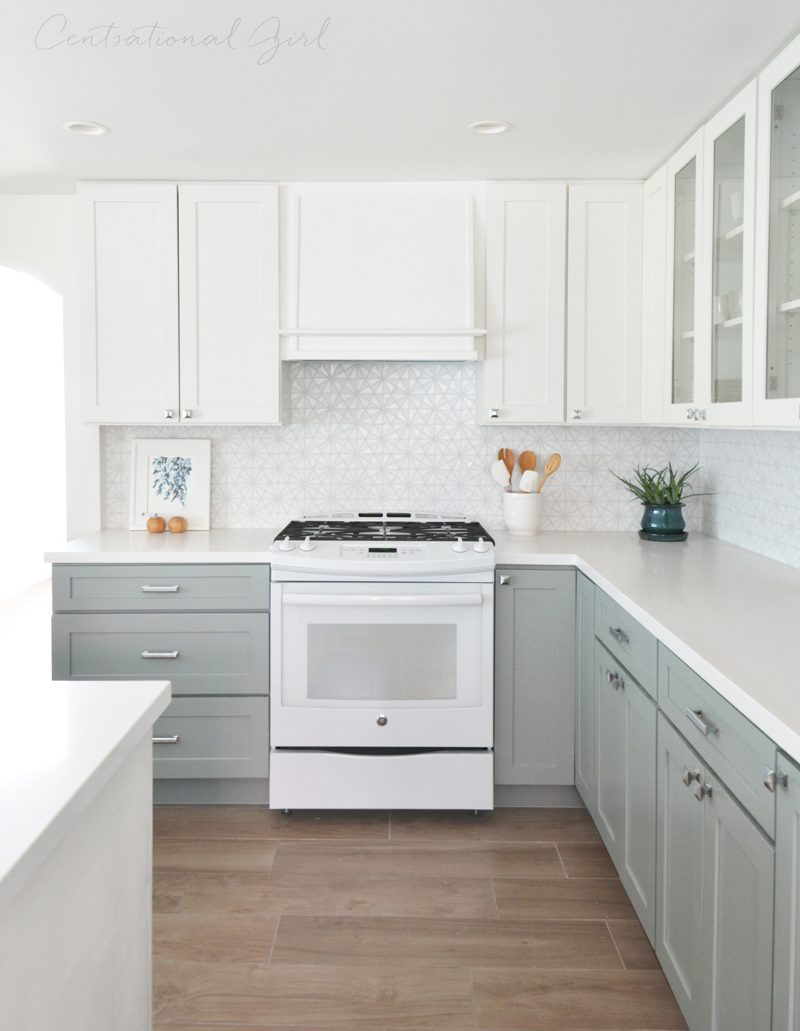
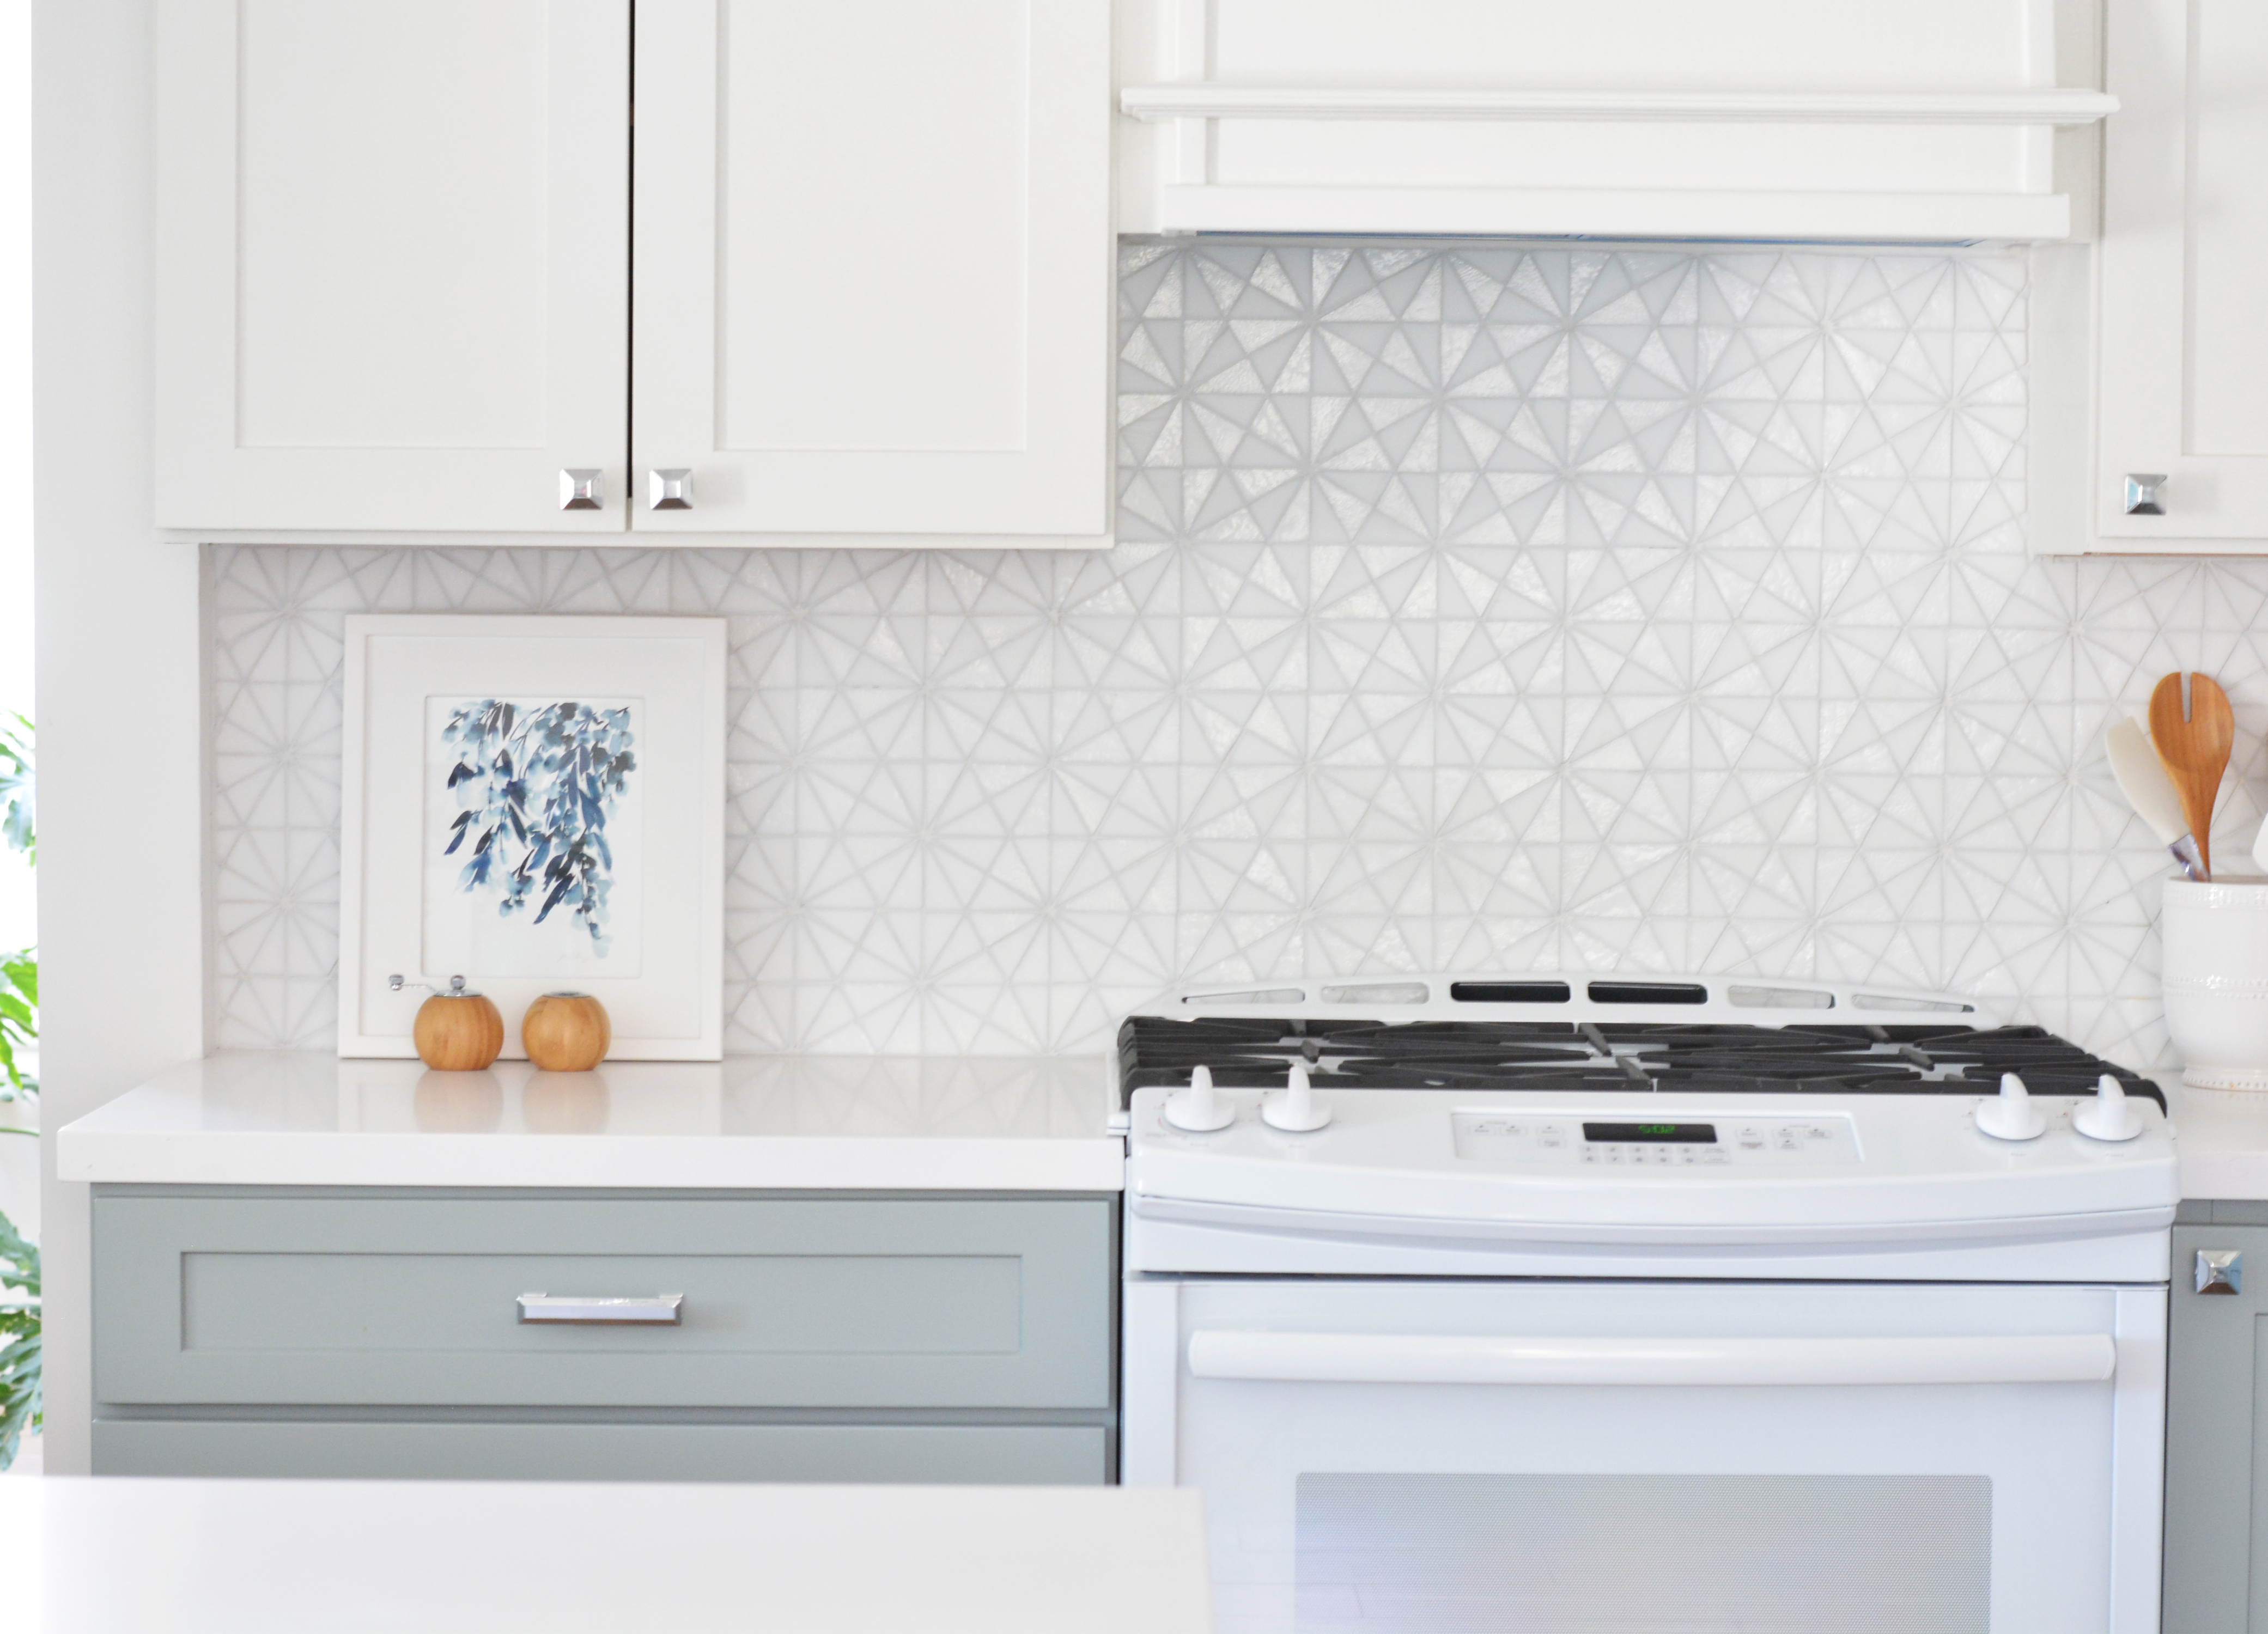
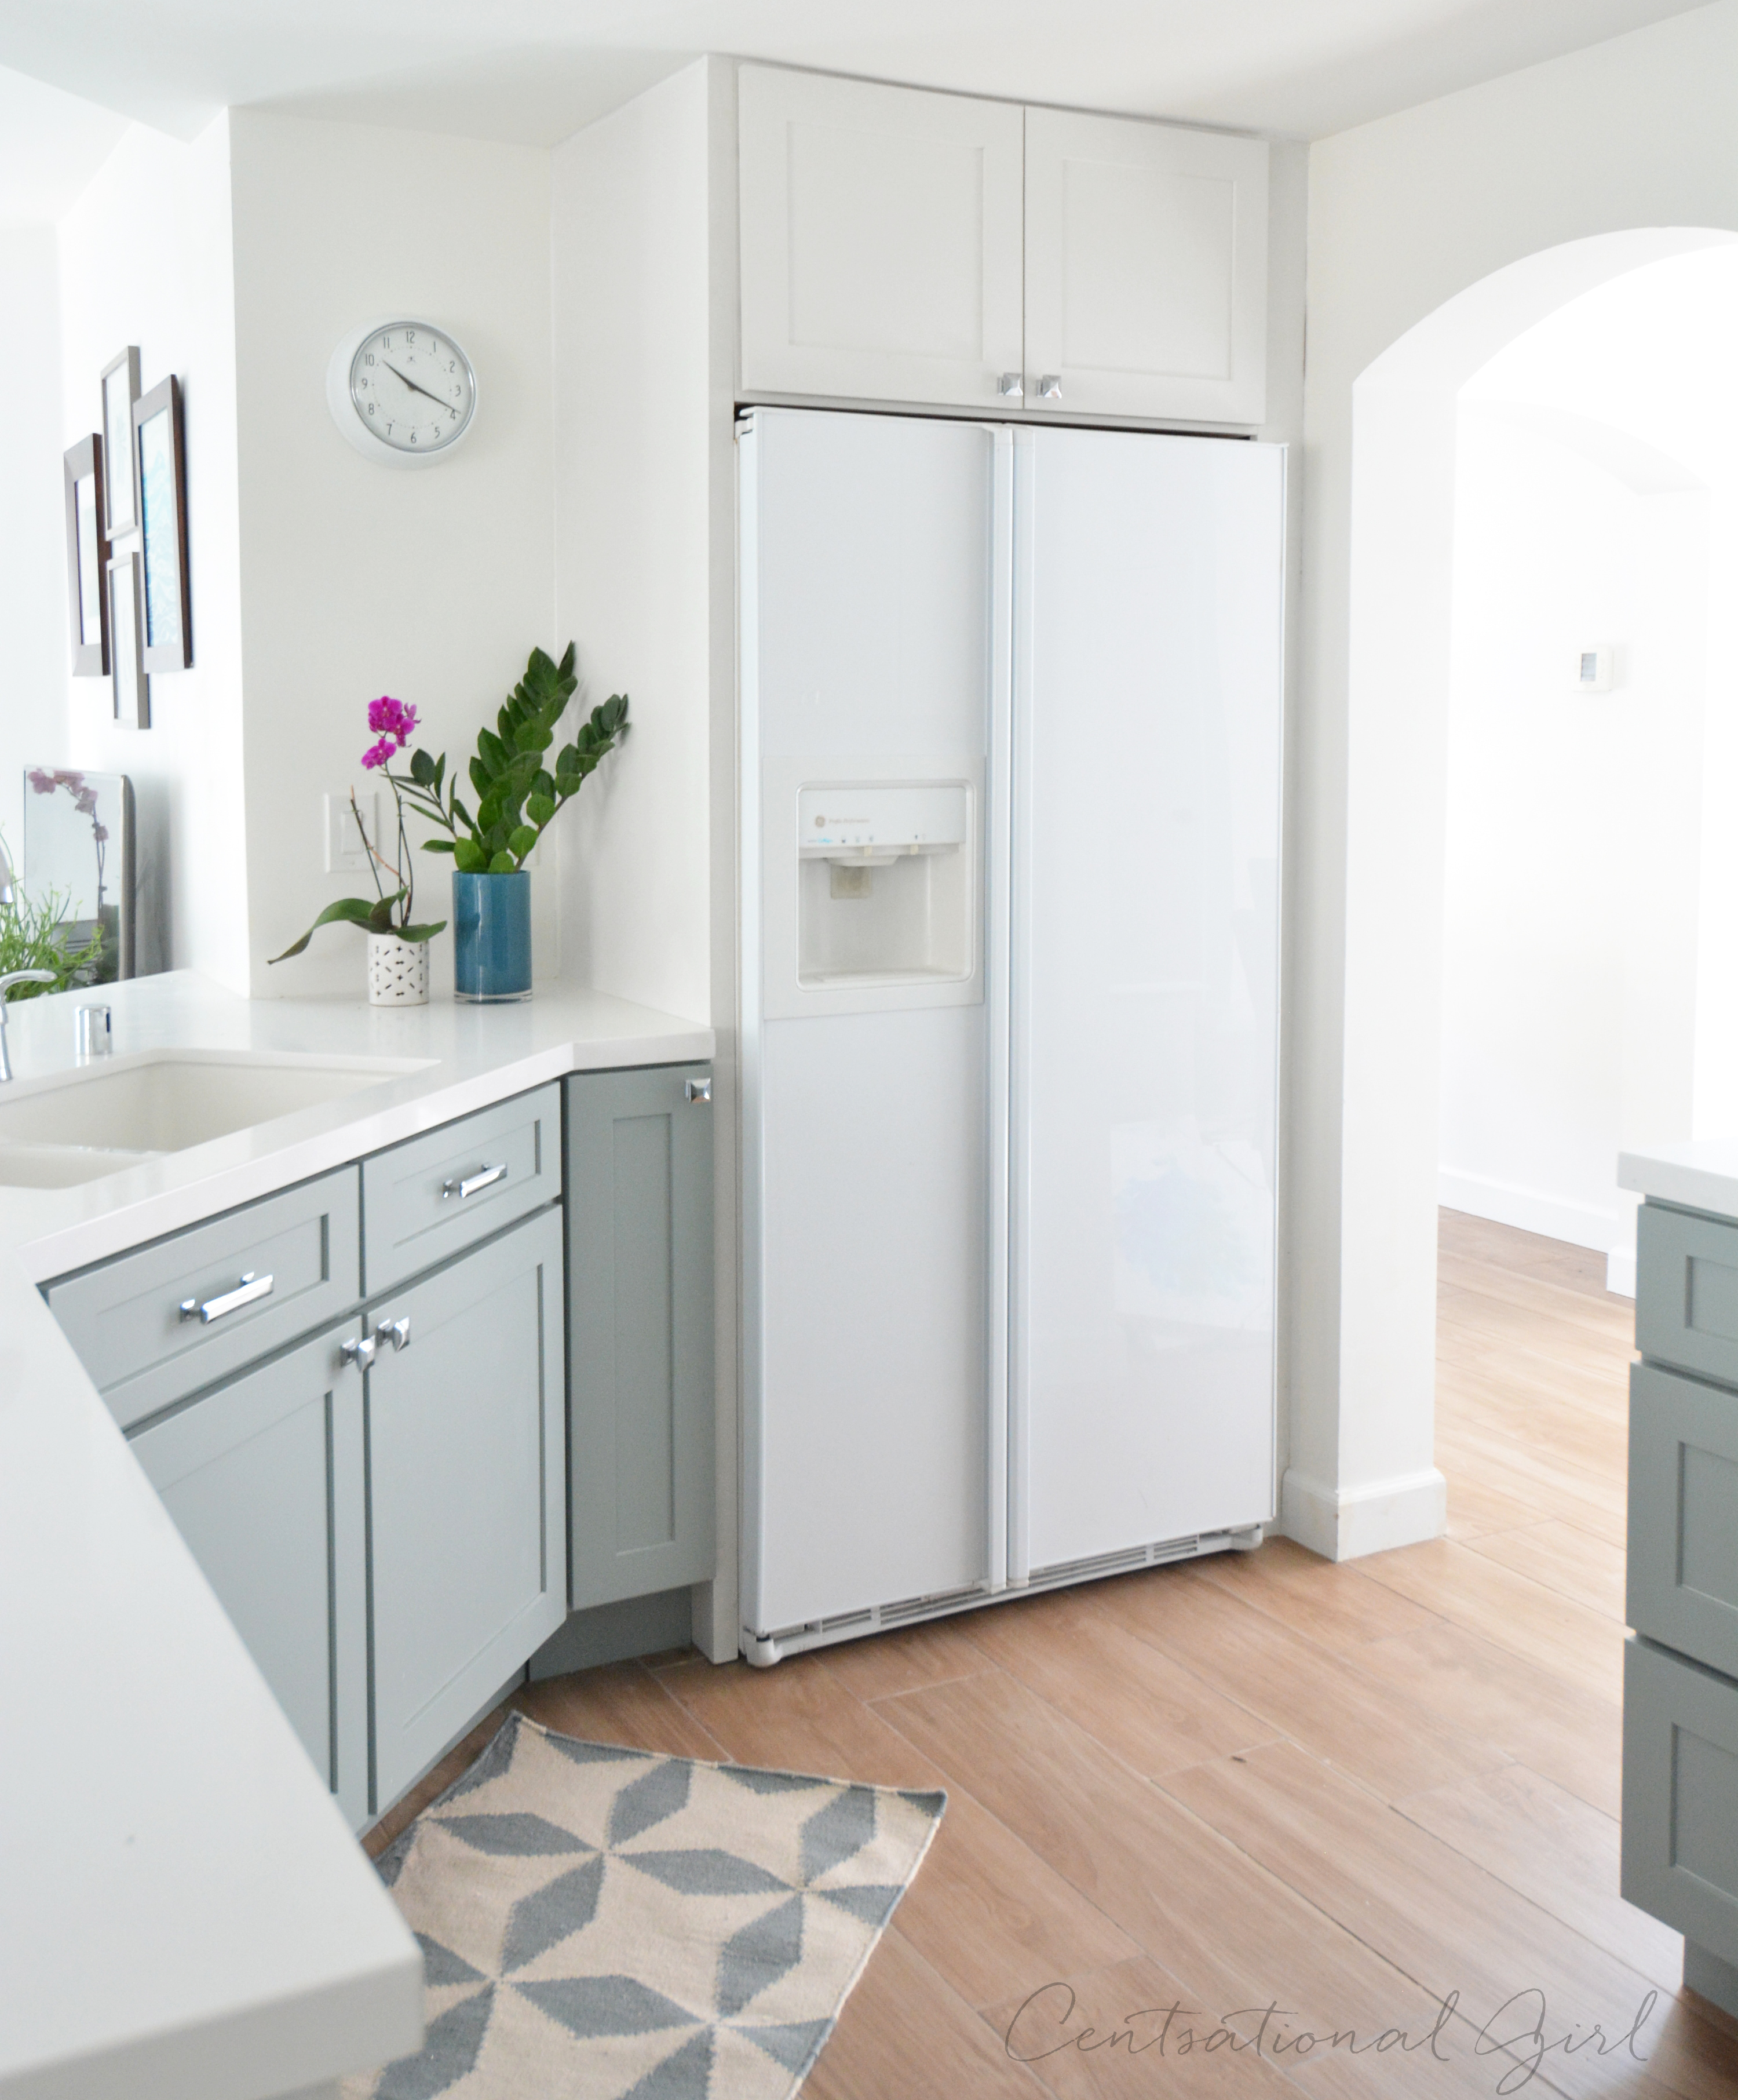
This kitchen demolition went down to the drywall, and we installed new cabinets from Cliq Studios, read about the installation of the cabinets in February here. I wanted light and bright since the space has no windows so white cabinets were the starting point. For a modern twist I used the Harbor color below, here’s what the range wall looks like completely remodeled from floor to ceiling.
.
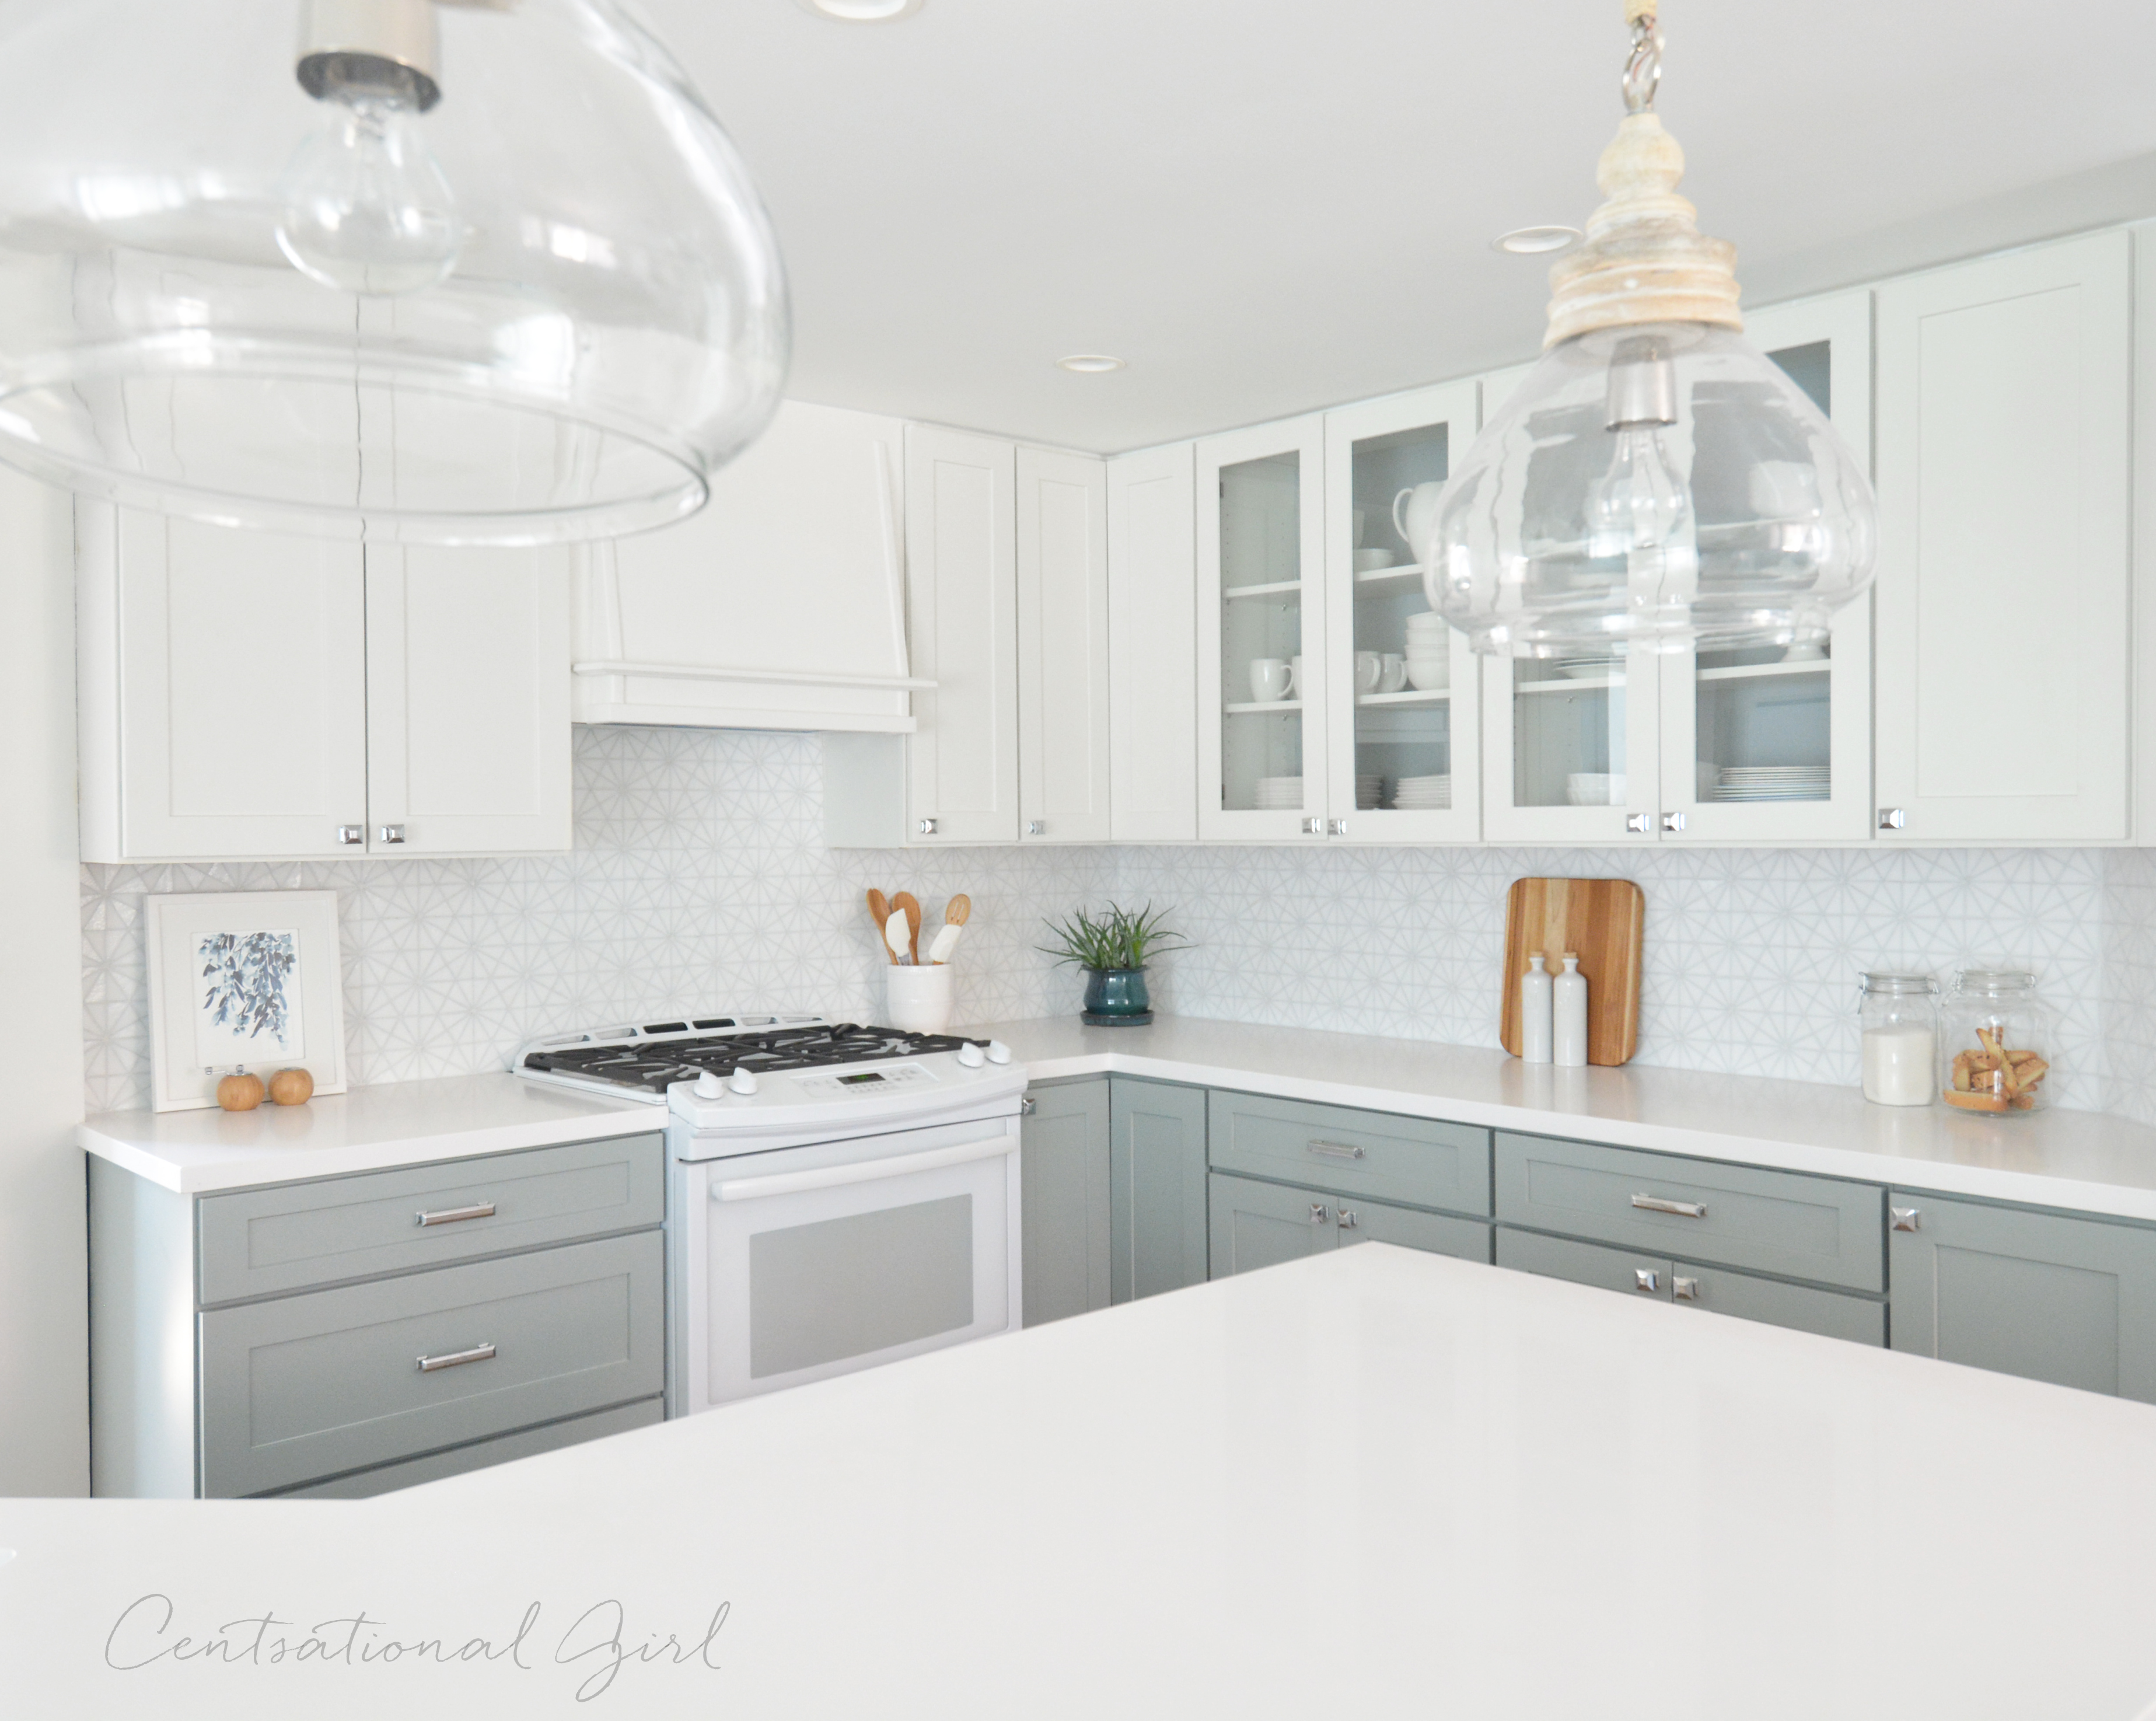
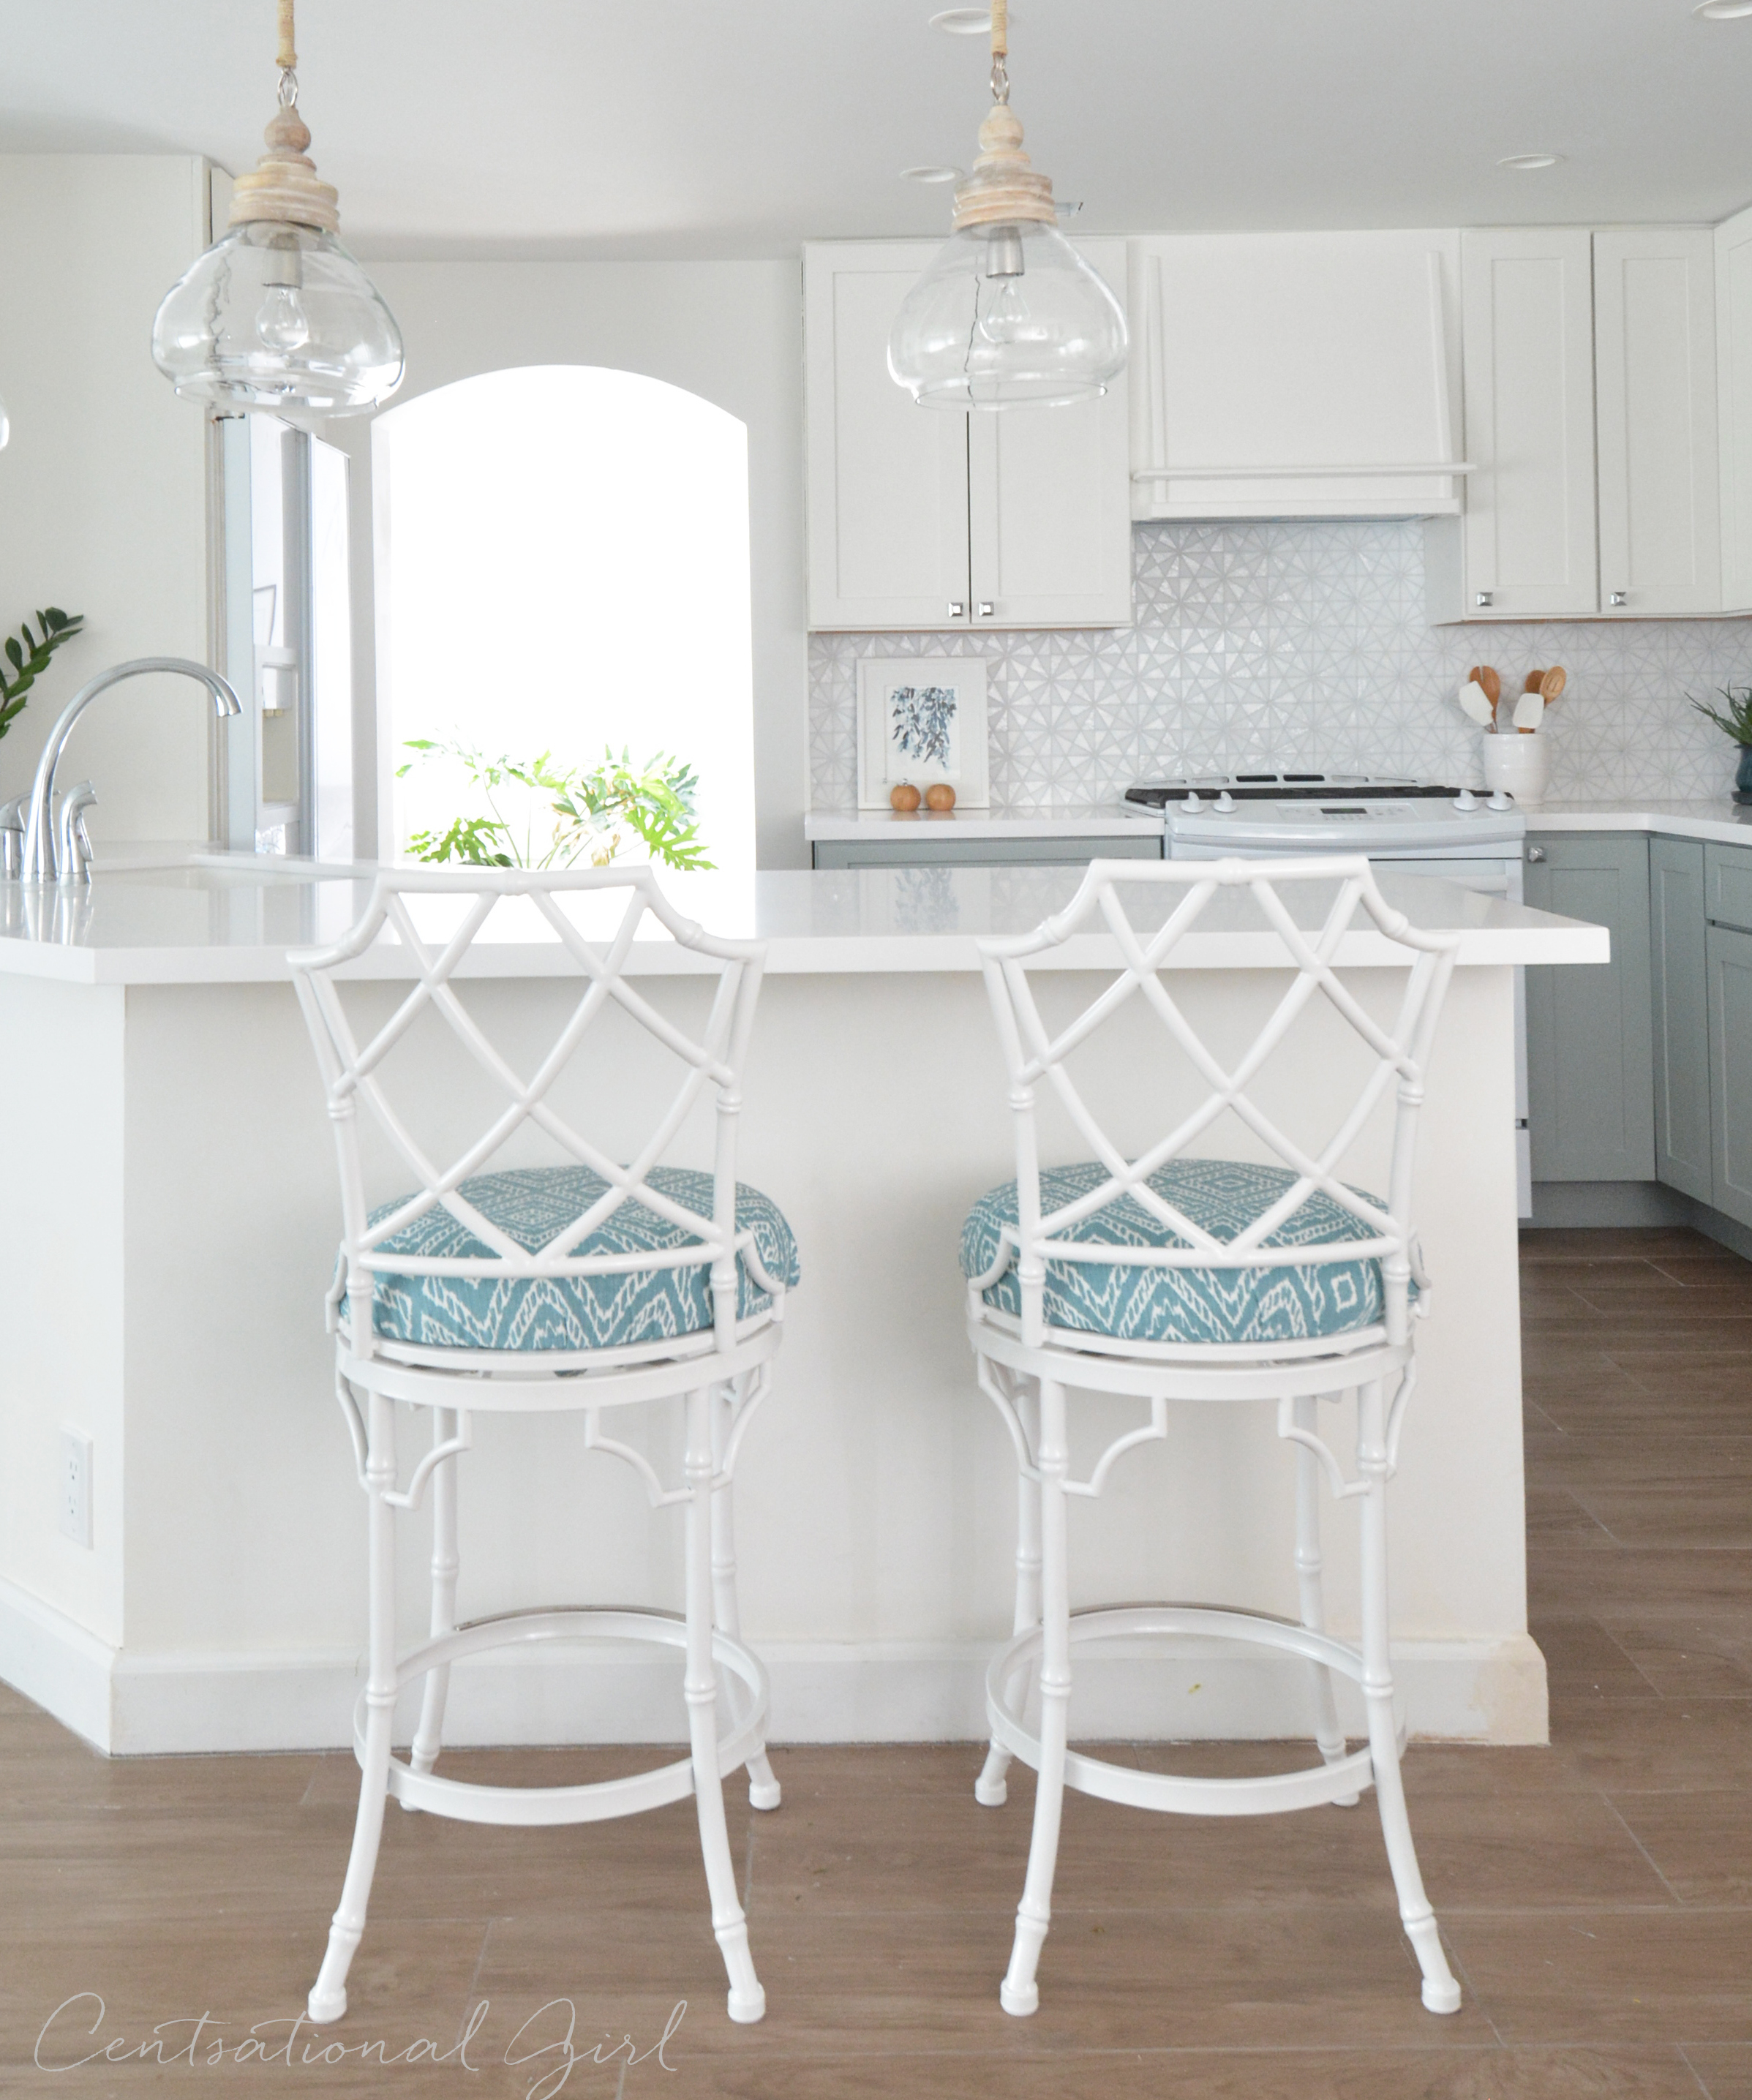
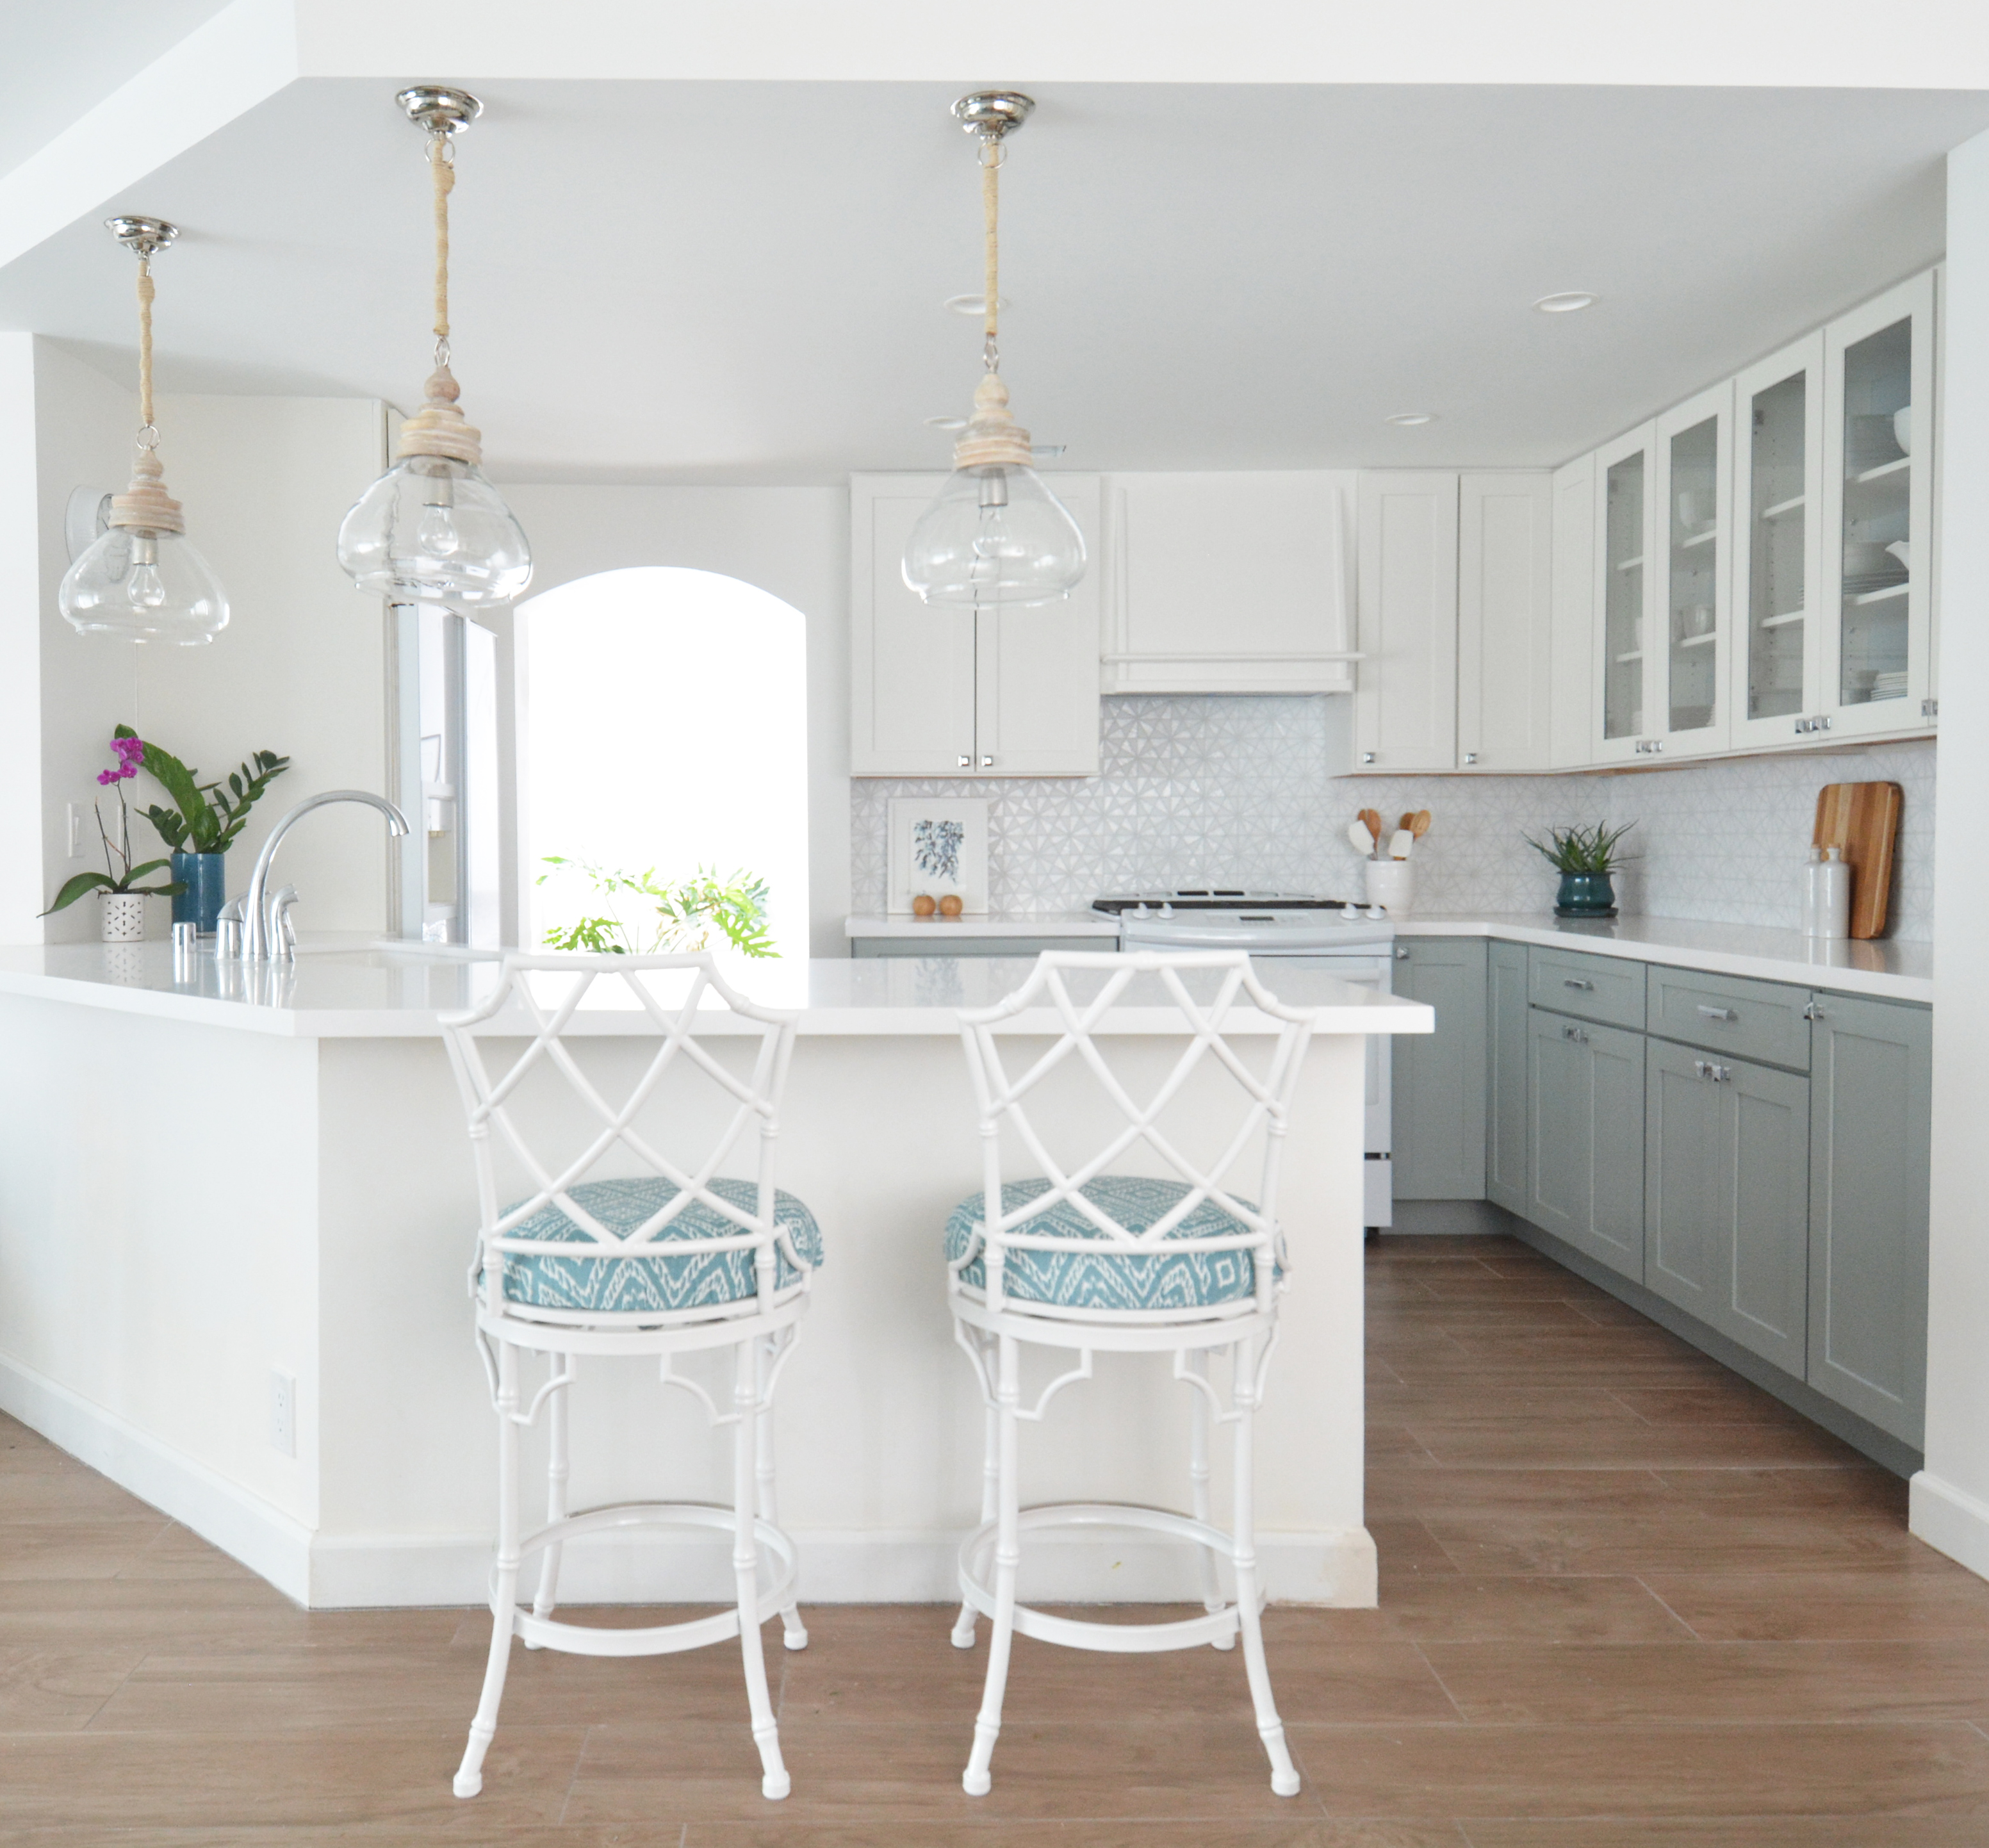
This backsplash I love, it’s Tessera from Oceanside Glass Tile.

I wanted something different and fresh, modern and geometric and found it in this hexagon pattern broken up into smaller triangle shapes. This is the Kaleidoscope pattern available in dozens of colors but I chose tone on tone white, mixing both matte and iridescent hand cut tiles, half of them shimmer in daylight and are so pretty! The grout is a pale gray to provide a touch of contrast, I’ll share more about its installation next week.
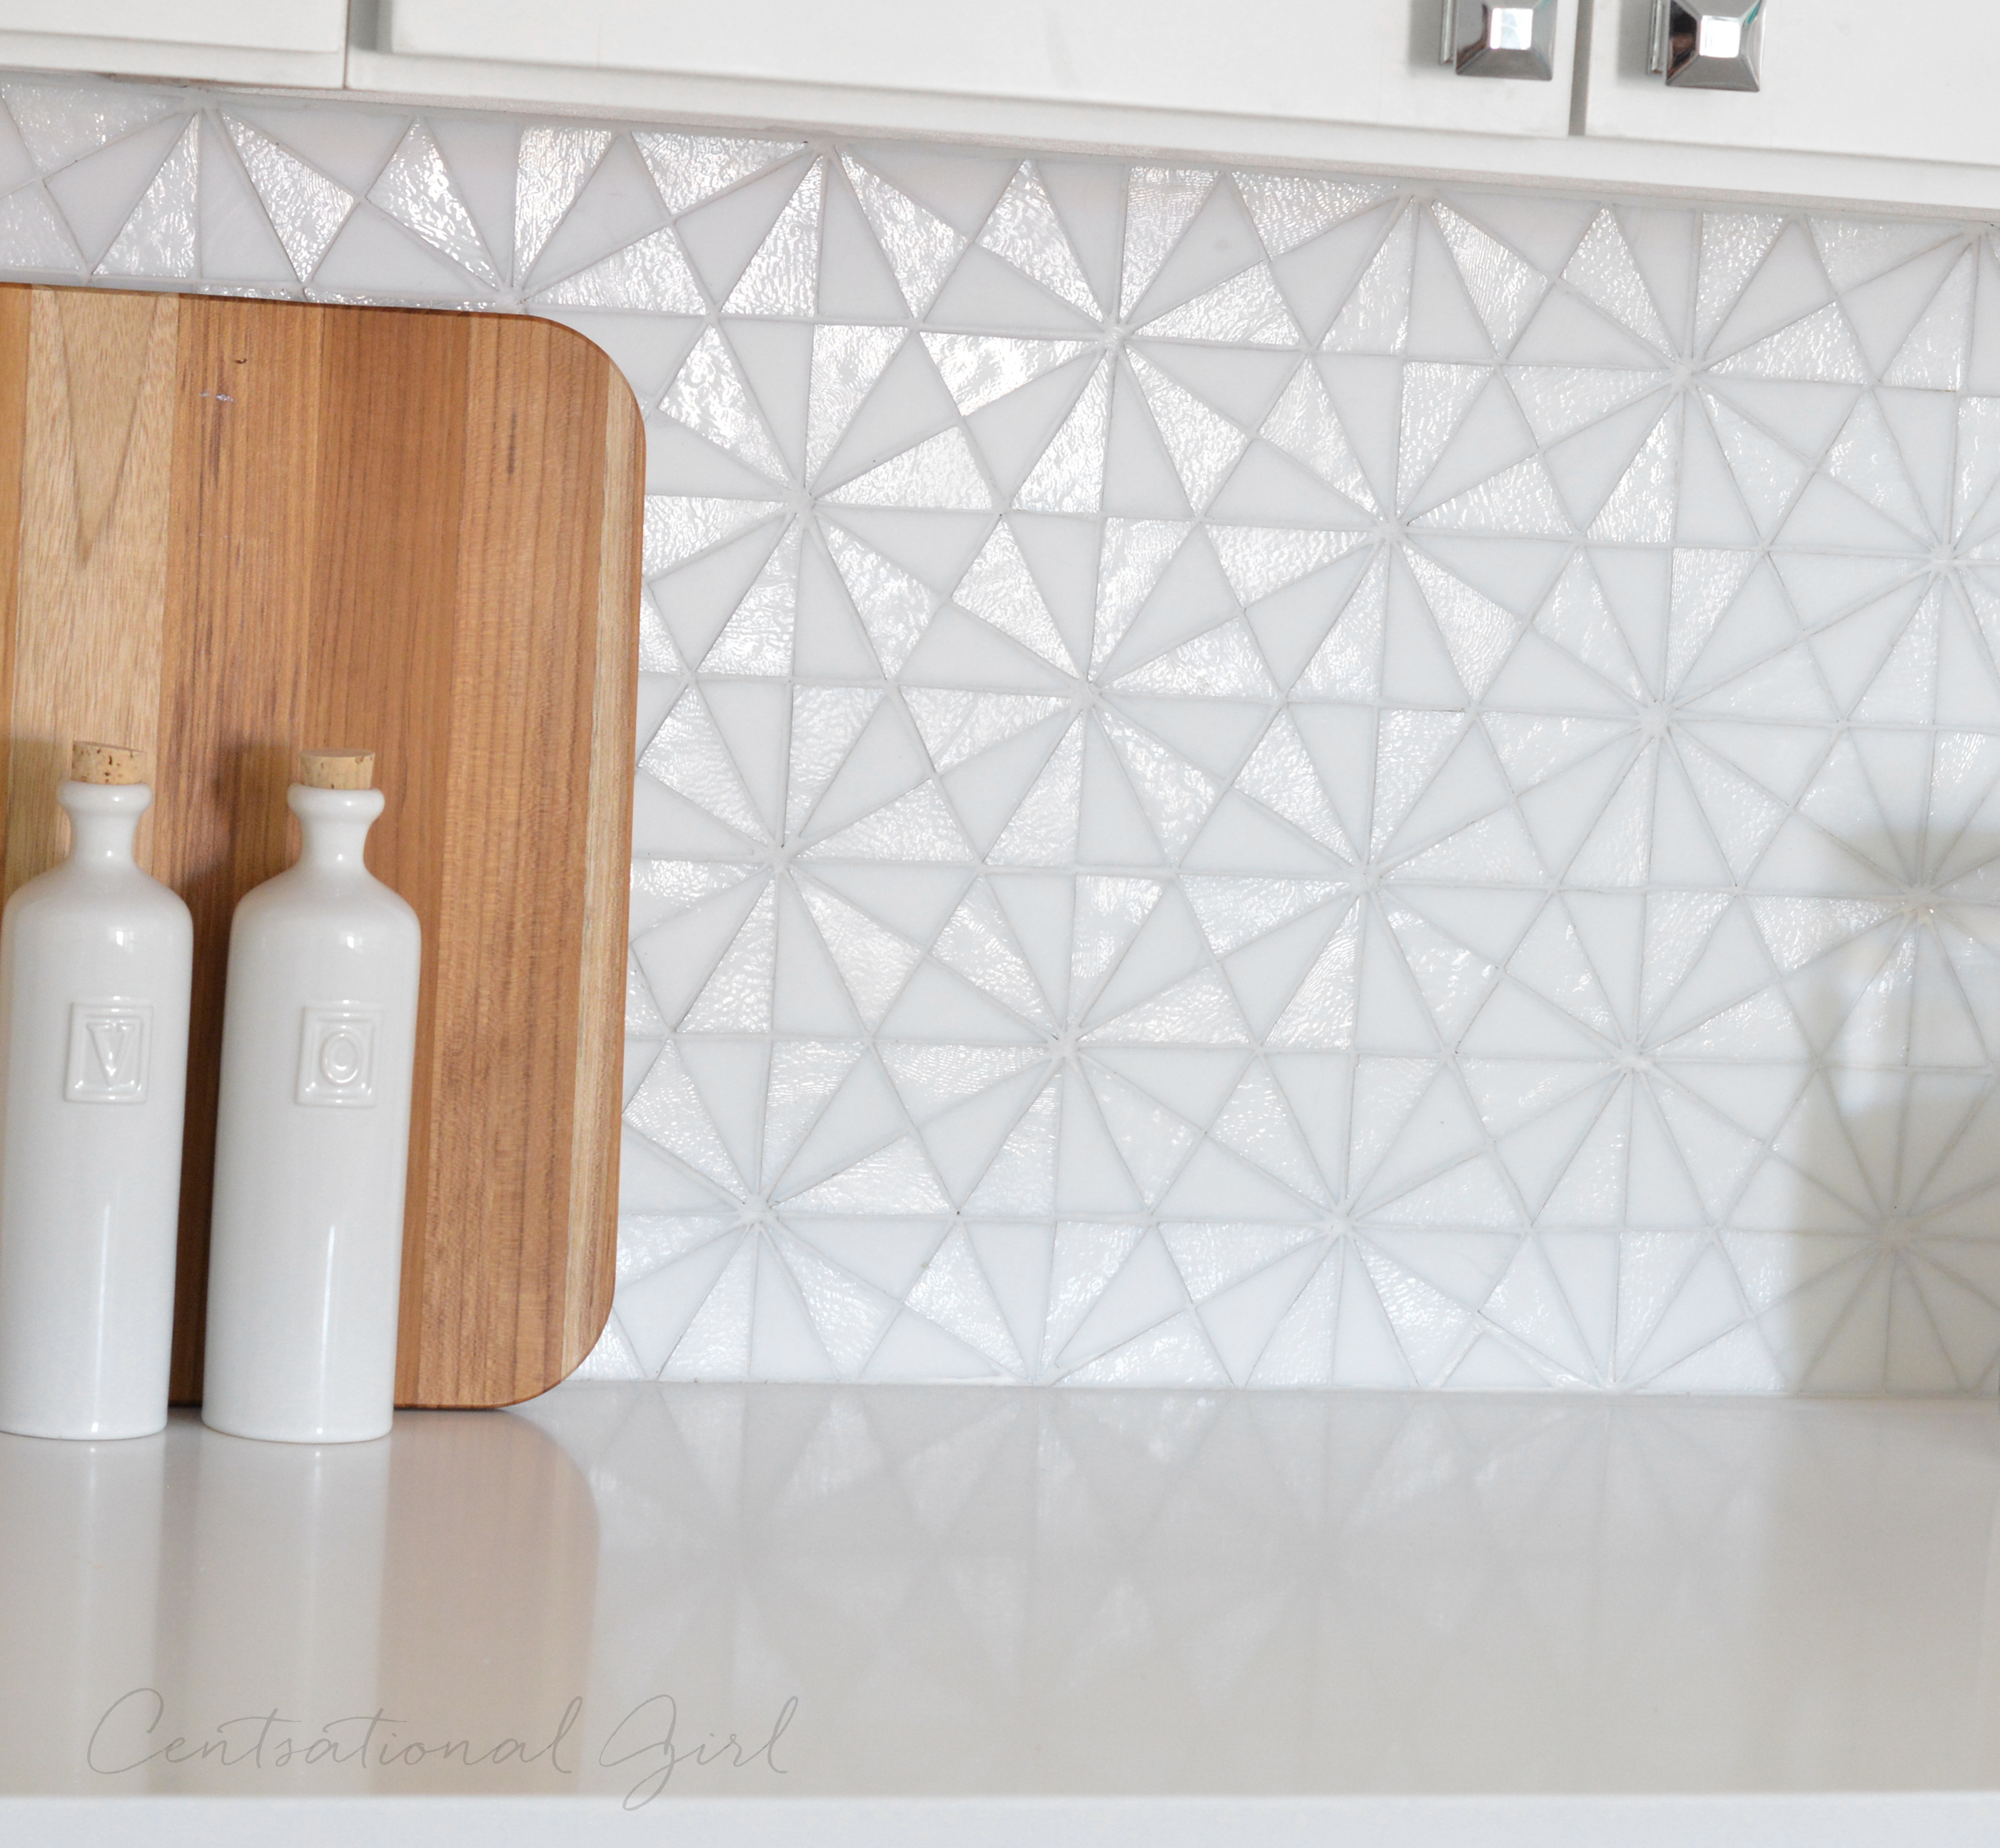
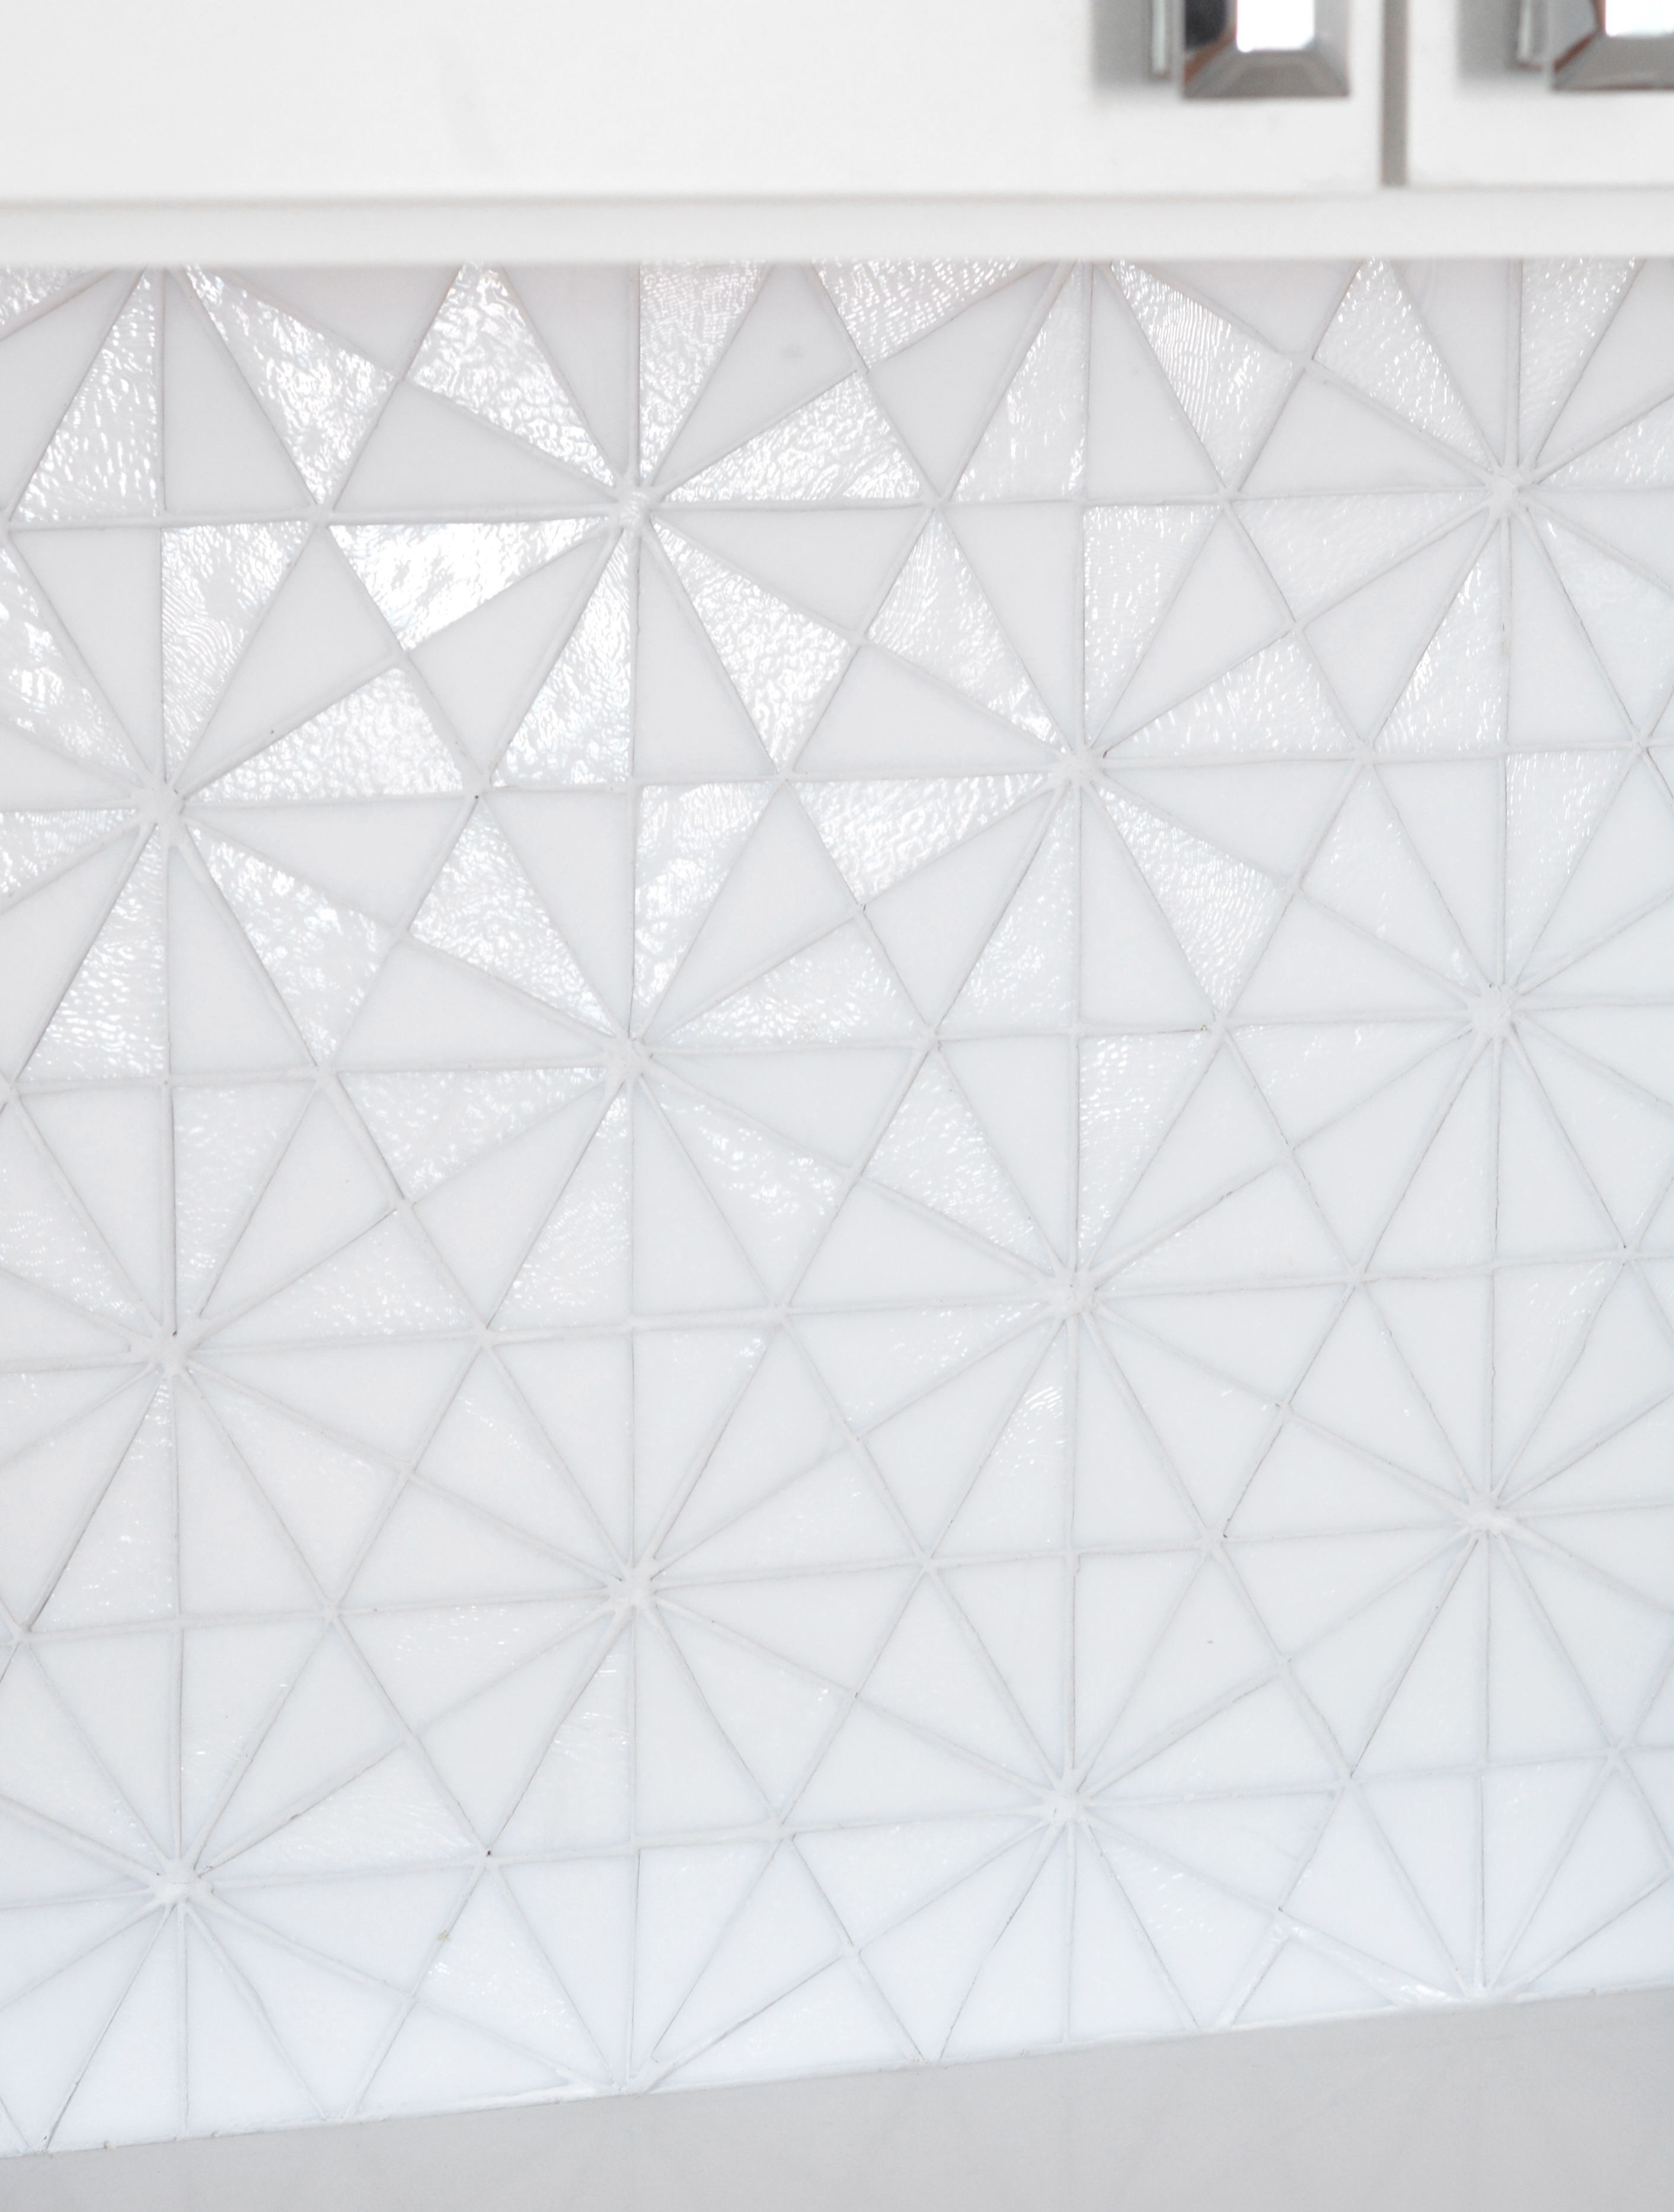
There is no window in this kitchen, the space gets its light from the windows in the family room, breakfast nook, and living room so the backsplash changes throughout the day, more subdued in the evening when the tiles aren’t reflective but they sparkle in the daylight.

On the adjacent side is a second wall of cabinets, notice the the old florescent light box and wallpaper, both were removed. There was a pantry on the right on the angled wall that took away counter space, I moved the pantry to the adjacent breakfast nook space (see pictures below).
For storage I chose another wall of upper cabinets but included some glass cabinets in the center for display. The old box fixture was replaced with four recessed cans.
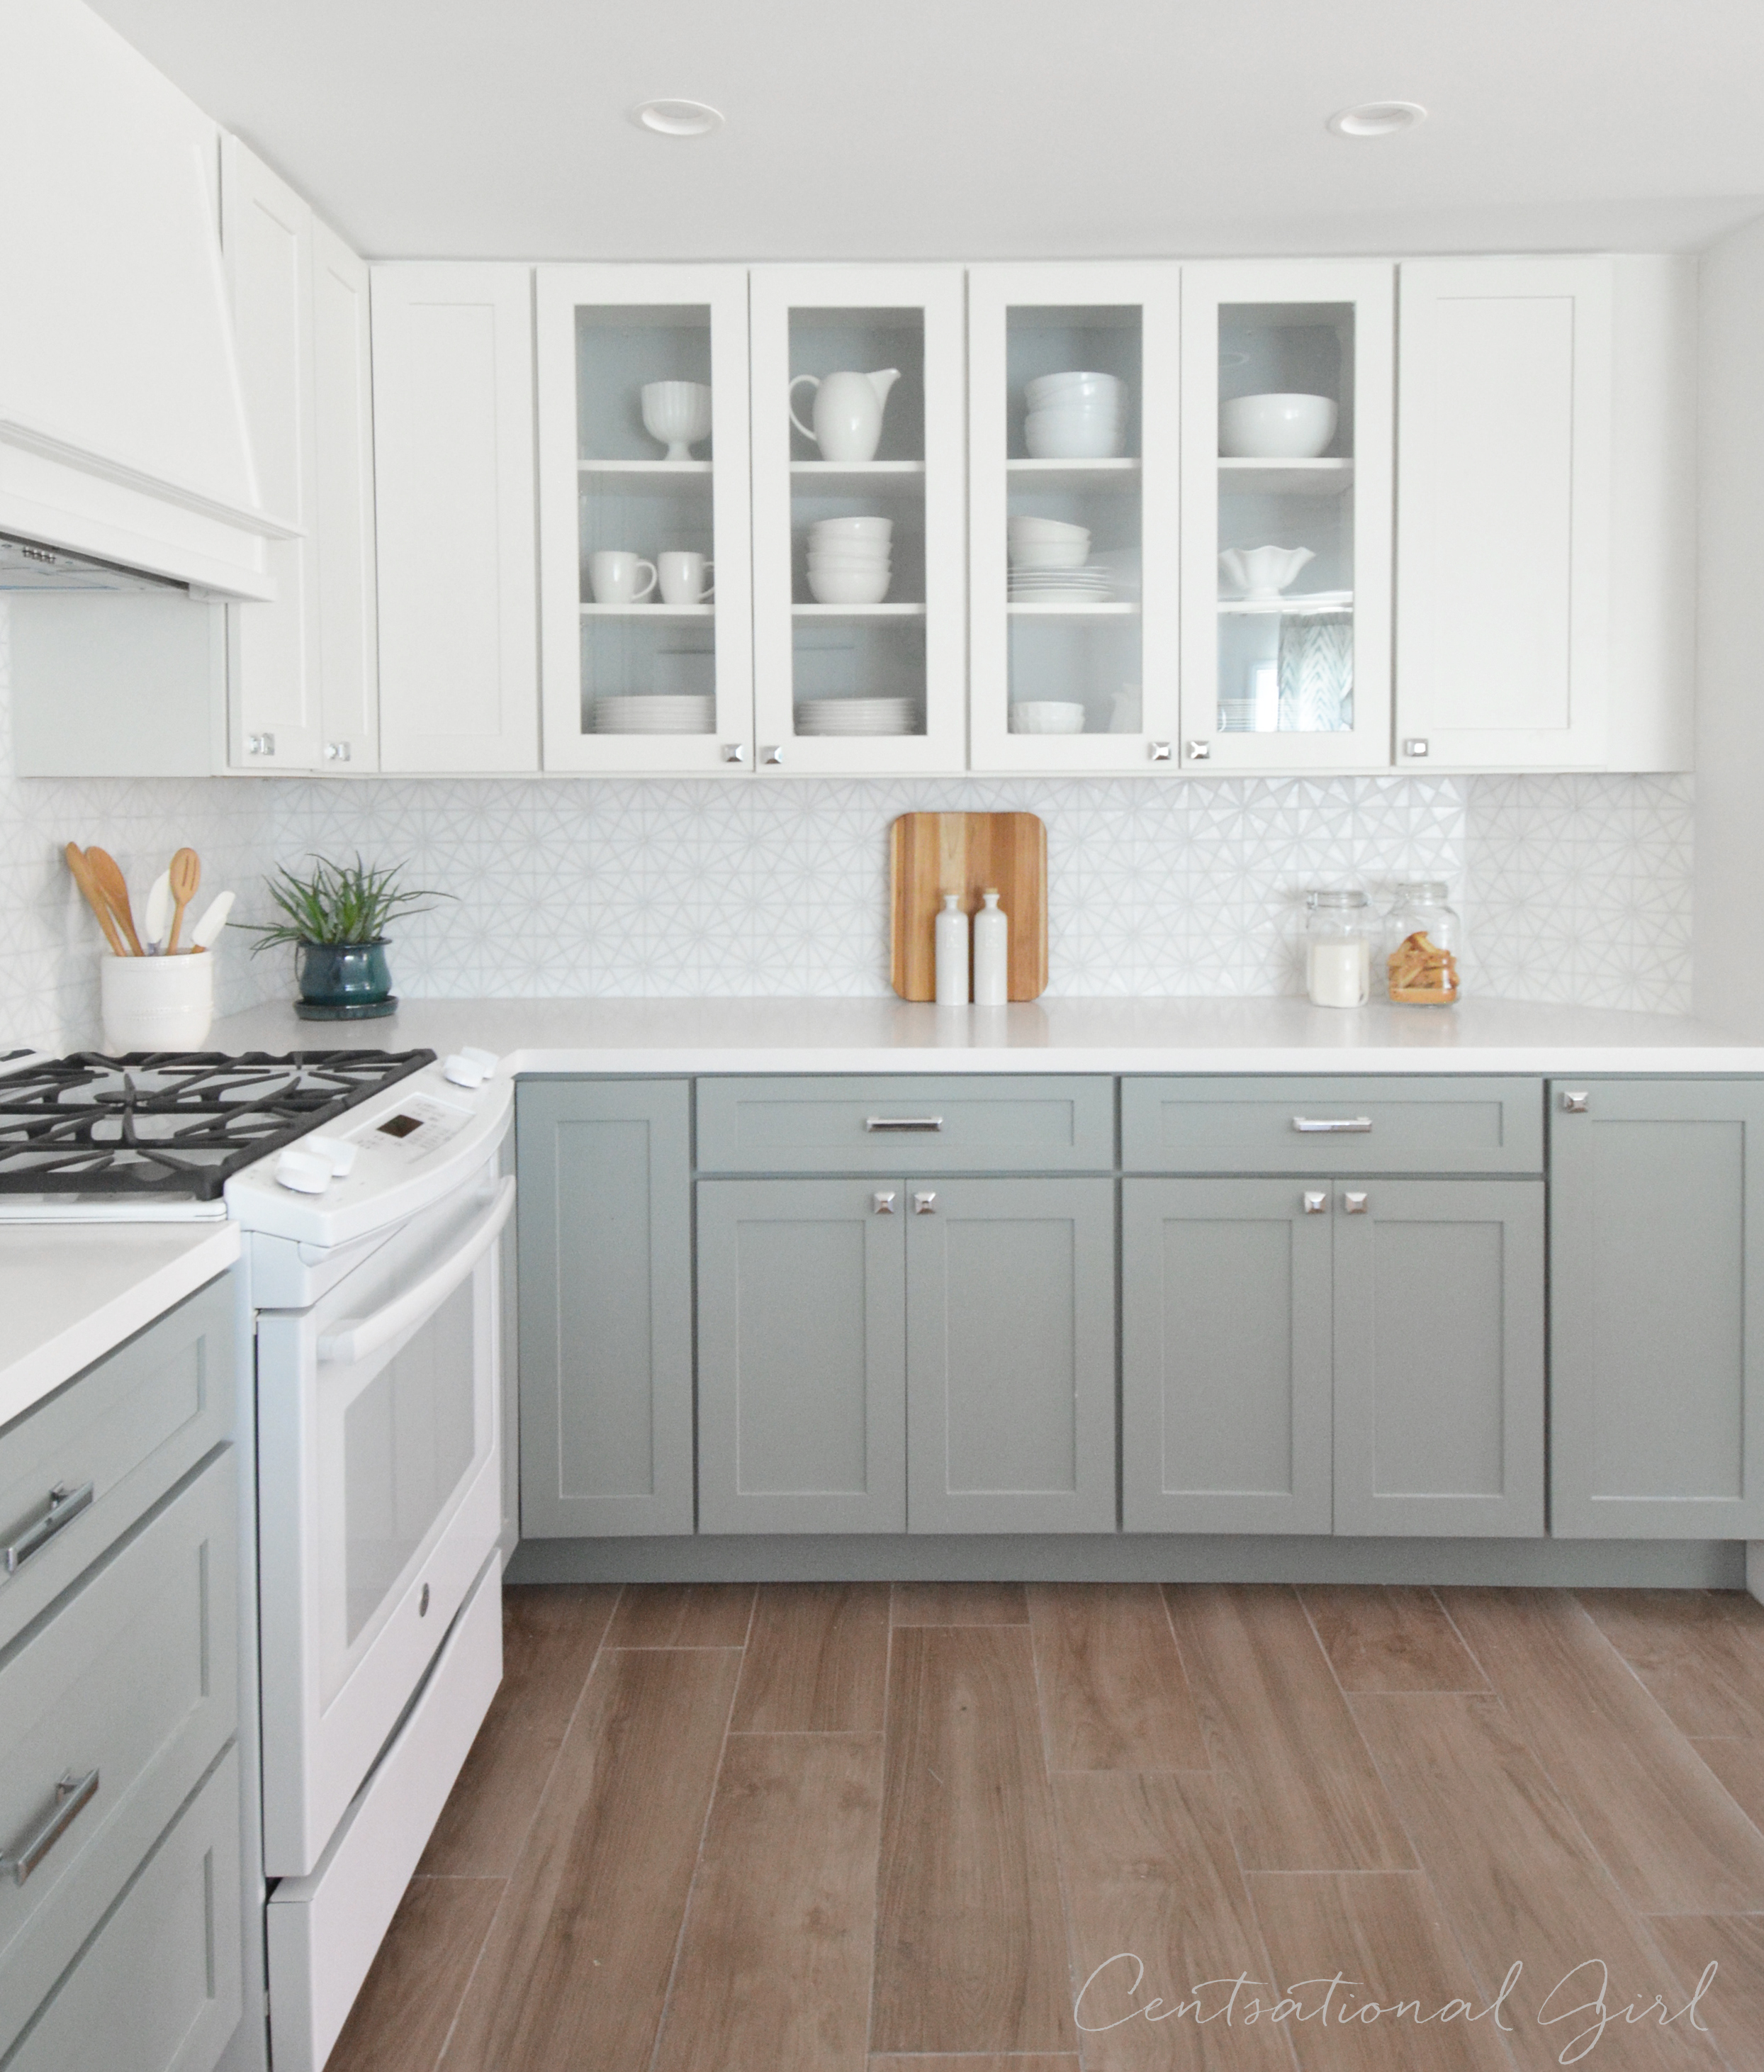
I painted the inside of the glass cabinets the same shade of gray as the lower cabinets to tie the upper and lower cabinets together.

The countertops are Caesarstone quartz in Pure White with a square edge, read all about the story of the countertop installation, it’s featured today on the Interior Collective blog.

On the fridge side, more 1980s wallpaper! All of it was stripped and the cabinets removed.

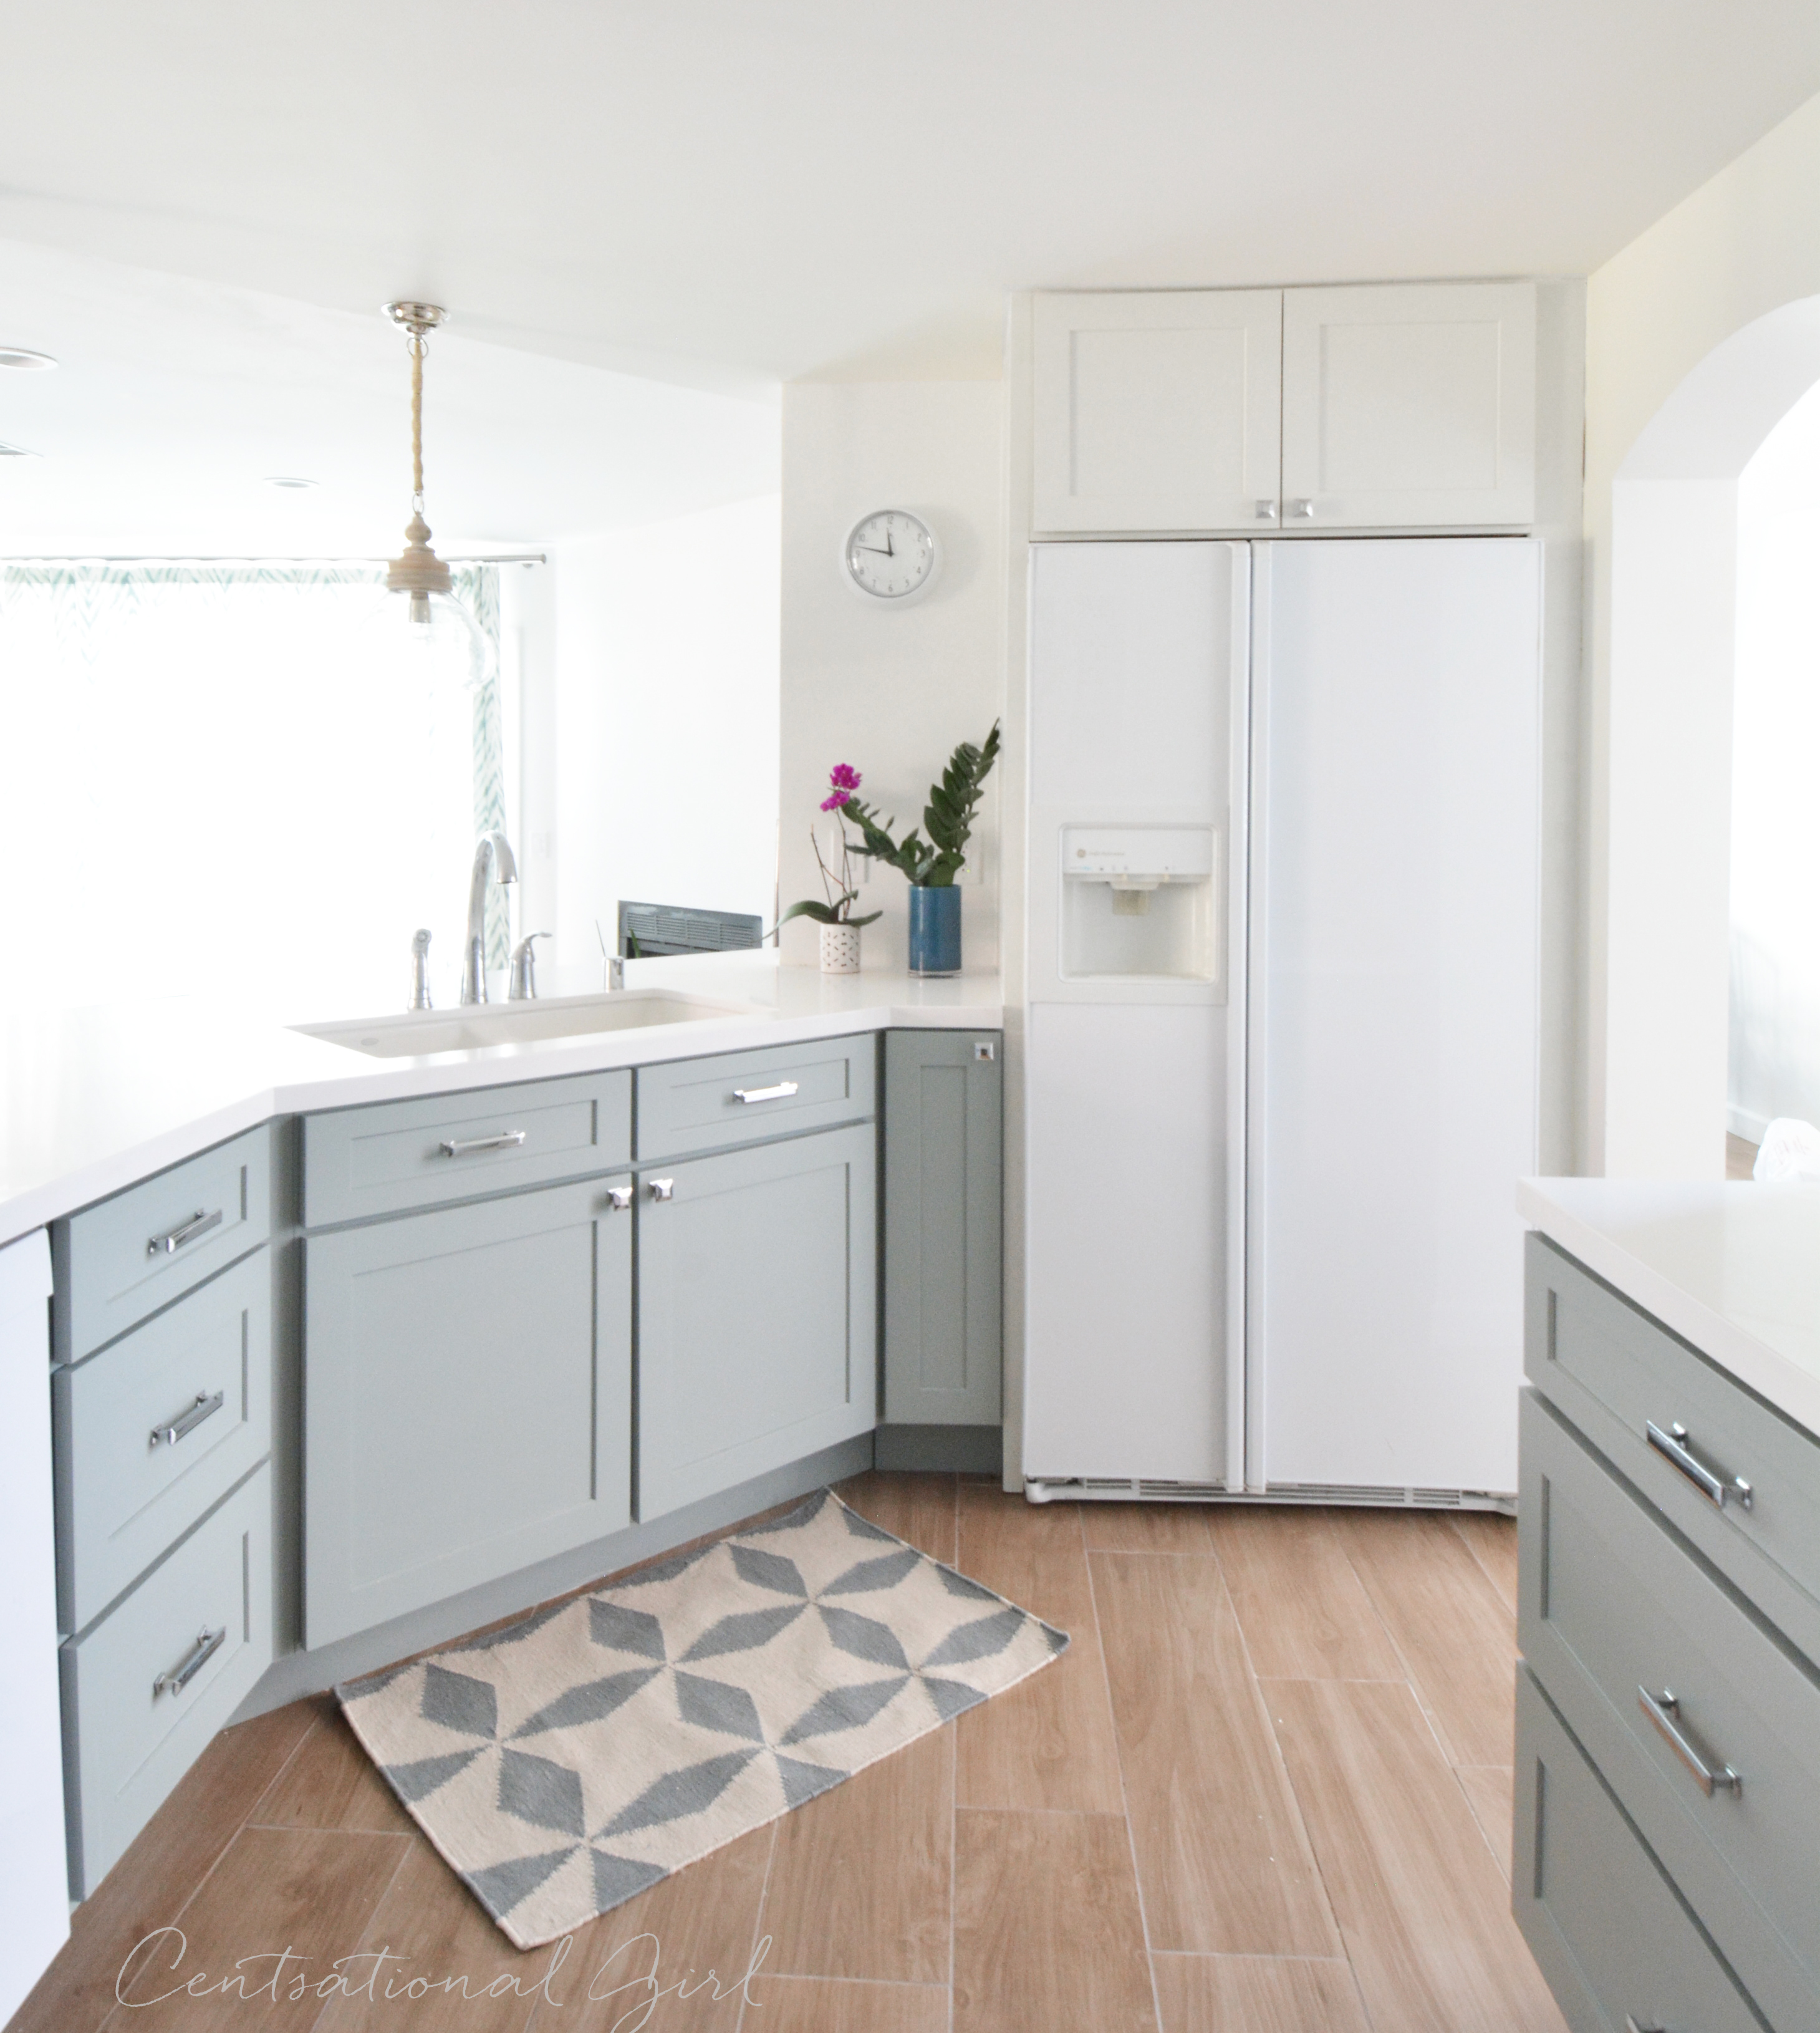
The old and perfectly good refrigerator we moved to the garage. I didn’t care for how the standard depth stuck out into the entry so I found a used counter depth fridge which doesn’t block the entrance and designed the new cabinet plan around it, framing it for a more custom look.
Here’s a better view of peninsula that looks out into the family room (but after the wood plank tile floors went in.) Later we removed these cabinets, cut down the pony wall, and patched the tile floor underneath so that the new cabinets and dishwasher sat on the same tile, more on that next week.

We kept the appliances in the same spot, this is a slab foundation so it makes it difficult to move plumbing. We cut down the peninsula so that it’s counter height and at one level which is a huge improvement, the counter is now one level surface.
Looking in from the other side…
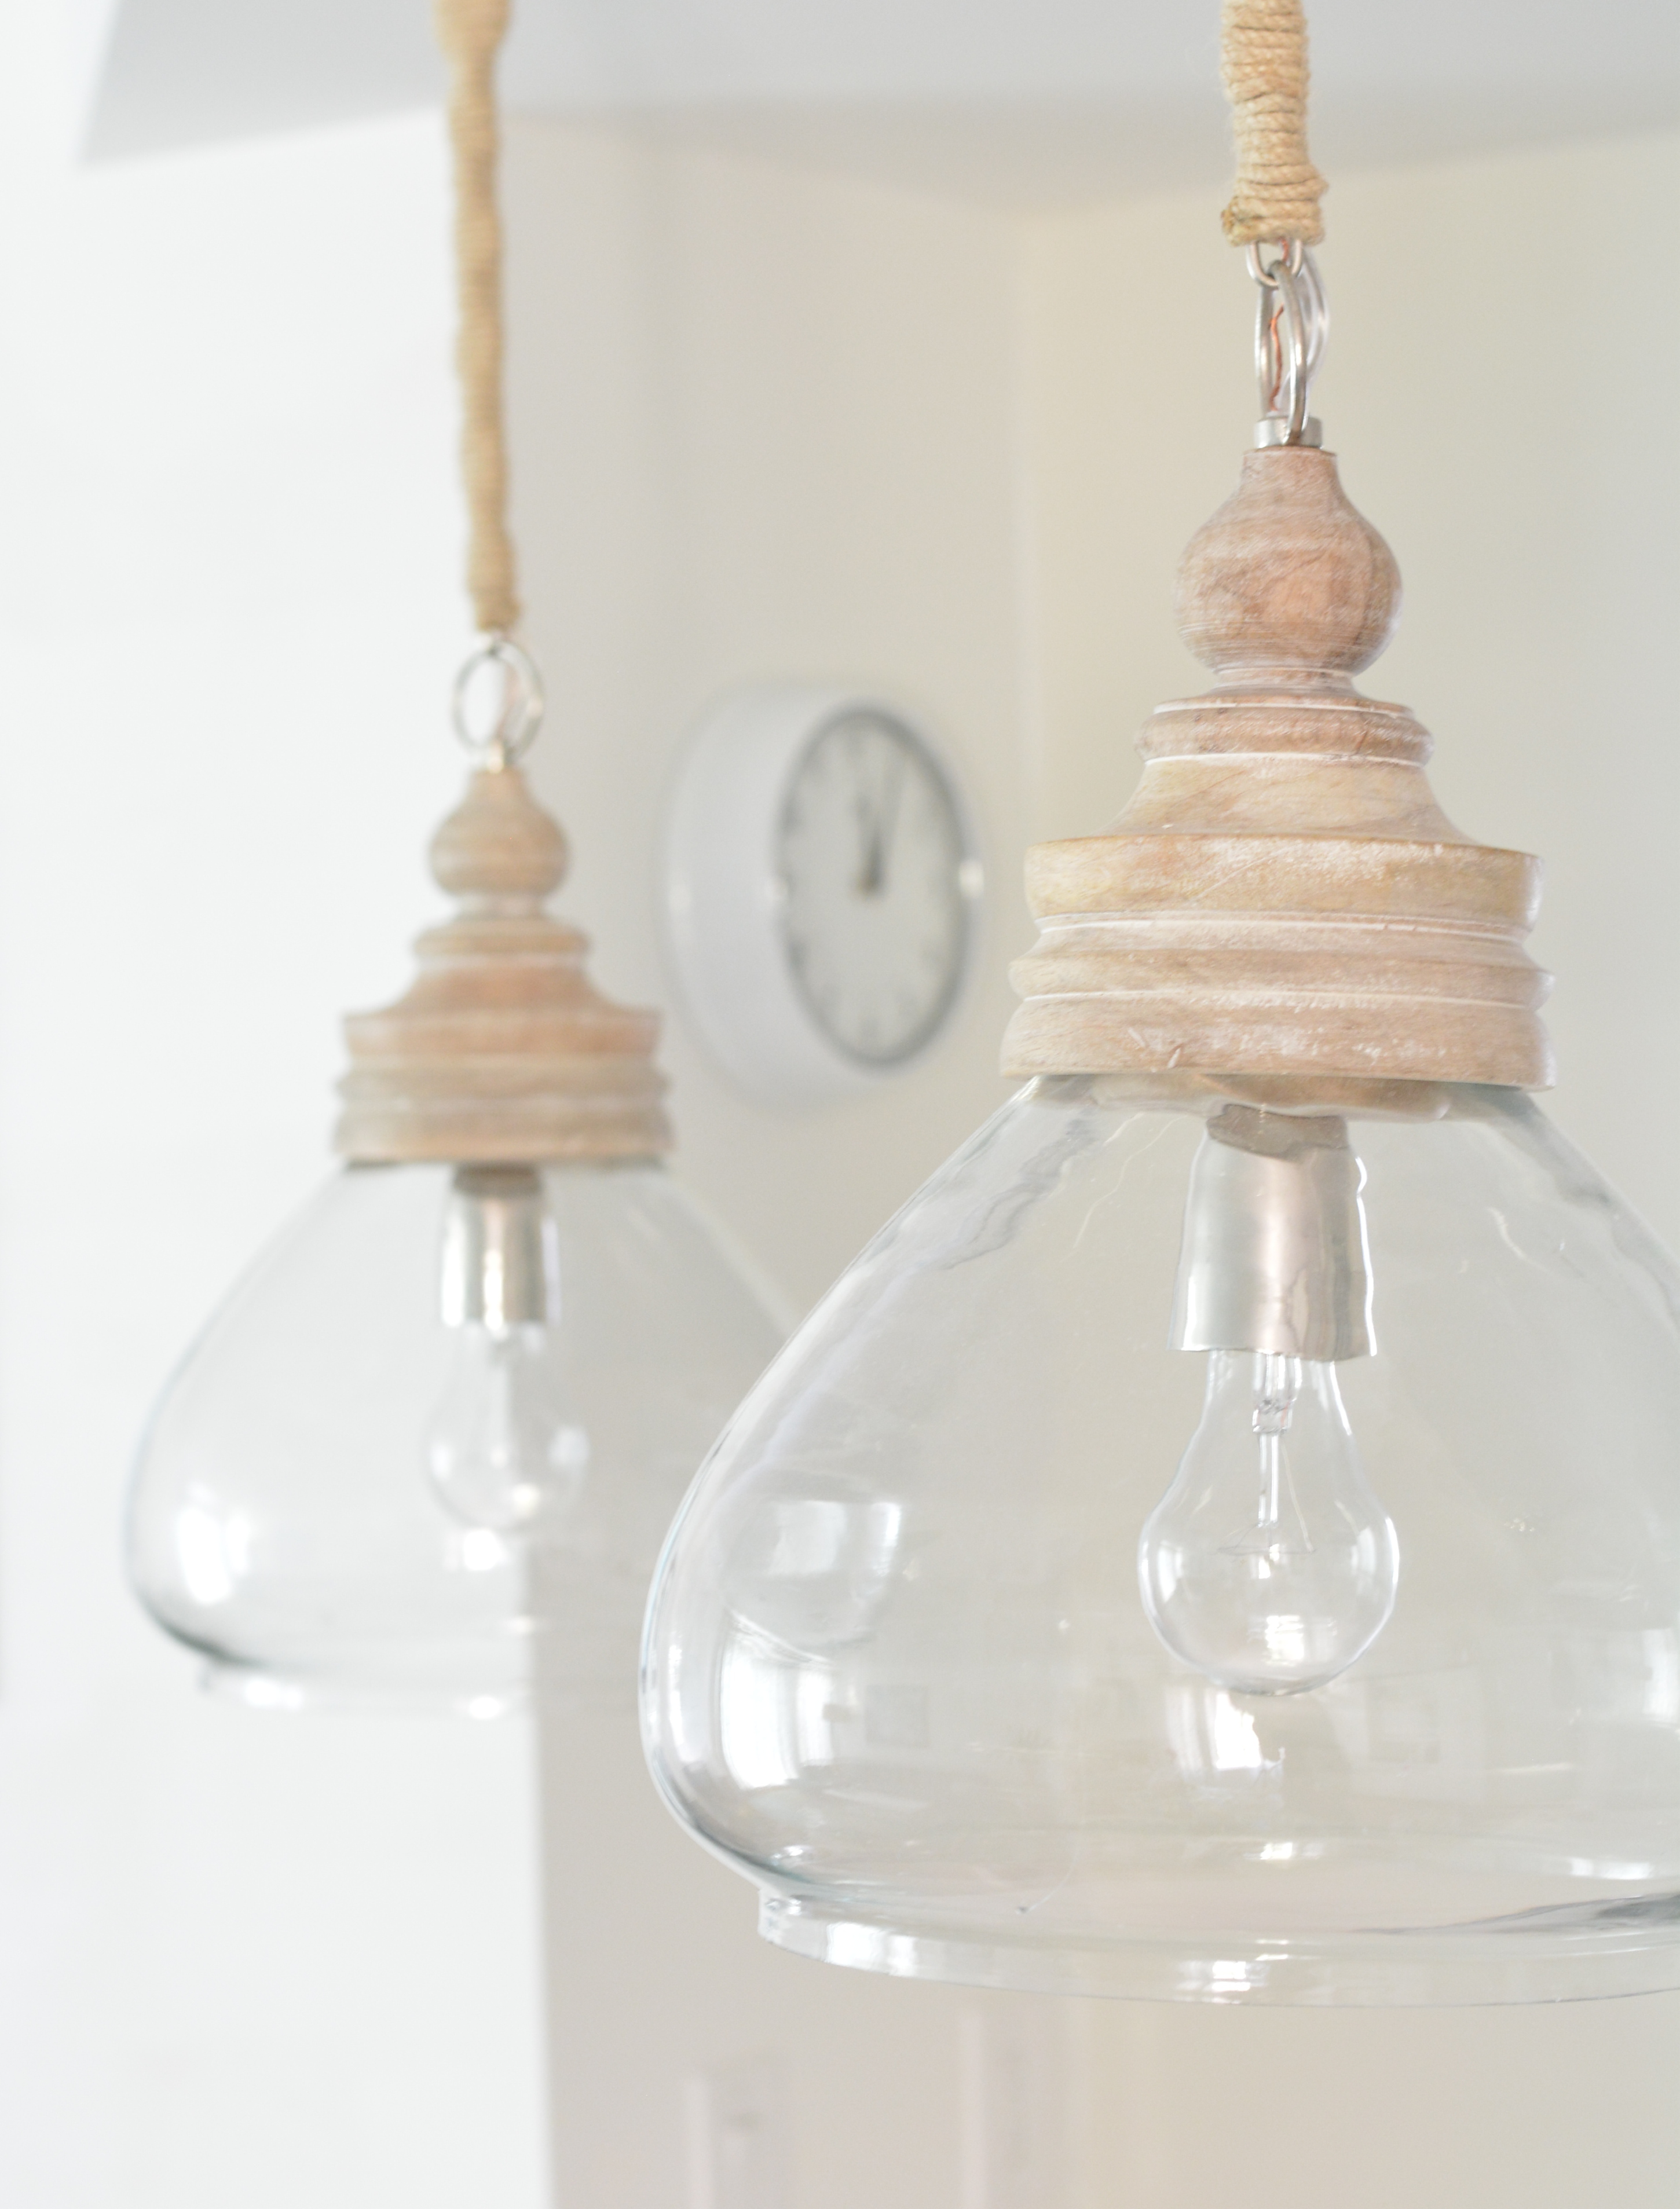
Over the peninsula hang a trio of weathered wood and glass pendants.
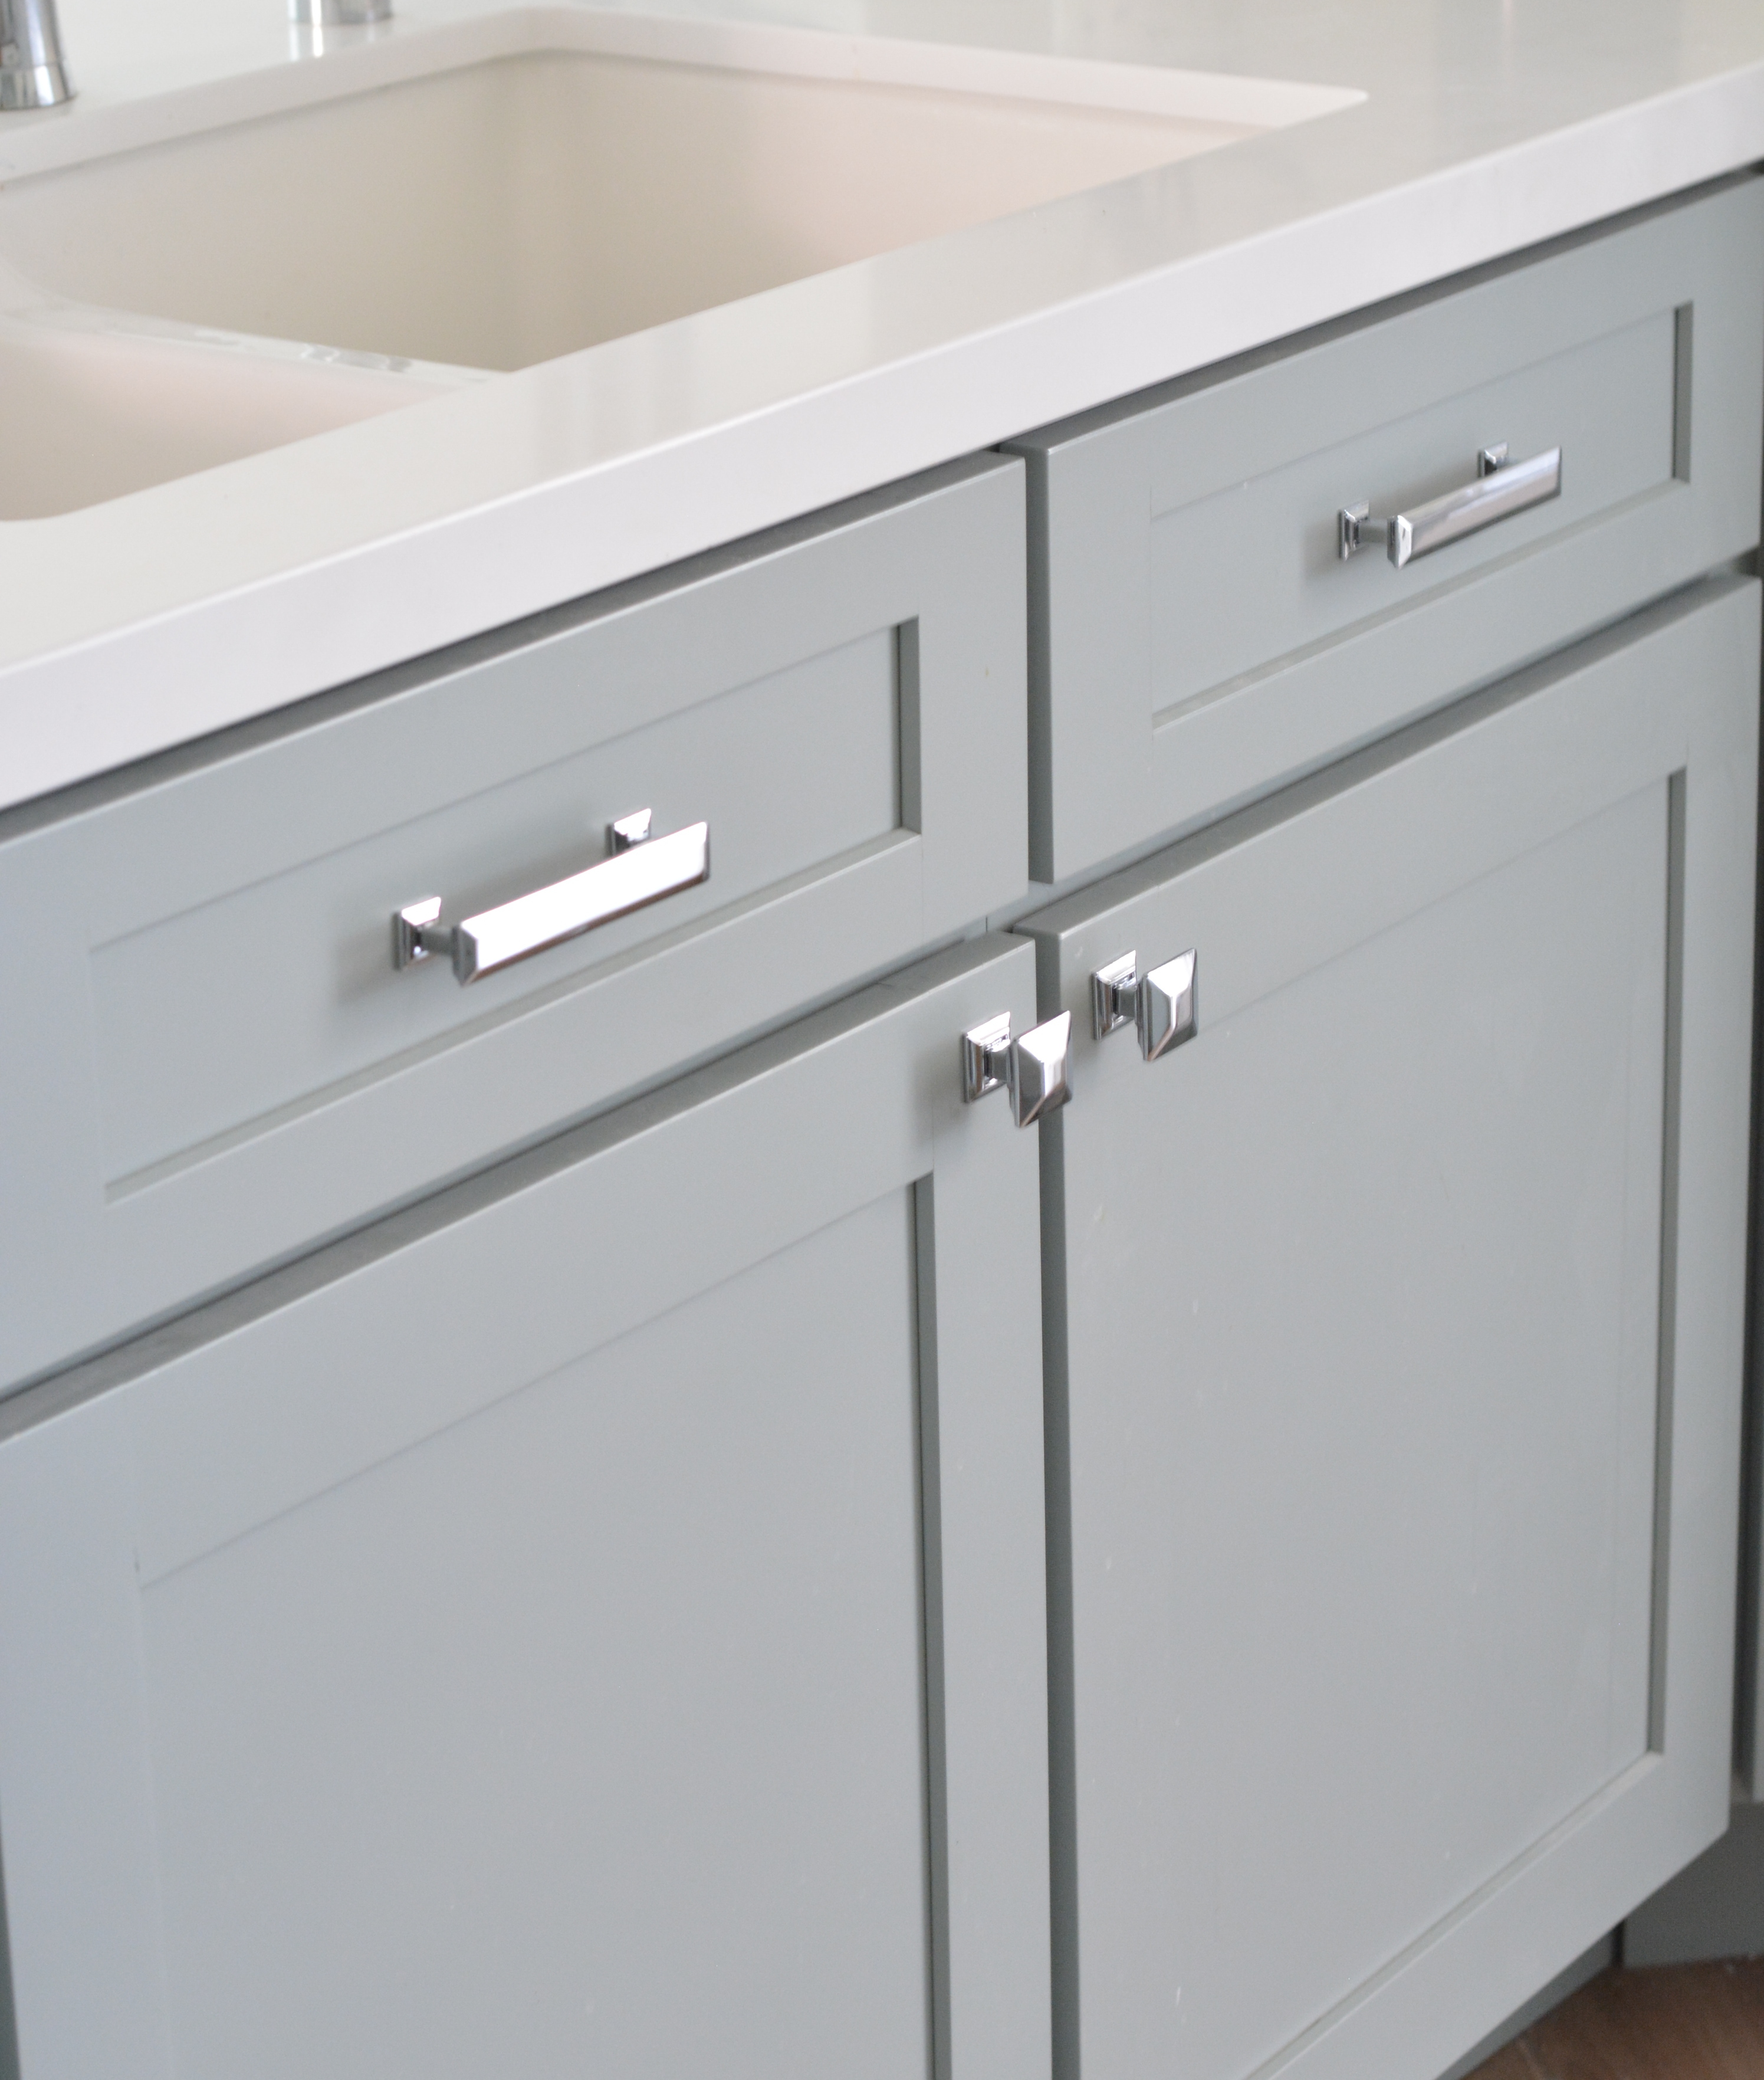
The hardware on the cabinets is the same square nickel pulls I used in the gray and white kitchen remodel completed earlier this year, the same faucet too!
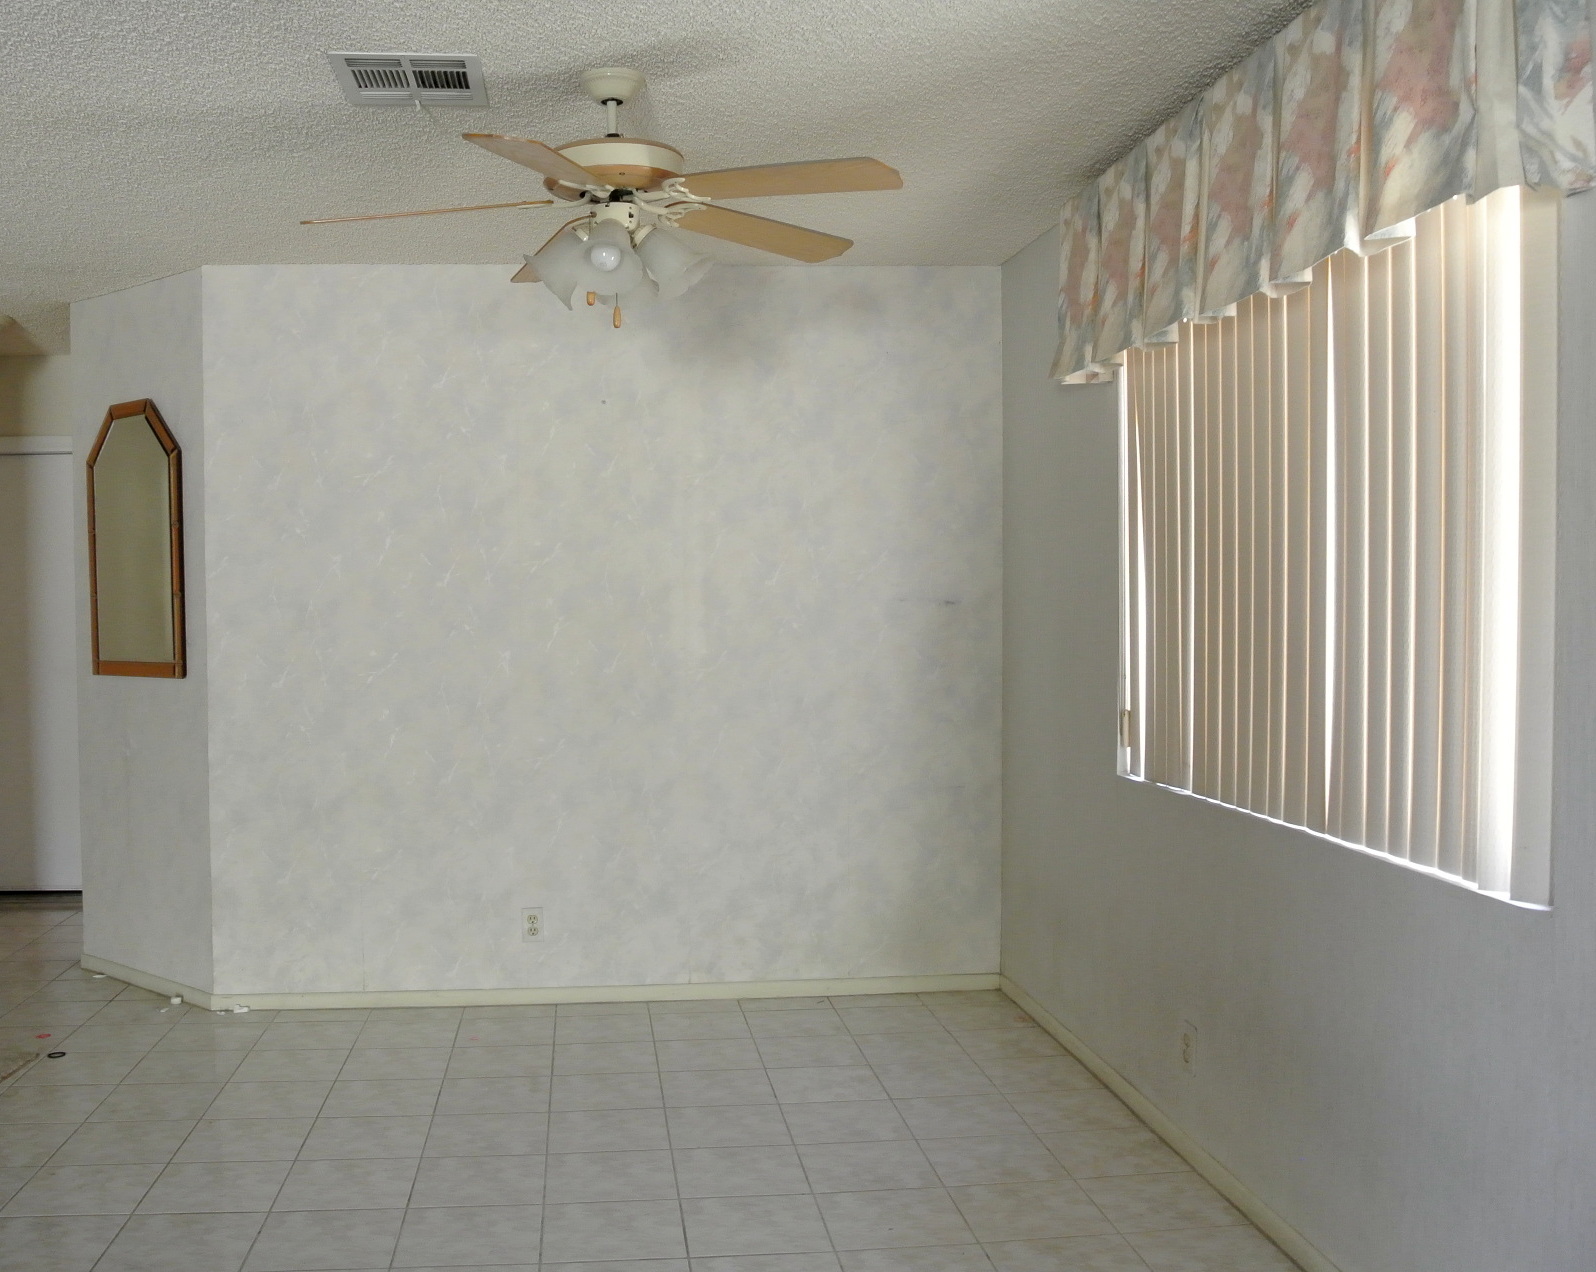
Here is the breakfast nook before, the kitchen is on the left. Over the course of a year, we removed the popcorn ceiling, old wallpaper, and ceiling fan and replaced the flooring and window treatments too.
As mentioned above I moved the pantry out of the kitchen to allow for more counter space in the kitchen and created a new storage area in the breakfast nook for food and bulk items with twin tall cabinets, in between are glass upper and a lower cabinets with the same Caesarstone quartz countertop for small appliances.
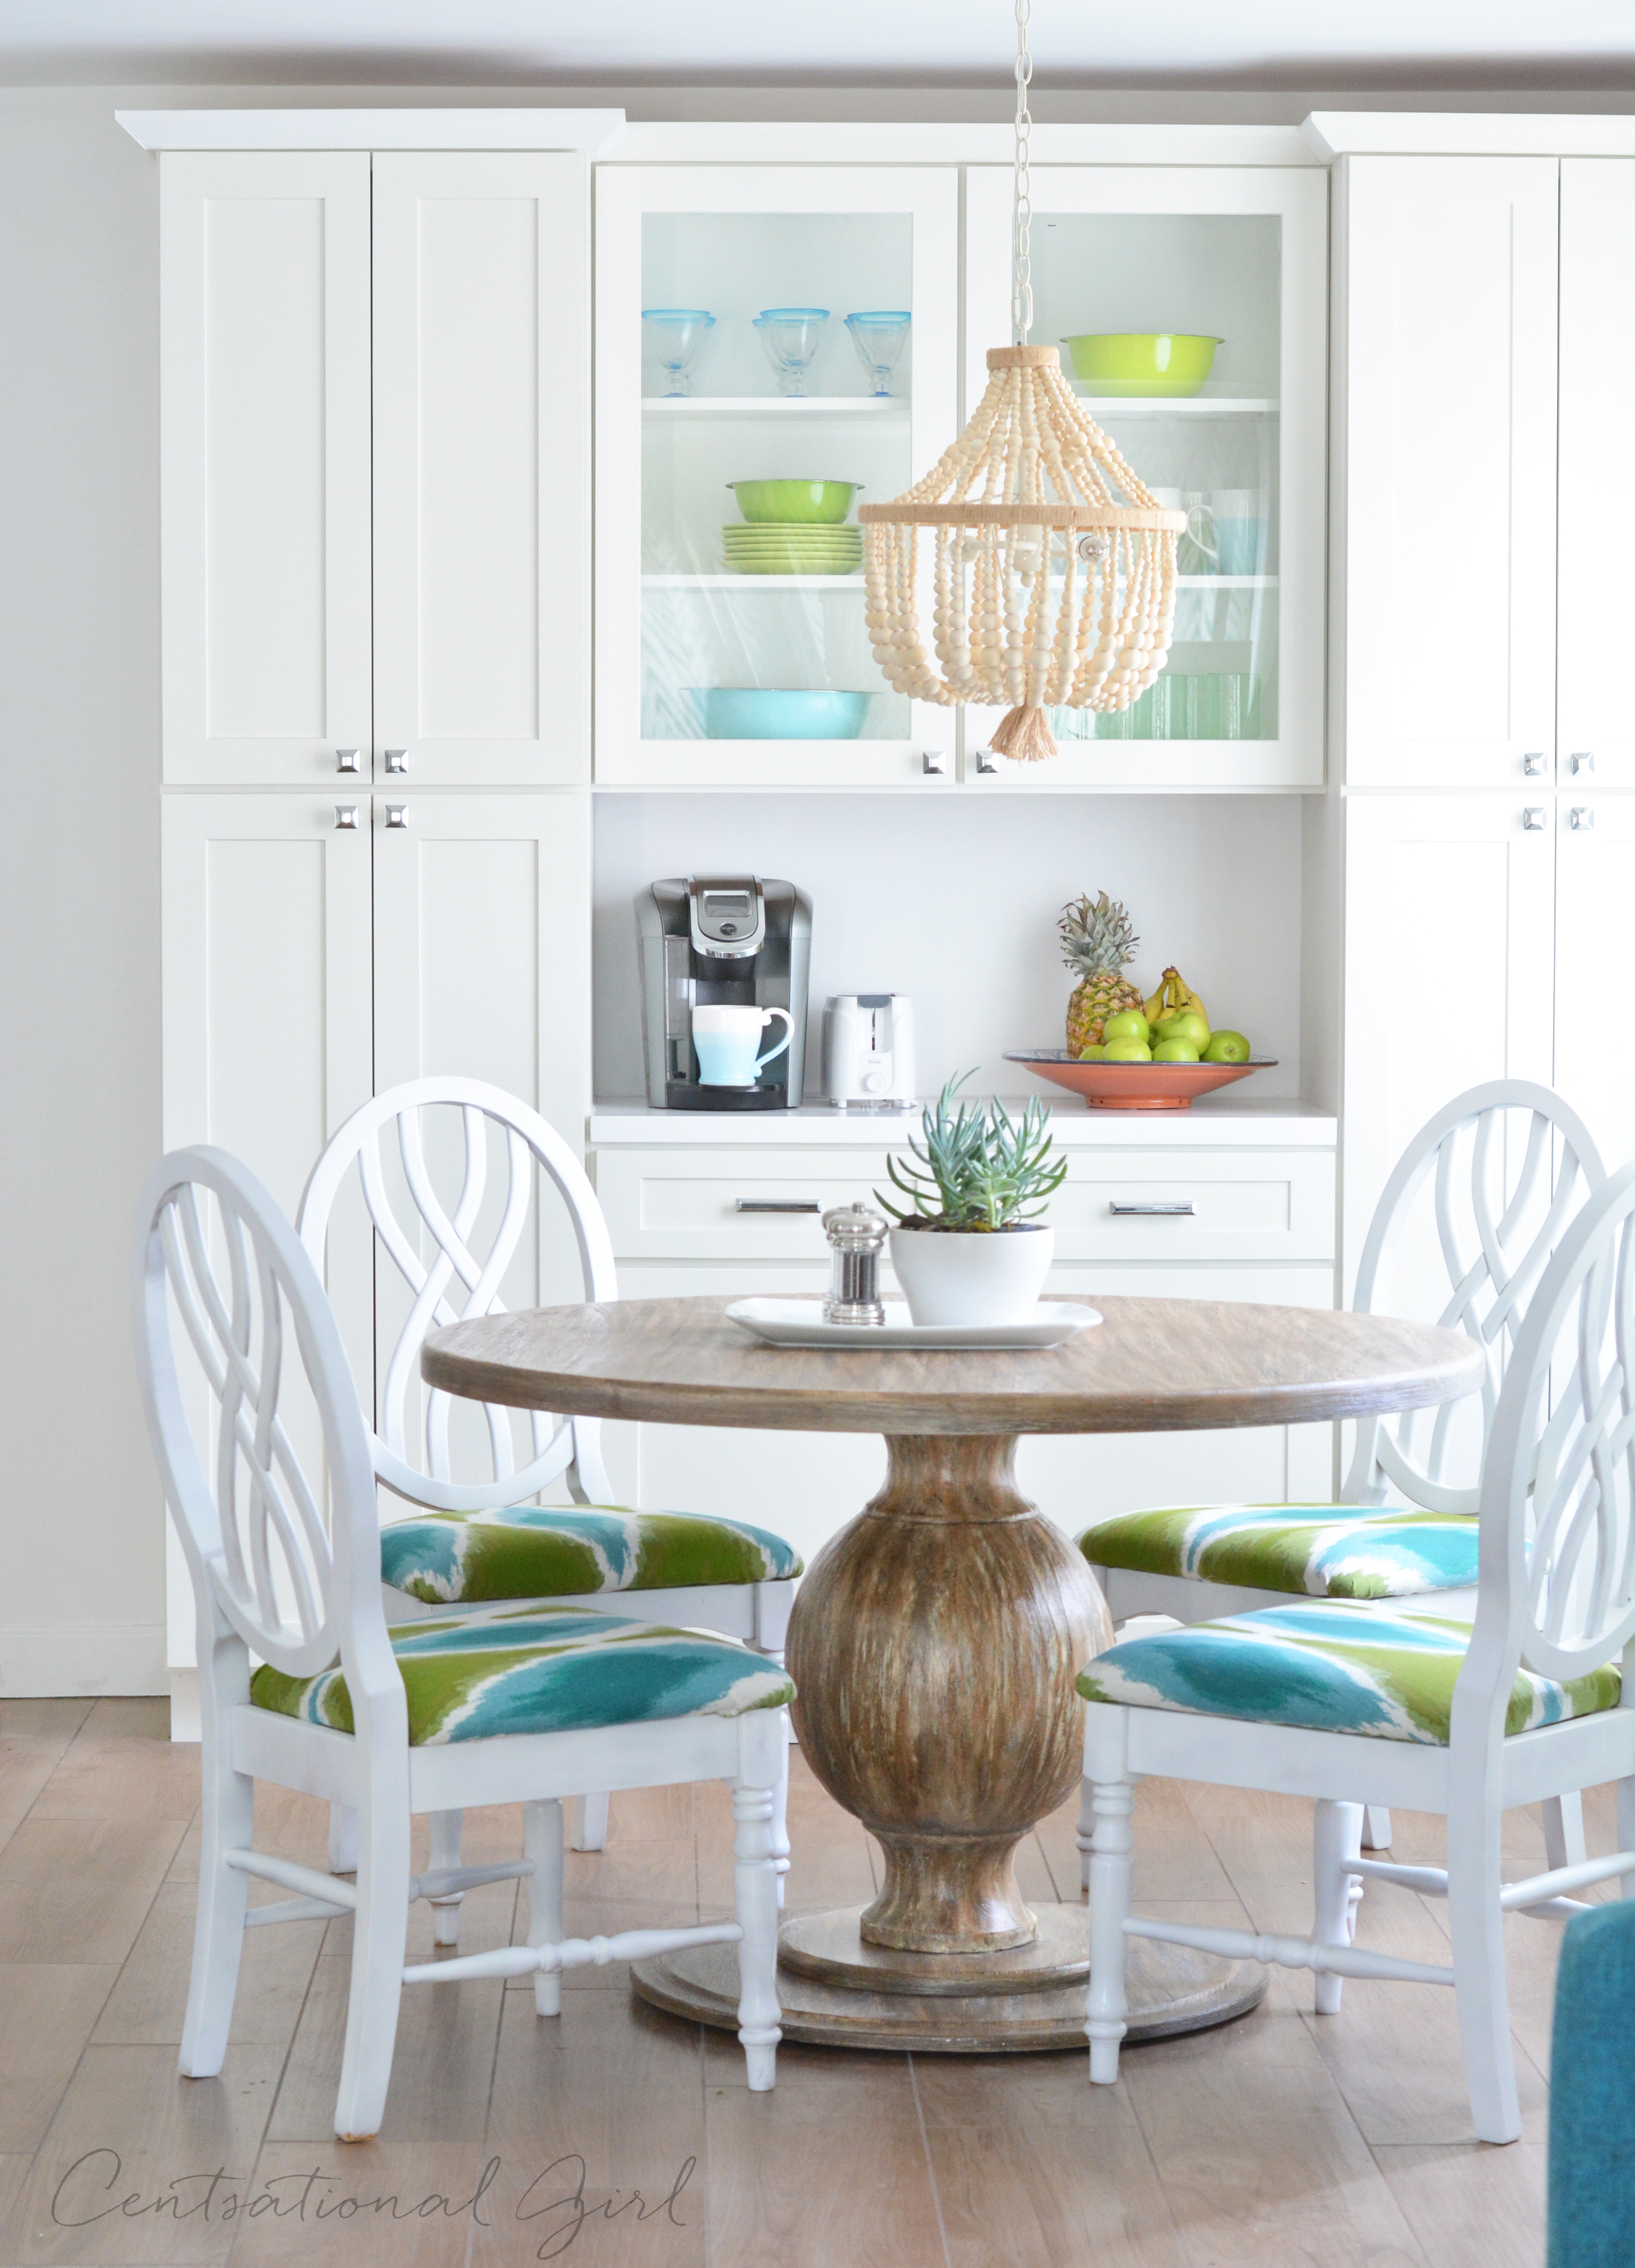

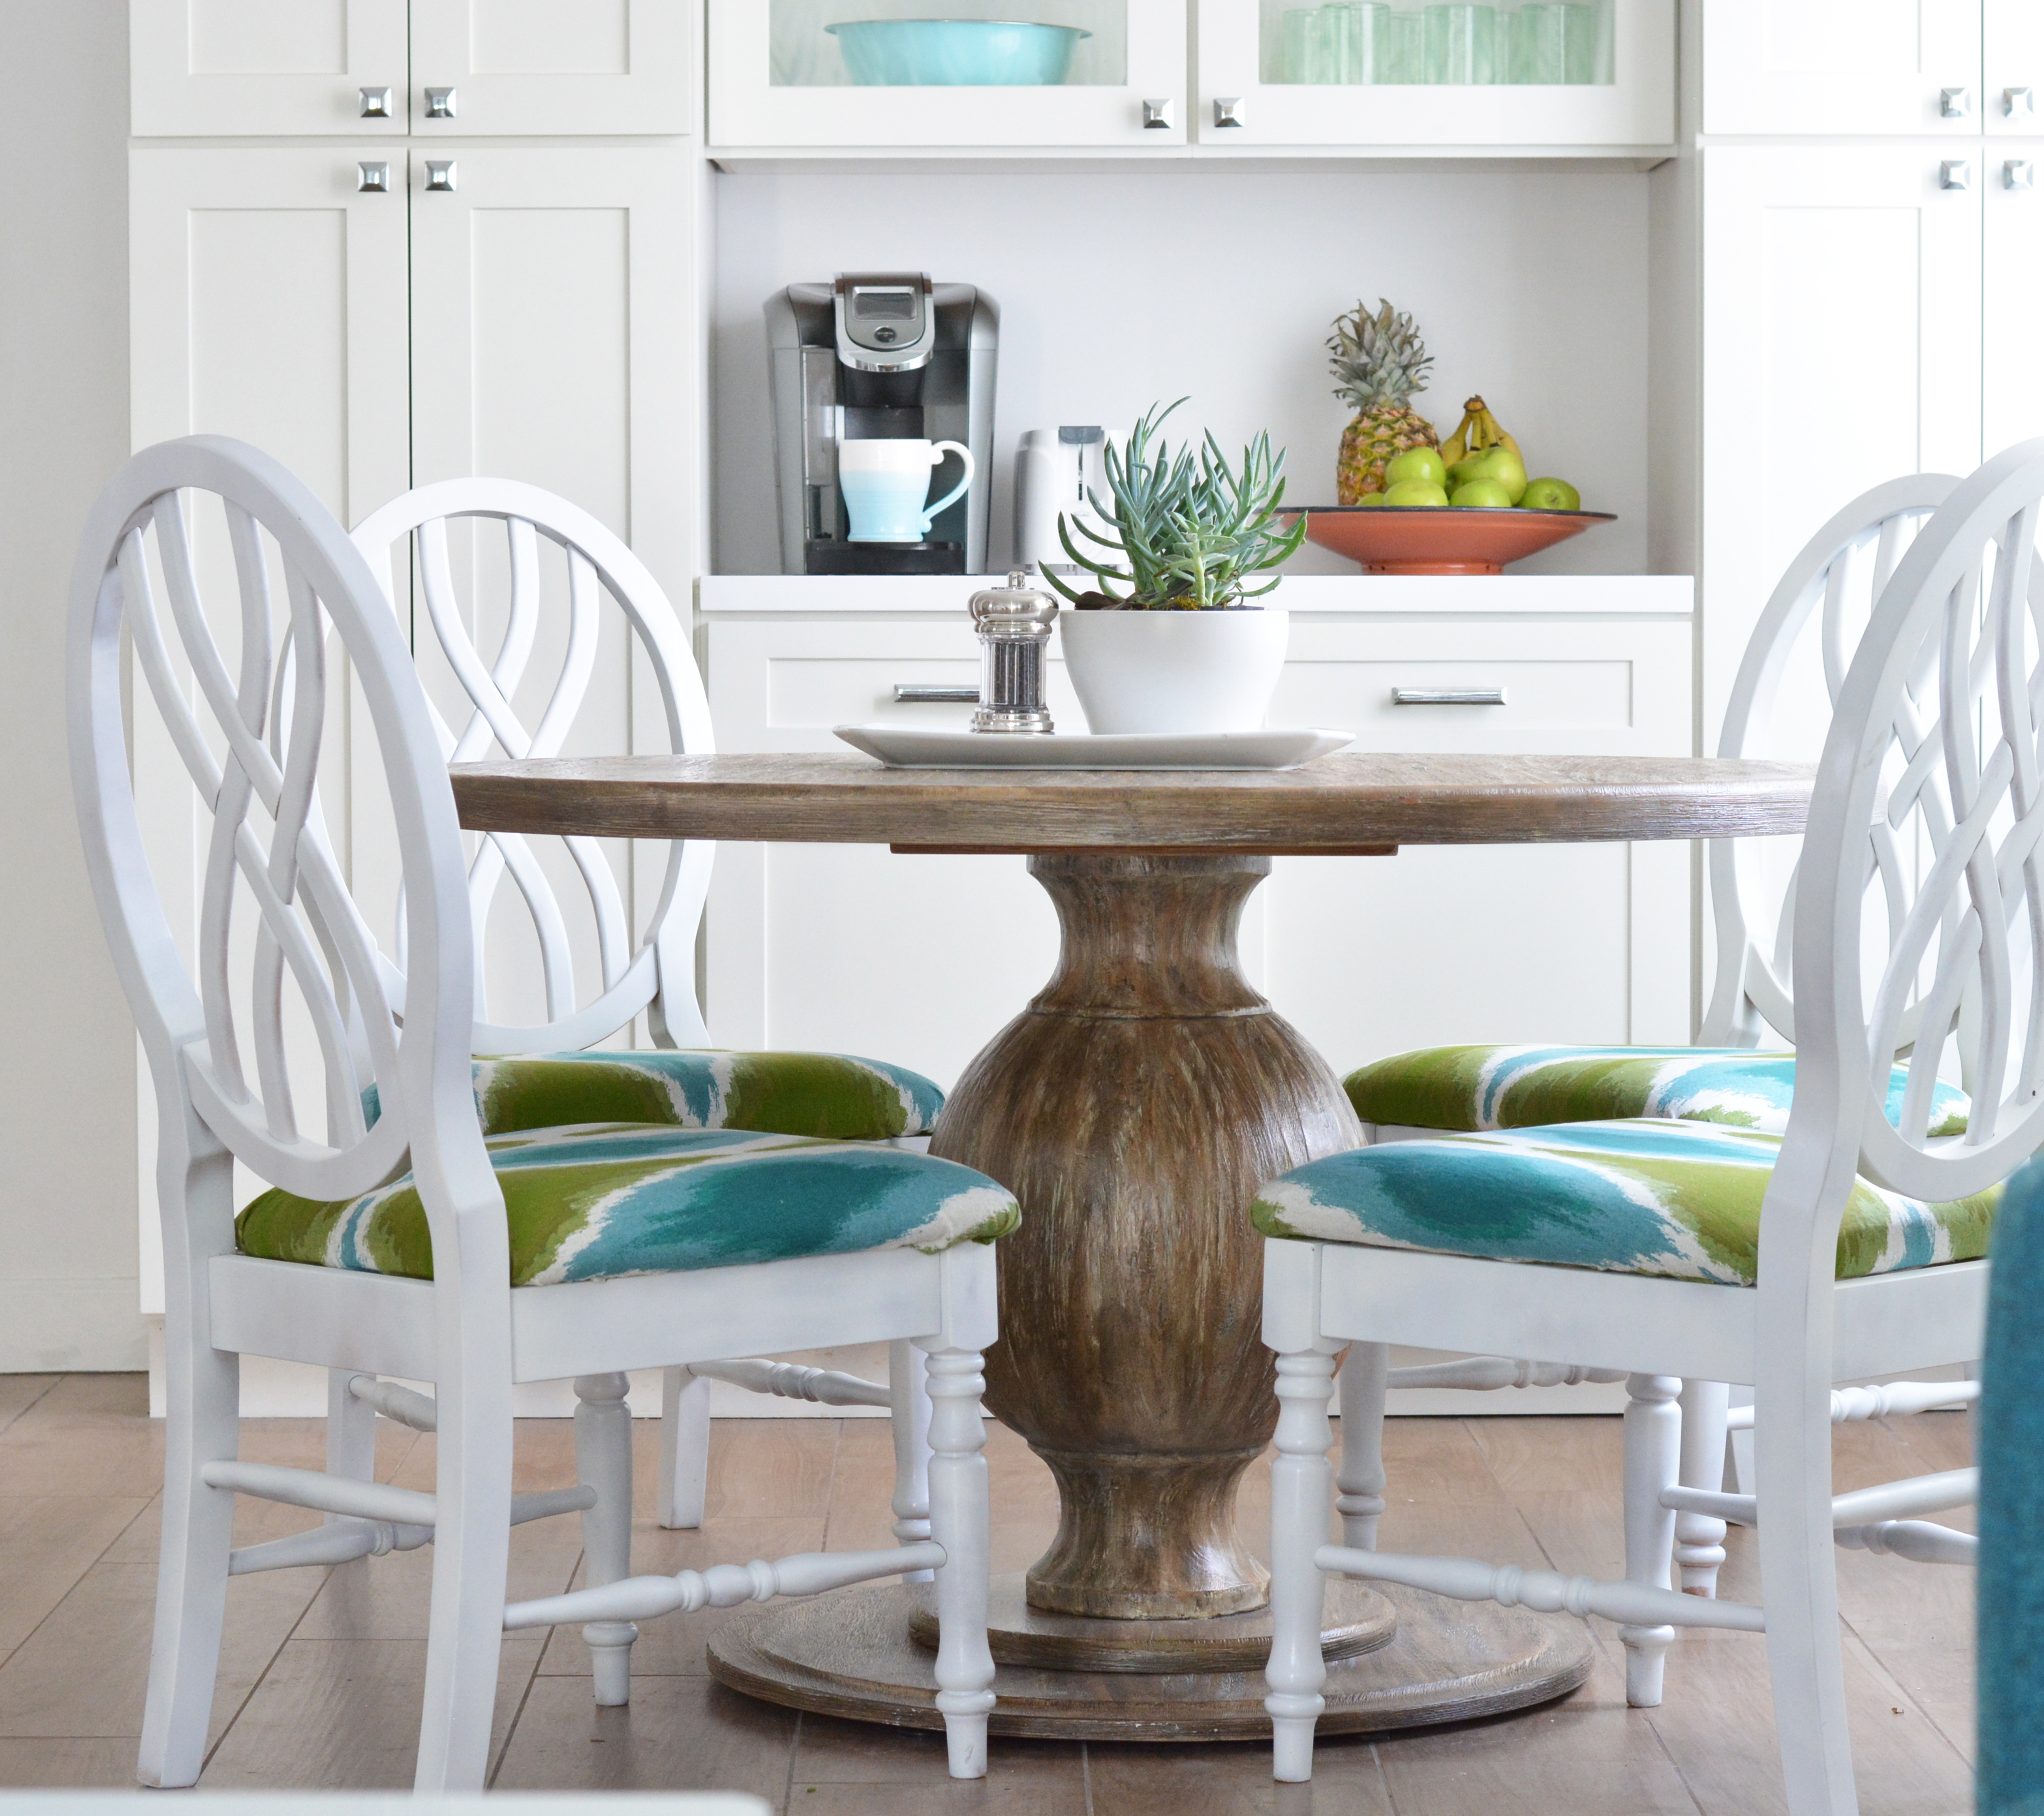

Just a few feet away sit two faux bamboo white barstools which provide additional seating, they swivel so they can face into the family room for TV viewing or conversation. I recovered the seats in a turquoise fabric to coordinate with the layered blue palette.

Next week I’ll share more of the back story behind the scenes plus all the sources for everything you see! What’s your favorite change in this space?
*This post is sponsored by Cliq Studios, we were provided with discounted kitchen cabinets, all opinions are my own.
…
The post Kitchen Remodel appeared first on Centsational Girl.
nice post! thanks for posting.
TumugonBurahinKitchen Ideas For Small Kitchens
Design A Kitchen Remodel
Country Kitchen Cabinets
Bathroom Remodel
Flooring Installation